Fun things I Tried In My Internship!
18 January 2022
Being one of the luckiest to take the placement at my school, the Cardiff University, is absolutely rewarded from various working aspects. Starting from cleaning the Roman coins, I learnt more about the metal corrosion process. The first batch of coins that I worked with are mainly containing silver. As silver is a stable material, we put them into the potassium sodium nitrate to only dissolve the greenish corrosion products as shown in Figure 1a. Then, I have got a chance to improve my scalpel working skills, scrapping off any corrosion residues. And we have other Roman copper alloy coins for practice. I am satisfied with my scrapping work, thoughtfully removing the greenish crystals under microscope (Figure 1b and 1c.).

Figure 1a. corrosion products dissolving in potassium sodium nitrate.

Figure 1b: Roman coin before cleaning: with greenish corrosion products

Figure 1c: Roman coin after cleaning
Next, I had tried to treat some archaeological glasses. The excavated Blackfairy glasses were encrusted and broken. Thus, cleaning and consolidation were the main treatments to clean and stabilize the laminating glass. In a box of sand as shown in Figure 2, we dug out the glass pieces and clean them in water. It was like digging out a treasure! It is interesting! We firstly brushing off the dirt and clean the encrustations in water. Then, we brushed the glass with industrial methylated spirits (IMS) to draw out any remaining water content so that no water keeps degrading the glasses.

Figure 2. Archaeological Blackfairy glasses in a box of sand. Brushes and water for cleaning.
After that, some lime plaster on the glass were removed and scrapping off by 15T scalpel blade as shown in Figure 3. I was really satisfied with the cleaned transparent appearance.

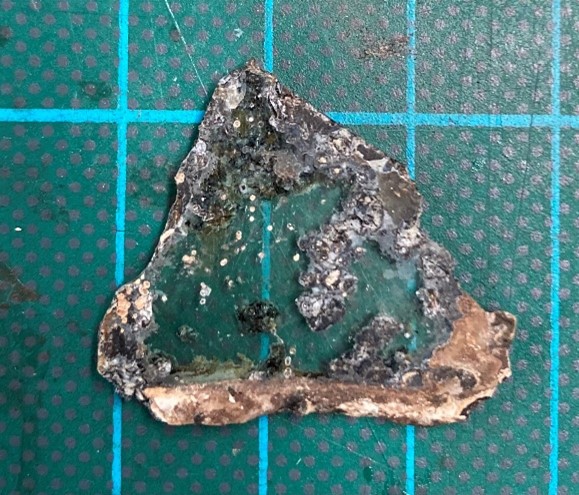
Figure 3a. glass after brushed with IMS. Figure 3b. lime plaster was scrapped off glass.
However, some glasses are fragile and prone to shatter. Wherever there was laminating edge of glass, we would do the consolidation. We consolidated glass by 10% Paraloid B72 in acetone around the unstable edges for any piece needed. For glasses that were broken, we would stick them back by 40% Paraloid B72 in acetone.

Figure 4. Glasses was consolidated by brushed with 10% Paraloid B72 in acetone.
Finally, we would package all glasses in crystal boxes with plastazote as shown in Figure 5 and creating a colour index. Reconstruction of all of these glasses would be an ultimate fantasy!

Figure 5. Glasses was traced and packed in crystal boxes. Then wait for record logging and send back to storage.
Apart from glass, I also have a chance to treat other archaeological objects, the archaeological nails. I was so intrigued by the air abrasion cleaning and it has been my favourite work during the placement. Air-abrasion, a technique to clean objects by a stream of powder in pressurised gas, are considered lower risk and do not cause vibration (Graham and Allington-Jones, 2018). Thus, it was often used in conservation industry. I was lucky enough to try this method with some archaeological nails, attempting to clean the corrosion off them, get a smoother surface and reveal the surface details of nails. Before the cleaning of the nails, their conditions should be established through a primary screening process (Blackshaw, 1982). It is always helpful to get X-ray images of the nails before the cleaning started (Figure 6). This allows us to get a clearer idea of their actual shapes and determine the thickness of the rust layer, aiding and guiding to a closer erasing to the original surface of nails.

Figure 6. X-ray image of the archaeological nails: assist with the air abrasion cleaning.
With the air abrasion method, air and the Airbrasive powders – Aluminium Oxide Powder, were discharged through a tube onto any deposits covering the nails. The layers of dust, soil and orange corrosion products were then stripped off by means of friction and left with a charcoal layer. Different settings and variables are set by profuse types of air-abrasive powders, which are differing in particle size, hardness and shape, as well as the gas pressure, angle of operation, nozzle size and the feed quantity of powders (Graham and Allington-Jones, 2018). All of these variables described will affect the ultimate evenness and completeness of the reduction or loss of surface detail. It is fun to always play with different settings, finding the most suitable setting for the abrading work!

Figure 7. Air abrasion machine: Oxide powders are charged into the cylindrical case. Then they are directed in a fine jet of air and discharged through the blue tube. The intensity of the jet can be controlled of a scale from 0 to 10.
Referring to the small finds no. 1026:1 imaged in Figure 6, I air abraded the deposits off the core nail and I was satisfied with my first attempt of the air abrasion work (Figure 8)! Alice, my classmate and buddy, assisted me so much for this. I truly feel I was working in a warm vibe environment. This is what makes me even dedicate into my works in any case!


Figure 8a. Archaeological iron before cleaning. Figure 8b. Archaeological iron after air abrasion.
Laser cleaning is my other fun attempt! Laser stands for Light Amplification by Stimulated Emission of Radiation. It is a thermal ablation cleaning method to remove the surface contaminants homogeneously and without physical interaction (Lynton conservation, n.d.). We have got a marble statue in the Laboratory for practice as shown in Figure 9. Stone surfaces are typically cleaned with the infrared light at 1064 nm wavelength. At this wavelength, the cleaning process is considered self-limiting as the laser beam is able to differentiate between clean and dirty surfaces to some extent (Lynton conservation, n.d.). It is because this light tends to be only absorbed or absorbed more strongly by the black crust formations and dirty polluted layers, whereas the clean surface of object often reflects this light. The energy is therefore insufficient to damage the original material, avoiding the problem of overcleaning. However, as laser cleaning sometimes removes the superficial information that is historically relevant to the artwork, we as the conservators should thoroughly analyse and study all aspects of the objects prior to making any treatment decision. For the marble statue in our laboratory, we will leave the pencil mark uncleaned as it reveals the artist’s thoughts.
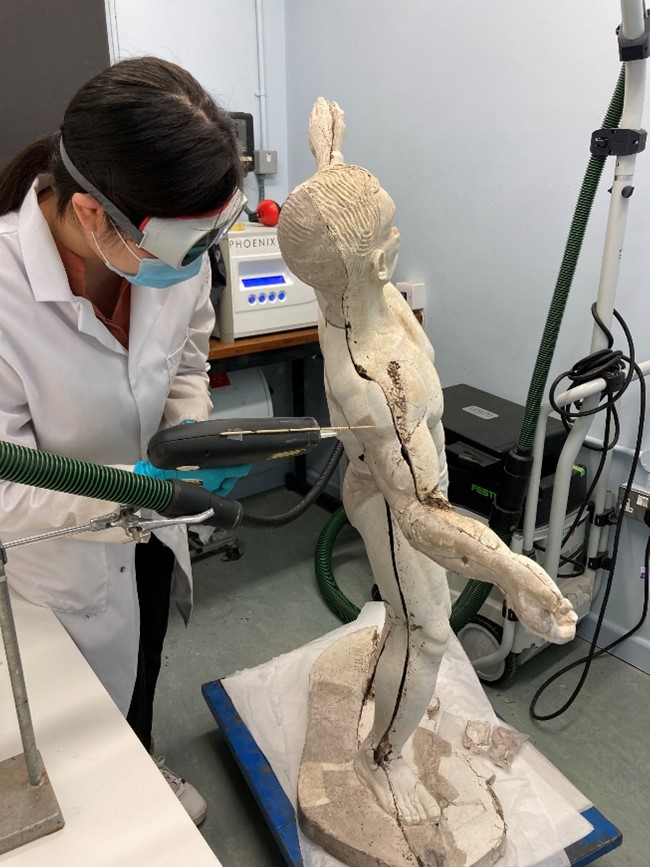
Figure 9. laser cleaning with the marble statue. Safety measurements were set up. A wooden stick was used to keep in a suitable distance to avoid the damage of the material.
Safety measurement is very important in laser cleaning. Laser goggles must be worn to protect our eyes. Laser cleaning also involve smoke-generating pyrolysis, evaporation, spalling of the layer to be removed (COST Office, n.d.). These waste products are mainly composed of the substrate removed from the artwork and may be potentially harmful to our respiratory systems. Thus, these potentially harmful fumes must be taken away by the extraction pipe as shown in Figure 9. The strength of the laser varies from the distance you hold it from the object surface. Hence, it is best to start far away and slowly move closer to the artwork in assessing the optimum level of leaser cleaning. In this case, we found the best working distance is 17.5cm and we used a wooden stick to assist to keep in the same distance. In the first attempt, energy might be a bit strong as some obvious spots seems splashing onto the object. We then quickly mitigated and lowered the energy to 90kvz for a gentler cleaning.
Trying with different machines and equipment makes me feel more confident to treat with different objects!
Reference list
Blackshaw, S.M. (1982). An appraisal of cleaning methods for use on corroded iron antiquities. In: Conservation of iron. Proceedings of a symposium held at greenwich on july 4th 1980. Greenwich: National Maritime Museum, pp.16–22.
COST Office (n.d.). Cleaning Safely with a Laser in Artwork Conservation. [online] Available at: https://conservationlasers.com/wp-content/uploads/2020/07/Safetybook_final_compressed.pdf [Accessed 15 Jan. 2022].
Graham, M. and Allington-Jones, L. (2018). The air-abrasive technique: A re-evaluation of its use in fossil preparation. Palaeontologia Electronica.
Lynton conservation (n.d.). Laser Cleaning. [online] Conservation Lasers. Available at: https://www.conservationlasers.com/laser-cleaning/ [Accessed 15 Jan. 2022].
- March 2024 (1)
- December 2023 (1)
- November 2023 (2)
- March 2023 (2)
- January 2023 (6)
- November 2022 (1)
- October 2022 (1)
- June 2022 (6)
- January 2022 (8)
- March 2021 (2)
- January 2021 (3)
- June 2020 (1)
- May 2020 (1)
- April 2020 (1)
- March 2020 (4)
- February 2020 (3)
- January 2020 (5)
- November 2019 (1)
- October 2019 (1)
- June 2019 (1)
- April 2019 (2)
- March 2019 (1)
- January 2019 (1)
- August 2018 (2)
- July 2018 (5)
- June 2018 (2)
- May 2018 (3)
- March 2018 (1)
- February 2018 (3)
- January 2018 (1)
- December 2017 (1)
- October 2017 (4)
- September 2017 (1)
- August 2017 (2)
- July 2017 (1)
- June 2017 (3)
- May 2017 (1)
- March 2017 (2)
- February 2017 (1)
- January 2017 (5)
- December 2016 (2)
- November 2016 (2)
- June 2016 (1)
- March 2016 (1)
- December 2015 (1)
- July 2014 (1)
- February 2014 (1)
- January 2014 (4)