Make Do and Conserve: Mechanical Skills and Conservation Principles in Context
17 January 2022Conservation is collaborative field. Training is a constant process of learning, tying together strands of different disciplines to understand options for treating an object – how it was made, the chemical structure of its components, how they react with each other, and how they may degrade. Particularly in a conversion degree, as at Cardiff, people from myriad different backgrounds bring their own unique skillsets to the sector.
My own background is in Art – history and practical – and I believe that having experience of different making techniques helps when understanding an object: for instance, you may be more equipped to understand how defects can occur in a ceramic if one of your own pieces exploded in the kiln!
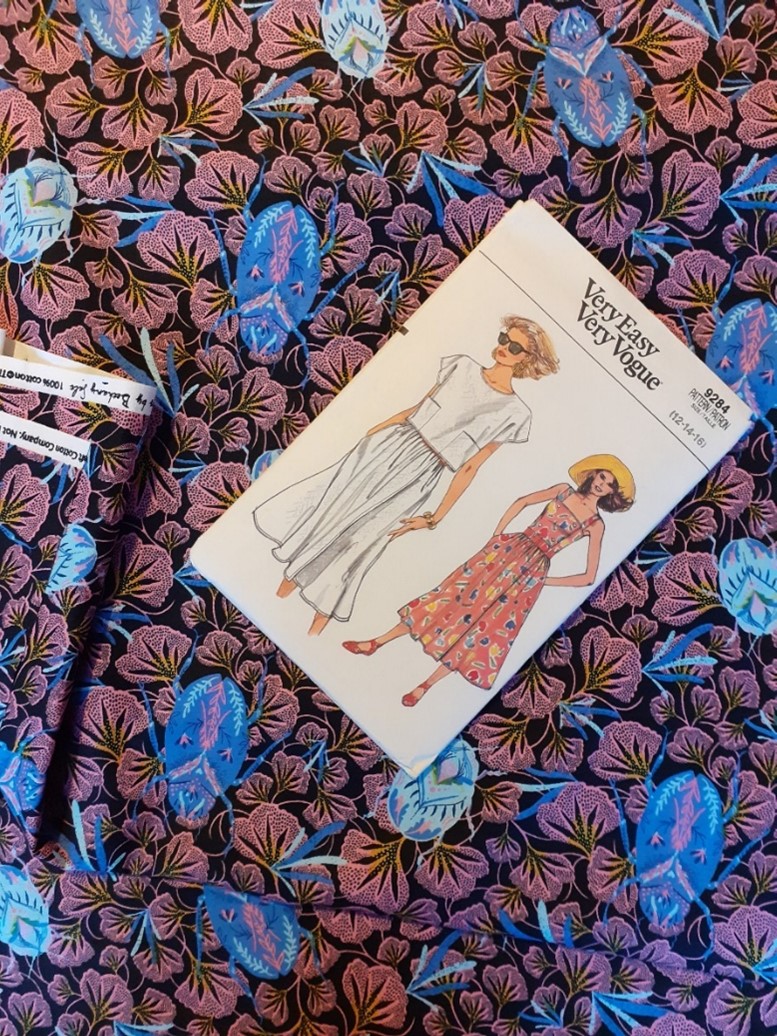
Understanding making methods also puts theoretical concepts into context. For a long time, I have wanted to make a piece of clothing from scratch, and the discovery of a vintage Vogue pattern in my Nana’s old fabric box provided the perfect opportunity. Inspired by the archaeological textiles I’m currently working on, it is also a chance to explore basic aspects of textile conservation through a new lens.
Step 1: Cutting the pieces out
The first stage was to cut the pattern out of the fabric. I didn’t need to be perfectly accurate here because the seam allowance – the space between the fabric edge and the future seams – is also included in the pattern and allows space for adjustment (Law, S. pers. comm). The pieces needed were: two skirt fronts and backs, two bodice fronts, a back, four pockets and shoulder straps, plus three pieces of facing to go on the inside of the bodice.
Structure of Cotton
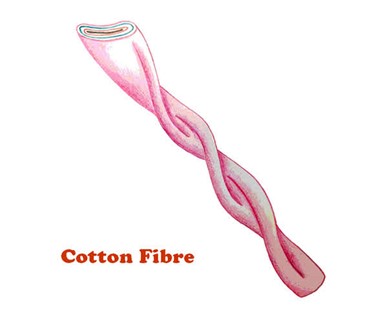
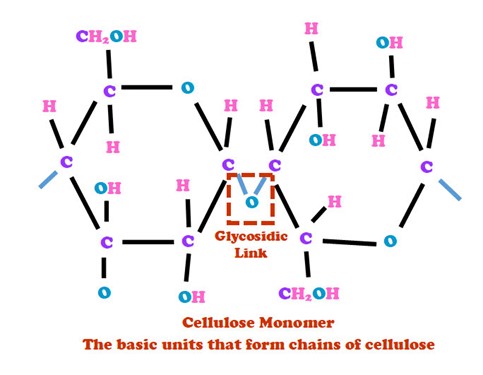
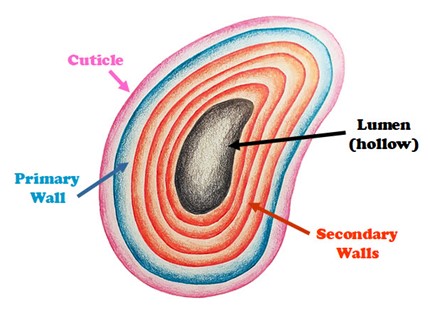
I’m using a printed cotton with a plain weave structure, so what does that look like on a structural level? Cotton is a plant fibre, derived from seed hairs from several different species of the Gossypium genus. Fibres are recognisable under a microscope due to their flat, twisted shape [Fig. 2], caused by its hollow structure, which collapses and warps as a fibre dries (Carr et al. 2008, 79). Each fibre is approximately 85% cellulose [Fig. 3], the remaining substances include wax, pectin and sugars (Landi 2012, 17; Foster 2021); and consists of several different layers: the outer, protective cuticle, the primary cell wall, and the secondary cell wall [Fig. 4] (Landi 2012, 17). In each of the cell walls, fibrils – cellulose chains – spiral around the centre and provide strength to the fibre (Foster 2021).
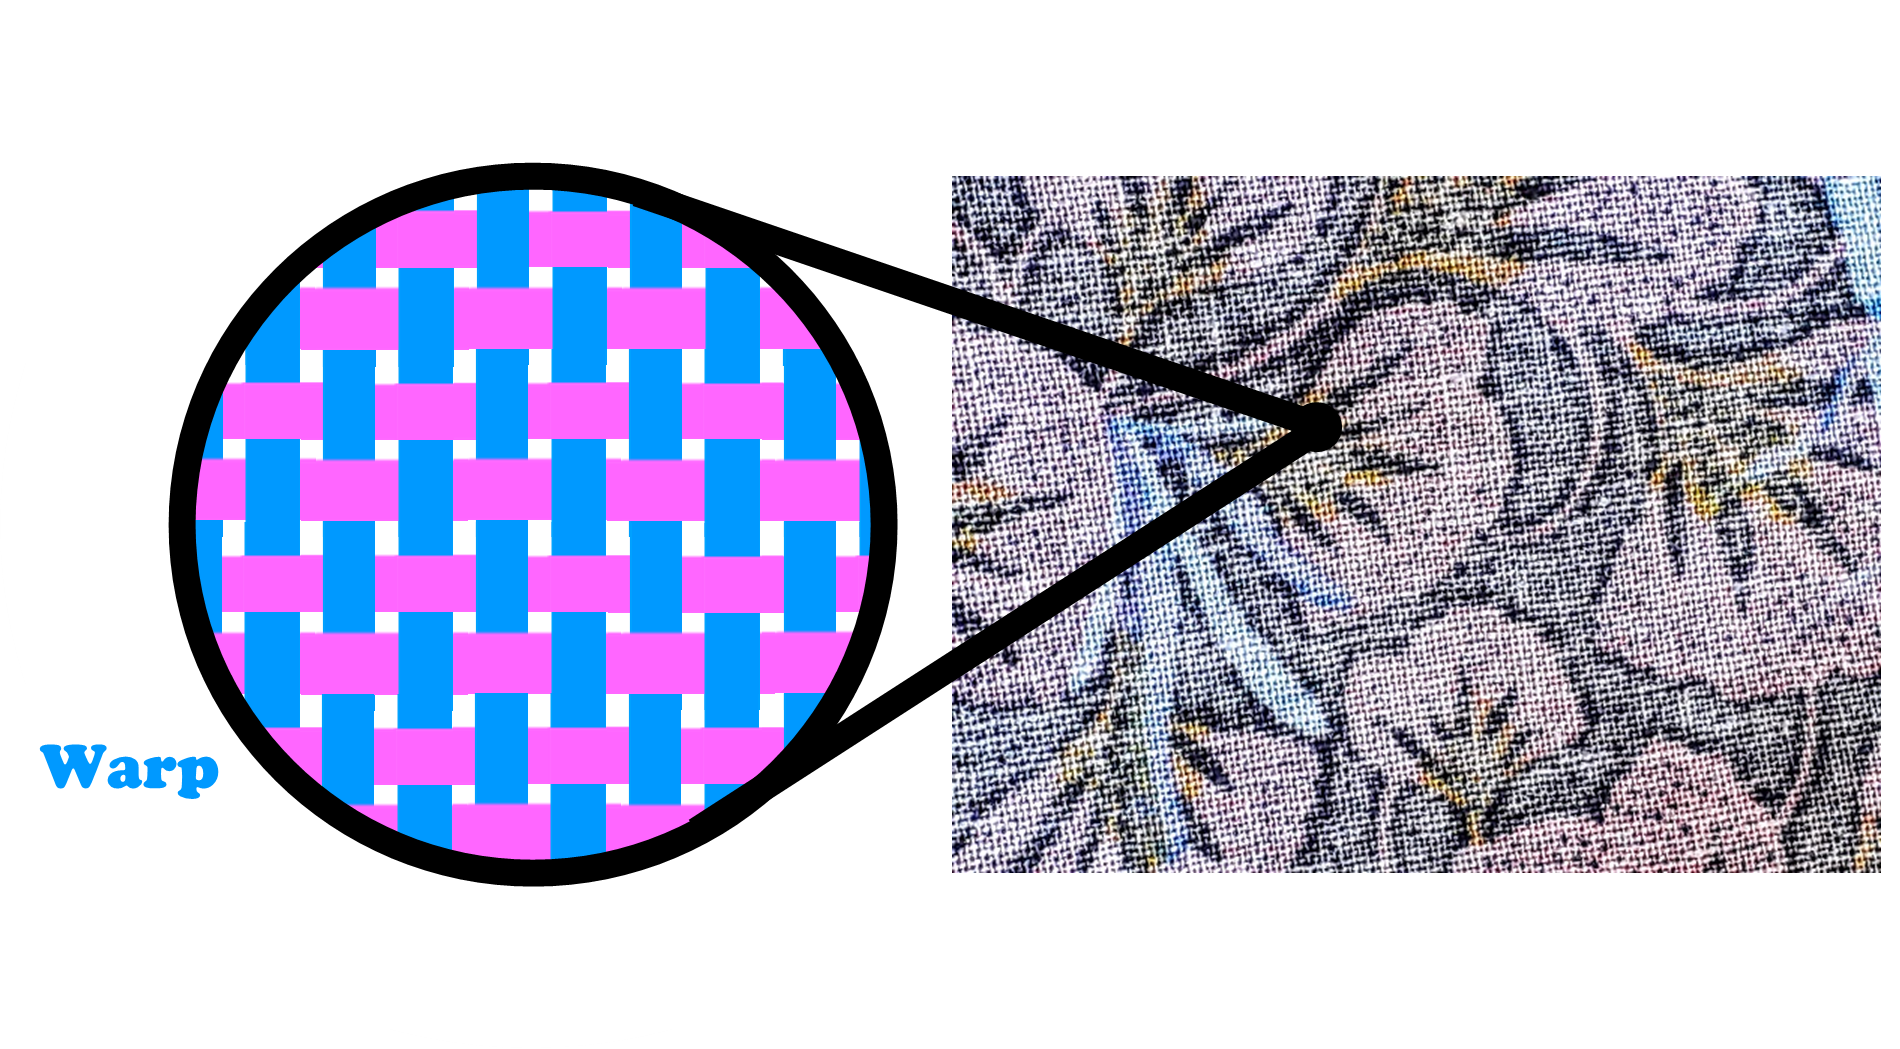
Plain weave is the most basic style of weave, where the warp (the static threads in the loom) and the weft (those that are fed between the warp threads on a shuttle) alternately overlap one another [Fig. 5]. It usually uses the same weight of yarn for both parts and produces a consistent surface (Landi 2012, 8).
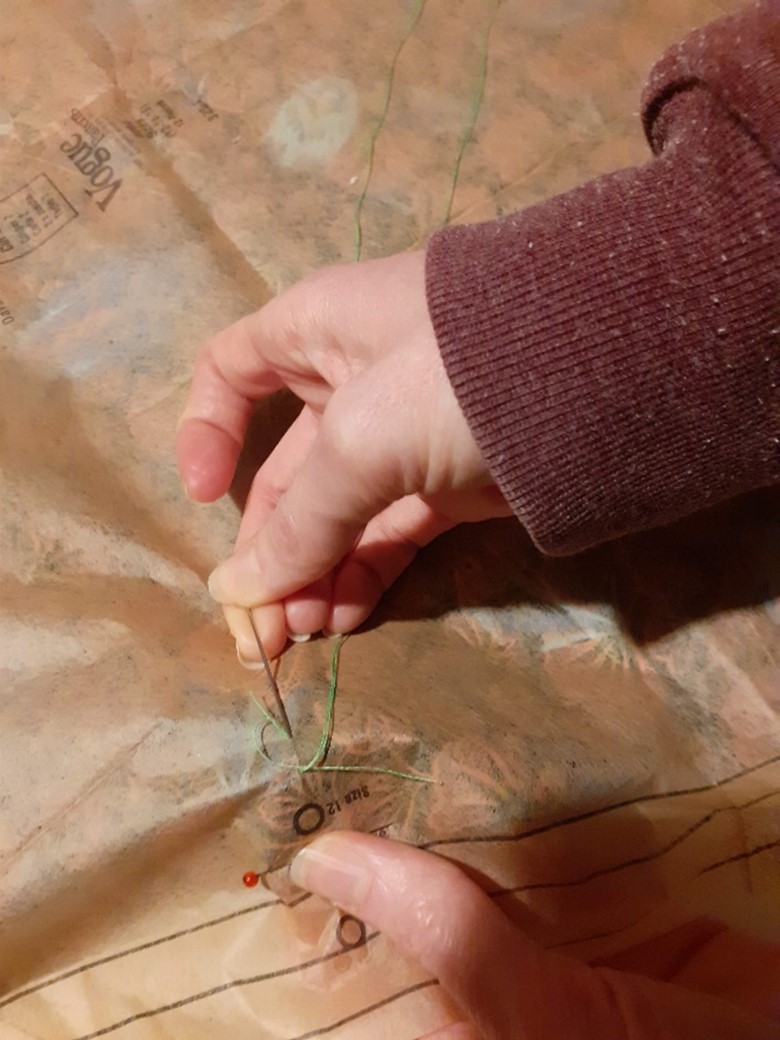
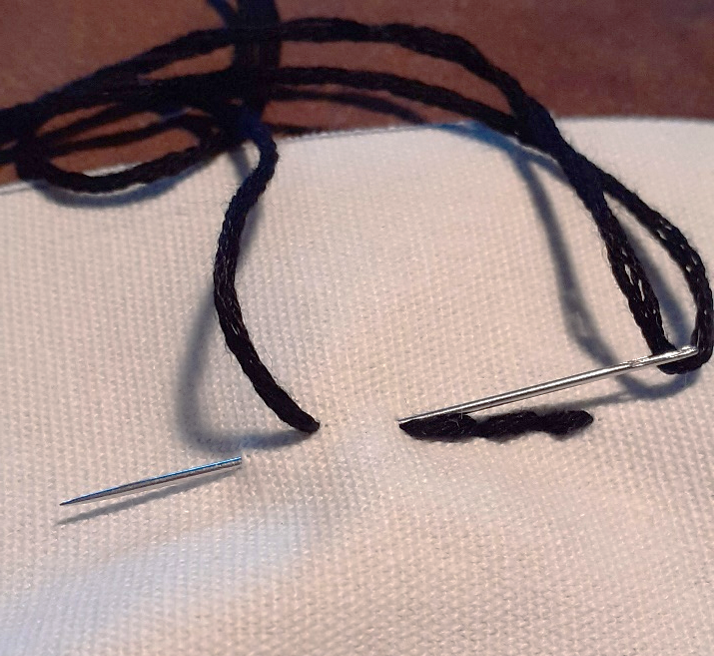
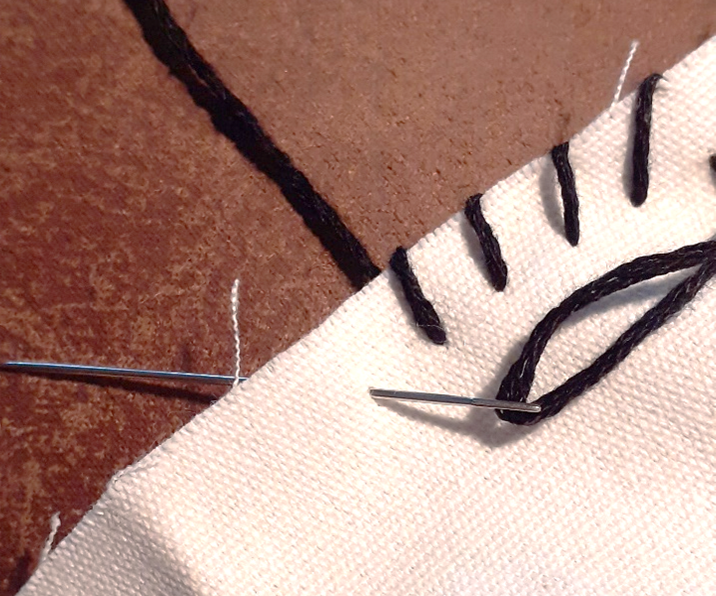
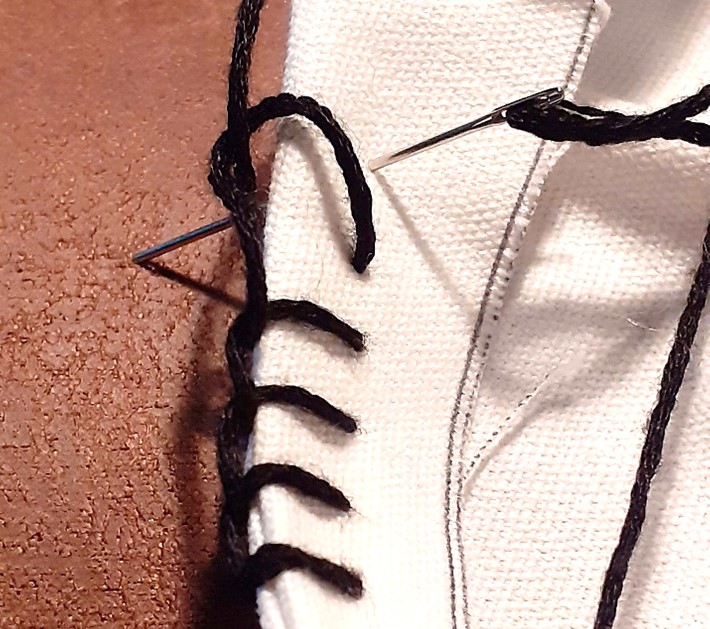
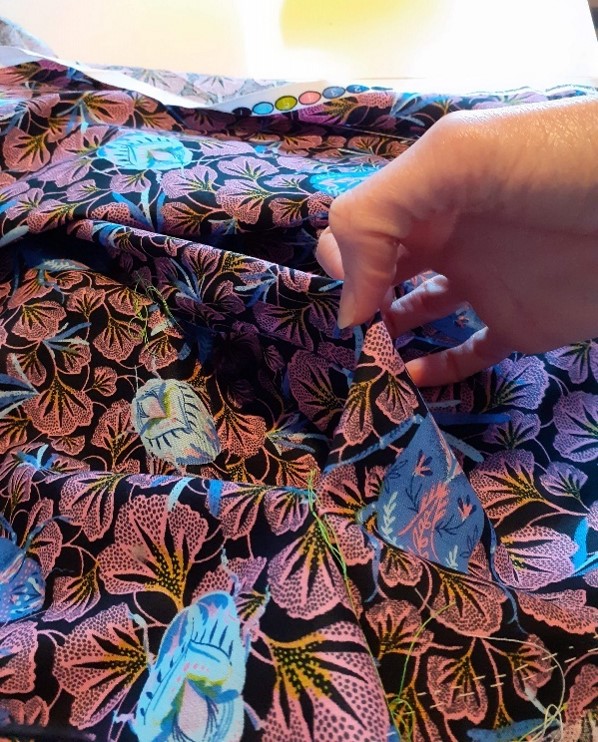
Step 2: Tacking
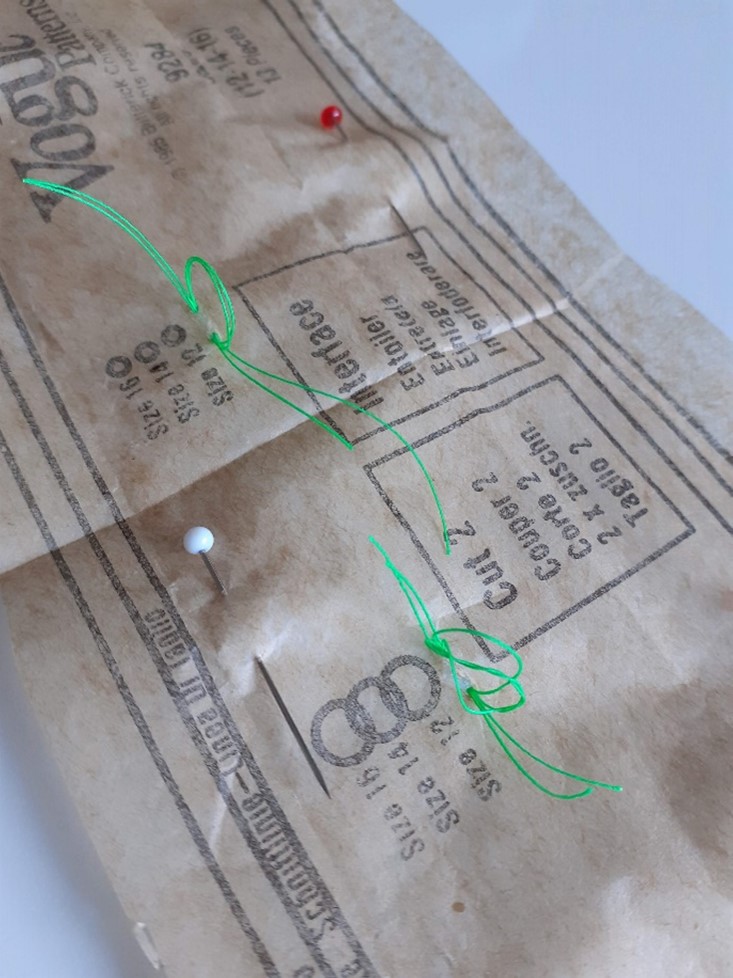
I tacked the positions marked on the pattern – these, along with notches on the edges, allow the pieces to line up when put together. Here I made a simple, loose loop with contrasting thread – there was no knot in the thread, so it can be easily removed [Fig. 6 & 7].
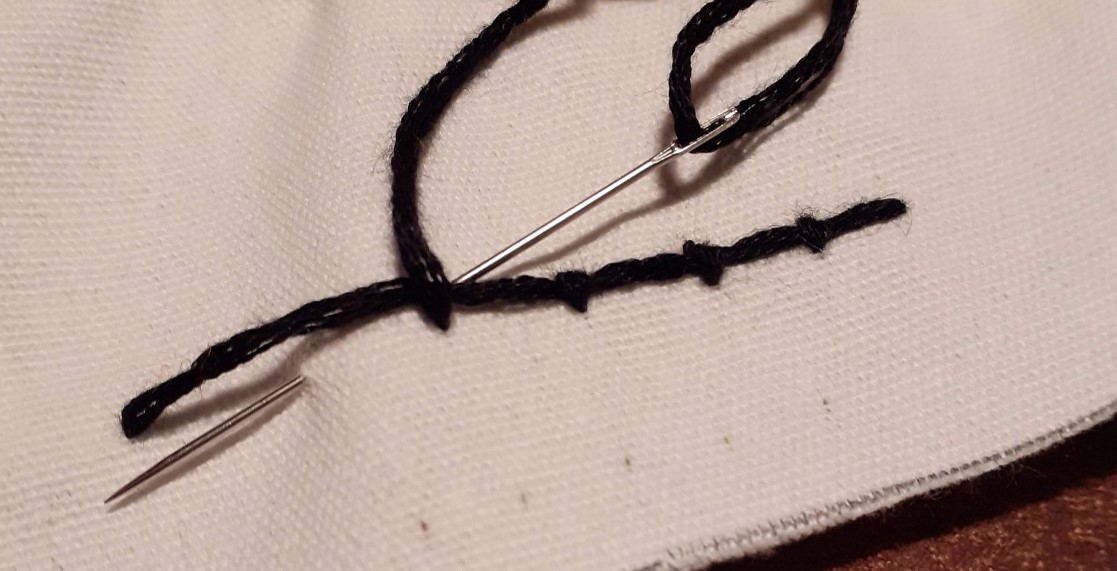
Temporary Attachments in Conservation
Tacks are simple, temporary stitches that hold pieces in place, pins can also be used (Landi 2012, 39). Because I’ve used an unglazed, modern fabric, rearranging pins and unpicking stitches is less of an issue, but if this dress were made from a fabric such as velvet, or was an archaeological specimen I would need to be careful not to make any unnecessary holes, as marks could remain in the former, and the latter would be too brittle to support pins (Landi 2012, 39). I would also need to make sure that I pushed the needle between yarns rather than through them, which will avoid causing unnecessary damage (CCI Notes 10: Stitches Used in Textile Conservation 2008, 1).
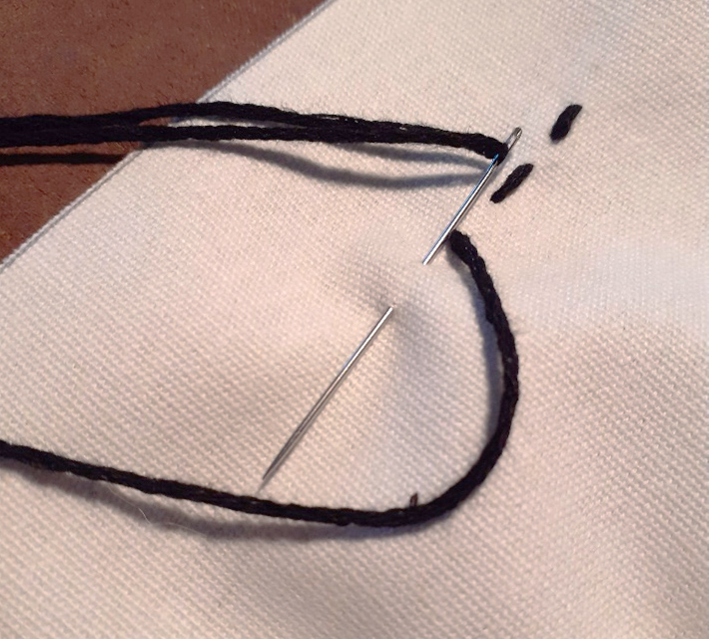
Generally, knots aren’t recommended in conservation, as it risks pulling the fabric, creating gathers, or even being pulled through the weave, all of which can break threads and cause damage to the textile (CCI Notes 10: Stitches Used in Textile Conservation 2008, 1; Landi 2012, 117). Instead, a single backstitch is often used to secure the thread, or alternatively, a knot until the thread is securely in place, before being cut off (Landi 2012, 117).
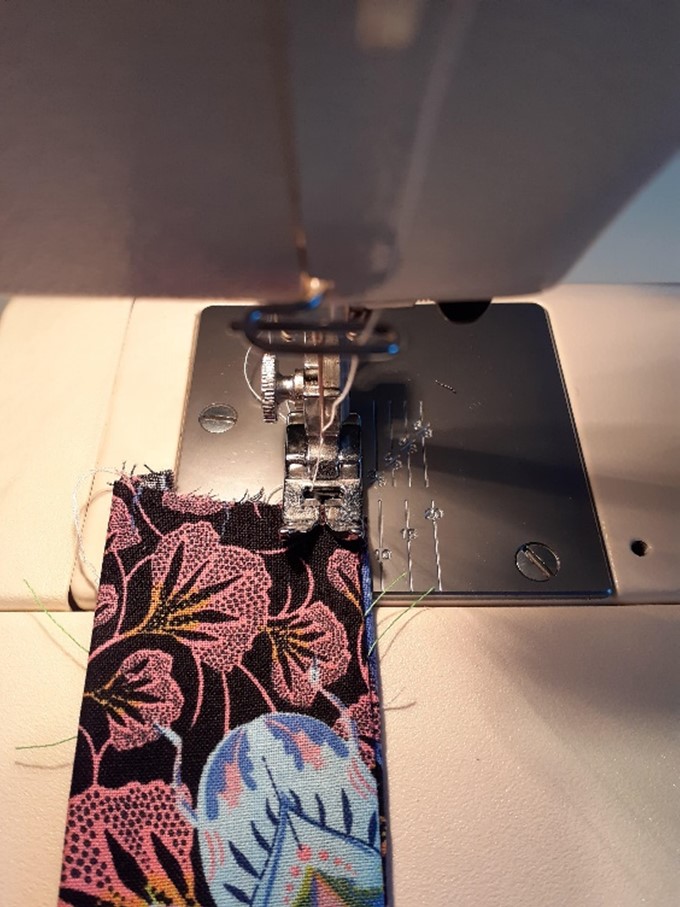
Step 3: Stitching Pattern Pieces
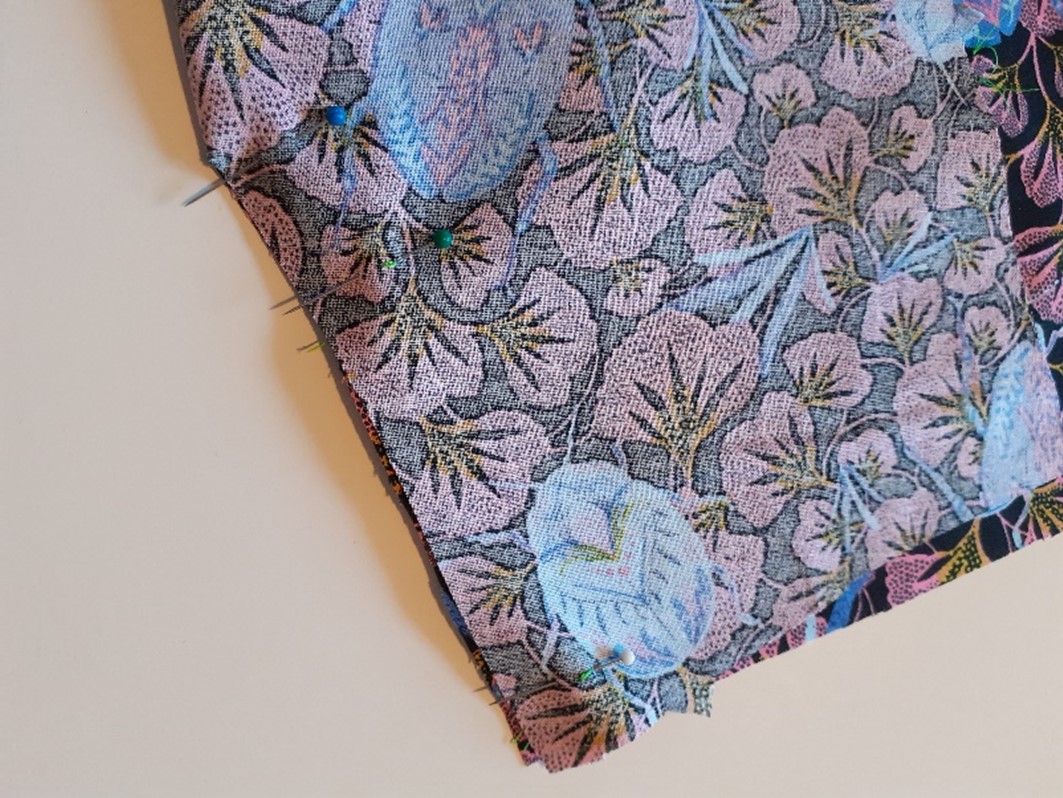
Once the pieces were cut out and marked, it could start being pieced together. Using a sewing machine, I stitched darts on the two front bodice pieces, to help it fit the body, and attached them to the back, aligning with the tacks and the notches [Fig. 8]. I stitched the shoulder straps, with two pieces face to face, before turning them the right way out and pressing to make the seams crisp [Fig. 9]. I fused the interfacing with the inner bodice pieces using an iron – this adds strength to the fabric, especially useful on an area of tension such as the seam between the straps and main garment. These were attached to the outer bodice, again with right sides facing each other, before being turned the right way out and pressed.
Stitching Techniques in Conservation
If I were working on this piece as a conservator, to patch a hole or add a support, there are several stitches I could use which overlap with embroidery, although the thread would likely be finer on heritage textiles, so the stitches would be less visible. These include:
Back Stitch
Running Stitch
Herringbone Stitch
Whipping/Overcast Stitch
Blanket Stitch
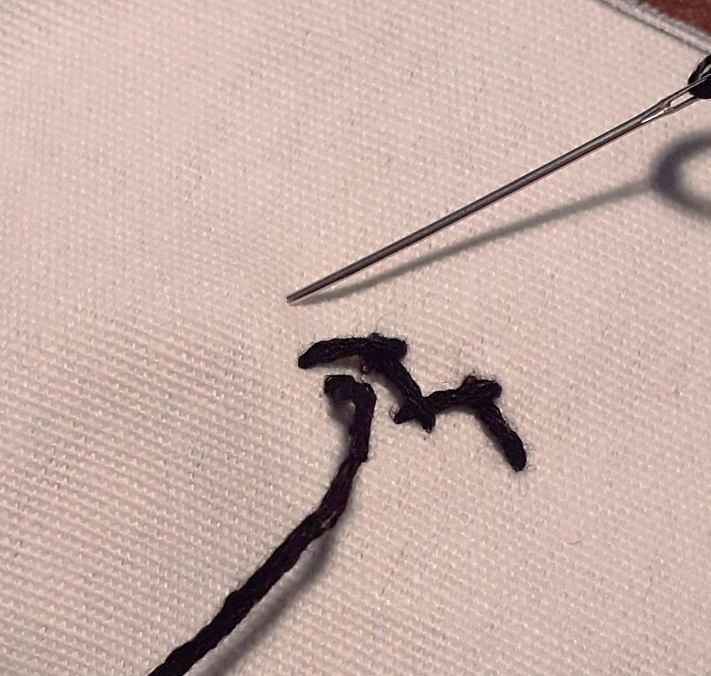
One of the most widely used stitches in conservation is couching [Fig. 10]: a long stitch aligned with the warp or weft threads, held in place by smaller holding stitches, which is used to secure a worn or broken piece of fabric to a support (CCI Notes 10: Stitches Used in Textile Conservation 2008, 1; Landi 2012, 117).
Step 4: Making the Skirt
I attached the skirt backs together at the centre seam, and used a basic running stitch on all four skirt pieces that could be tightened into gathers, adding fullness [Fig. 11]. I stitched the rest of the skirt sides and pocket edges together, making sure to leave a space for the pocket openings [Fig. 12]. Bodice and skirt were attached… although I caught the bodice in a couple of places, and needed to unpick several times before I finally got it right, but I got there in the end!
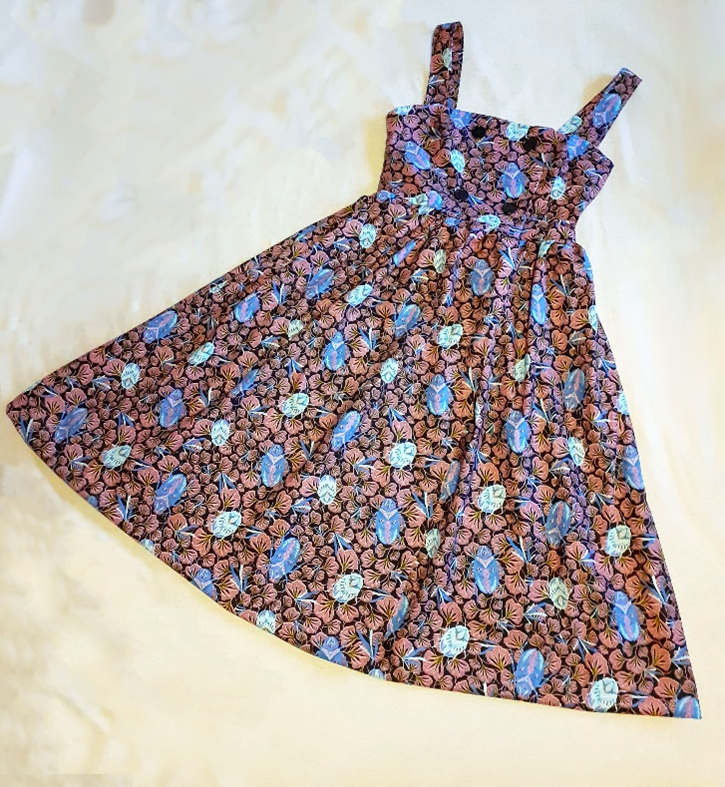
Step 5: Finishing Up
All that was left to do was to fold and stitch the hems – which neatens the edges and prevents the material from fraying – attach the shoulder straps, and add the buttons and buttonholes, and the dress was complete [Fig. 13]!
What if it Were a Heritage Object in a Museum?
This dress, as many textiles, is organic, and more susceptible to environmental factors than inorganic material such as stone or ceramics. Although brand new, it will eventually deteriorate, and if I were to put it into storage or on display in a museum, there are several factors I would need to manage so it could last as long as possible.
| Agent of Deterioration | Risks to the Dress | Managing the Risks |
| Pests | · Silverfish and Cockroaches eat cellulose.
· Clothes Moths, Carpet Beetle eat protein, but can also eat cotton if soiled, e.g., animal pests. |
· Keep the dress in a sealed cabinet, away from possible entry points, to make it more difficult for pests to access.
· Make sure that external doors and windows are sealed. · Monitor pest activity around the dress with traps. · E.g., Place dress in a freezer or oxygen-free environment to treat if pests found. |
| Light and Ultraviolet Radiation
|
· Colour fading
· Yellowing · Fibre weakening
|
· Keep it in dark storage when not in use, and always out of direct sunlight.
· If on display, Install UV filters on light bulbs and windows · Reduce the lighting levels while making sure it can be seen. · Take it off display after a set time. E.g., I could take it out for a few days a year and keep it in dark storage the rest of the time. |
| Incorrect Temperature
and Relative Humidity (the amount of moisture in the air relative to the maximum amount it can hold) |
Textiles absorb water from the atmosphere.
Too high an RH: · Fibre swelling · Mould Too low an RH: · Fibres become brittle
High temperatures: ·Hasten deterioration processes.
Too low temperatures and poor ventilation can cause high RH, but if controlled, can reduce chemical deterioration and pests. |
· Keep the dress at a moderate level of RH, approximately 50%, with room for fluctuation.
· Monitor conditions with a thermo-hygrograph. · Remove sources of damp, e.g., leaks. · Make sure it’s not situated too close to an exterior wall. · Good air circulation. |
| Pollution
From: · Handling – sweat · External Emissions – sulphur dioxide, nitrogen dioxide, ozone. · Interior Emissions -organic acids from wood. · Dust · Dyes · Substances in the buttons, e.g. plasticisers. |
· Chemical reactions with fabric or dye.
· Attract pests. · Mould · Sharp particles could break fibres. |
· Don’t store the dress near wood
· Acid-free packaging. · Display/Storage room not directly connected to outside – reducing external pollutants. · Handle with gloves. |
| Physical Damage | · Threads breaking, holes, splits and creases from wear.
· Shoulder straps, seams and buttonholes are areas of tension. |
· Wear a replica rather than the original.
· Handle fabric as little as possible. · Commission a custom mount, or choose to store it flat. |
(Insect Pests Found in Historic Houses and Museums [No Date]; Comparison of Treatment Methods 2017; Materials, objects and common damaging insect pests 2017; Caring for Textiles and Constumes 2019; Mould Growth on Textiles 2019; Pests 2021; Pollutants 2021)
Conclusion
So there we have it, a finished garment! It’s not perfect, but for a first attempt, I’m proud of what I achieved. There are a few places where the stitches will probably need to be tweaked in the future, but that is also the nature of conservation – there is very rarely one straightforward route through a treatment, and testing things is the only way to establish what does and doesn’t work. This is a good philosophy to take into the worlds of craft and conservation, because there’s not as much difference between them as may first appear.
References
All pictures and Illustrations are author’s own.
Caring for textiles and costumes – Preventive conservation guidelines for collections – Canada.ca. 2018. Available at: https://www.canada.ca/en/conservation-institute/services/preventive-conservation/guidelines-collections/textiles-costumes.html#a2 [Accessed: 14 January 2022].
Carr, D. et al. 2008. Identification of selected vegetable textile fibres. Studies in Conservation 53(sup2), pp. 75-87. doi: 10.1179/sic.2008.53.supplement-2.75.
Cotton – CAMEO. 2021. Available at: http://cameo.mfa.org/wiki/Cotton [Accessed: 13 January 2022].
CCI Notes 10: Stitches Used in Textile Conservation 2008. Ottawa: Canadian Conservation Institute. Available at: https://www.canada.ca/en/conservation-institute/services/conservation-preservation-publications/canadian-conservation-institute-notes/stitches-textile-conservation.html [Accessed: 13 January 2022].
Comparison of Treatment Methods – Canada.ca. 2017. Available at: https://www.canada.ca/en/conservation-institute/services/agents-deterioration/pests/comparison-treatment-methods.html [Accessed: 15 January 2022].
Foster, C. 2021. Icon Textiles Group: Fibres Back to Basics.
Insect Pests Found in Historic Houses and Museums. [No Date]. English Heritage. Available at: https://www.english-heritage.org.uk/siteassets/home/learn/conservation/science/serpentine/insect-pests-historic-houses-poster.pdf [Accessed: 13 January 2022].
Materials, objects and common damaging insect pests – Canada.ca. 2017. Available at: https://www.canada.ca/en/conservation-institute/services/agents-deterioration/pests/materials-objects-damaging-insects.html [Accessed: 13 January 2022].
Mould Growth on Textiles – Canadian Conservation Institute (CCI) Notes 13/15 – Canada.ca. 2019. Available at: https://www.canada.ca/en/conservation-institute/services/conservation-preservation-publications/canadian-conservation-institute-notes/mould-growth-textiles.html [Accessed: 14 January 2022].
Landi, S. 2012. Textile Conservator’s Manual. Hoboken: Taylor and Francis.
Misses’ Top and Dress, 1985. New York: Vogue Pattern Service, Butterick Company Inc.
Pests – Canadian Conservation Institute. 2021. Available at: https://www.canada.ca/en/conservation-institute/services/agents-deterioration/pests.html [Accessed: 13 January 2022].
Pollutants – Canadian Conservation Institute. 2021. Available at: https://www.canada.ca/en/conservation-institute/services/agents-deterioration/pollutants.html#strat6 [Accessed: 14 January 2022].
The Identification of Natural Fibres – Canadian Conservation Institute (CCI) Notes 13/18 – Canada.ca. 2019. Available at: https://www.canada.ca/en/conservation-institute/services/conservation-preservation-publications/canadian-conservation-institute-notes/identification-natural-fibres.html [Accessed: 13 January 2022].
- March 2024 (1)
- December 2023 (1)
- November 2023 (2)
- March 2023 (2)
- January 2023 (6)
- November 2022 (1)
- October 2022 (1)
- June 2022 (6)
- January 2022 (8)
- March 2021 (2)
- January 2021 (3)
- June 2020 (1)
- May 2020 (1)
- April 2020 (1)
- March 2020 (4)
- February 2020 (3)
- January 2020 (5)
- November 2019 (1)
- October 2019 (1)
- June 2019 (1)
- April 2019 (2)
- March 2019 (1)
- January 2019 (1)
- August 2018 (2)
- July 2018 (5)
- June 2018 (2)
- May 2018 (3)
- March 2018 (1)
- February 2018 (3)
- January 2018 (1)
- December 2017 (1)
- October 2017 (4)
- September 2017 (1)
- August 2017 (2)
- July 2017 (1)
- June 2017 (3)
- May 2017 (1)
- March 2017 (2)
- February 2017 (1)
- January 2017 (5)
- December 2016 (2)
- November 2016 (2)
- June 2016 (1)
- March 2016 (1)
- December 2015 (1)
- July 2014 (1)
- February 2014 (1)
- January 2014 (4)