Treatment of a Plaster Shark
17 January 2022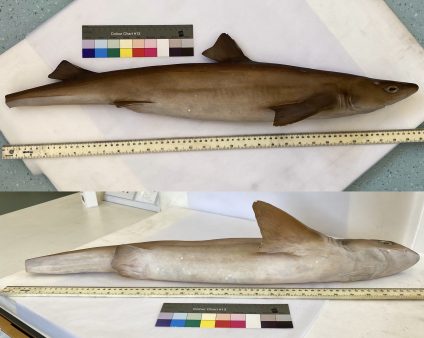
Over the summer, I had the opportunity to do a six-week student placement at Bolton Museum. During my time there, I had the opportunity to work with a wide range of objects and gain first-hand experience with integrated pest management, emergency response in museums, and heritage conservation.
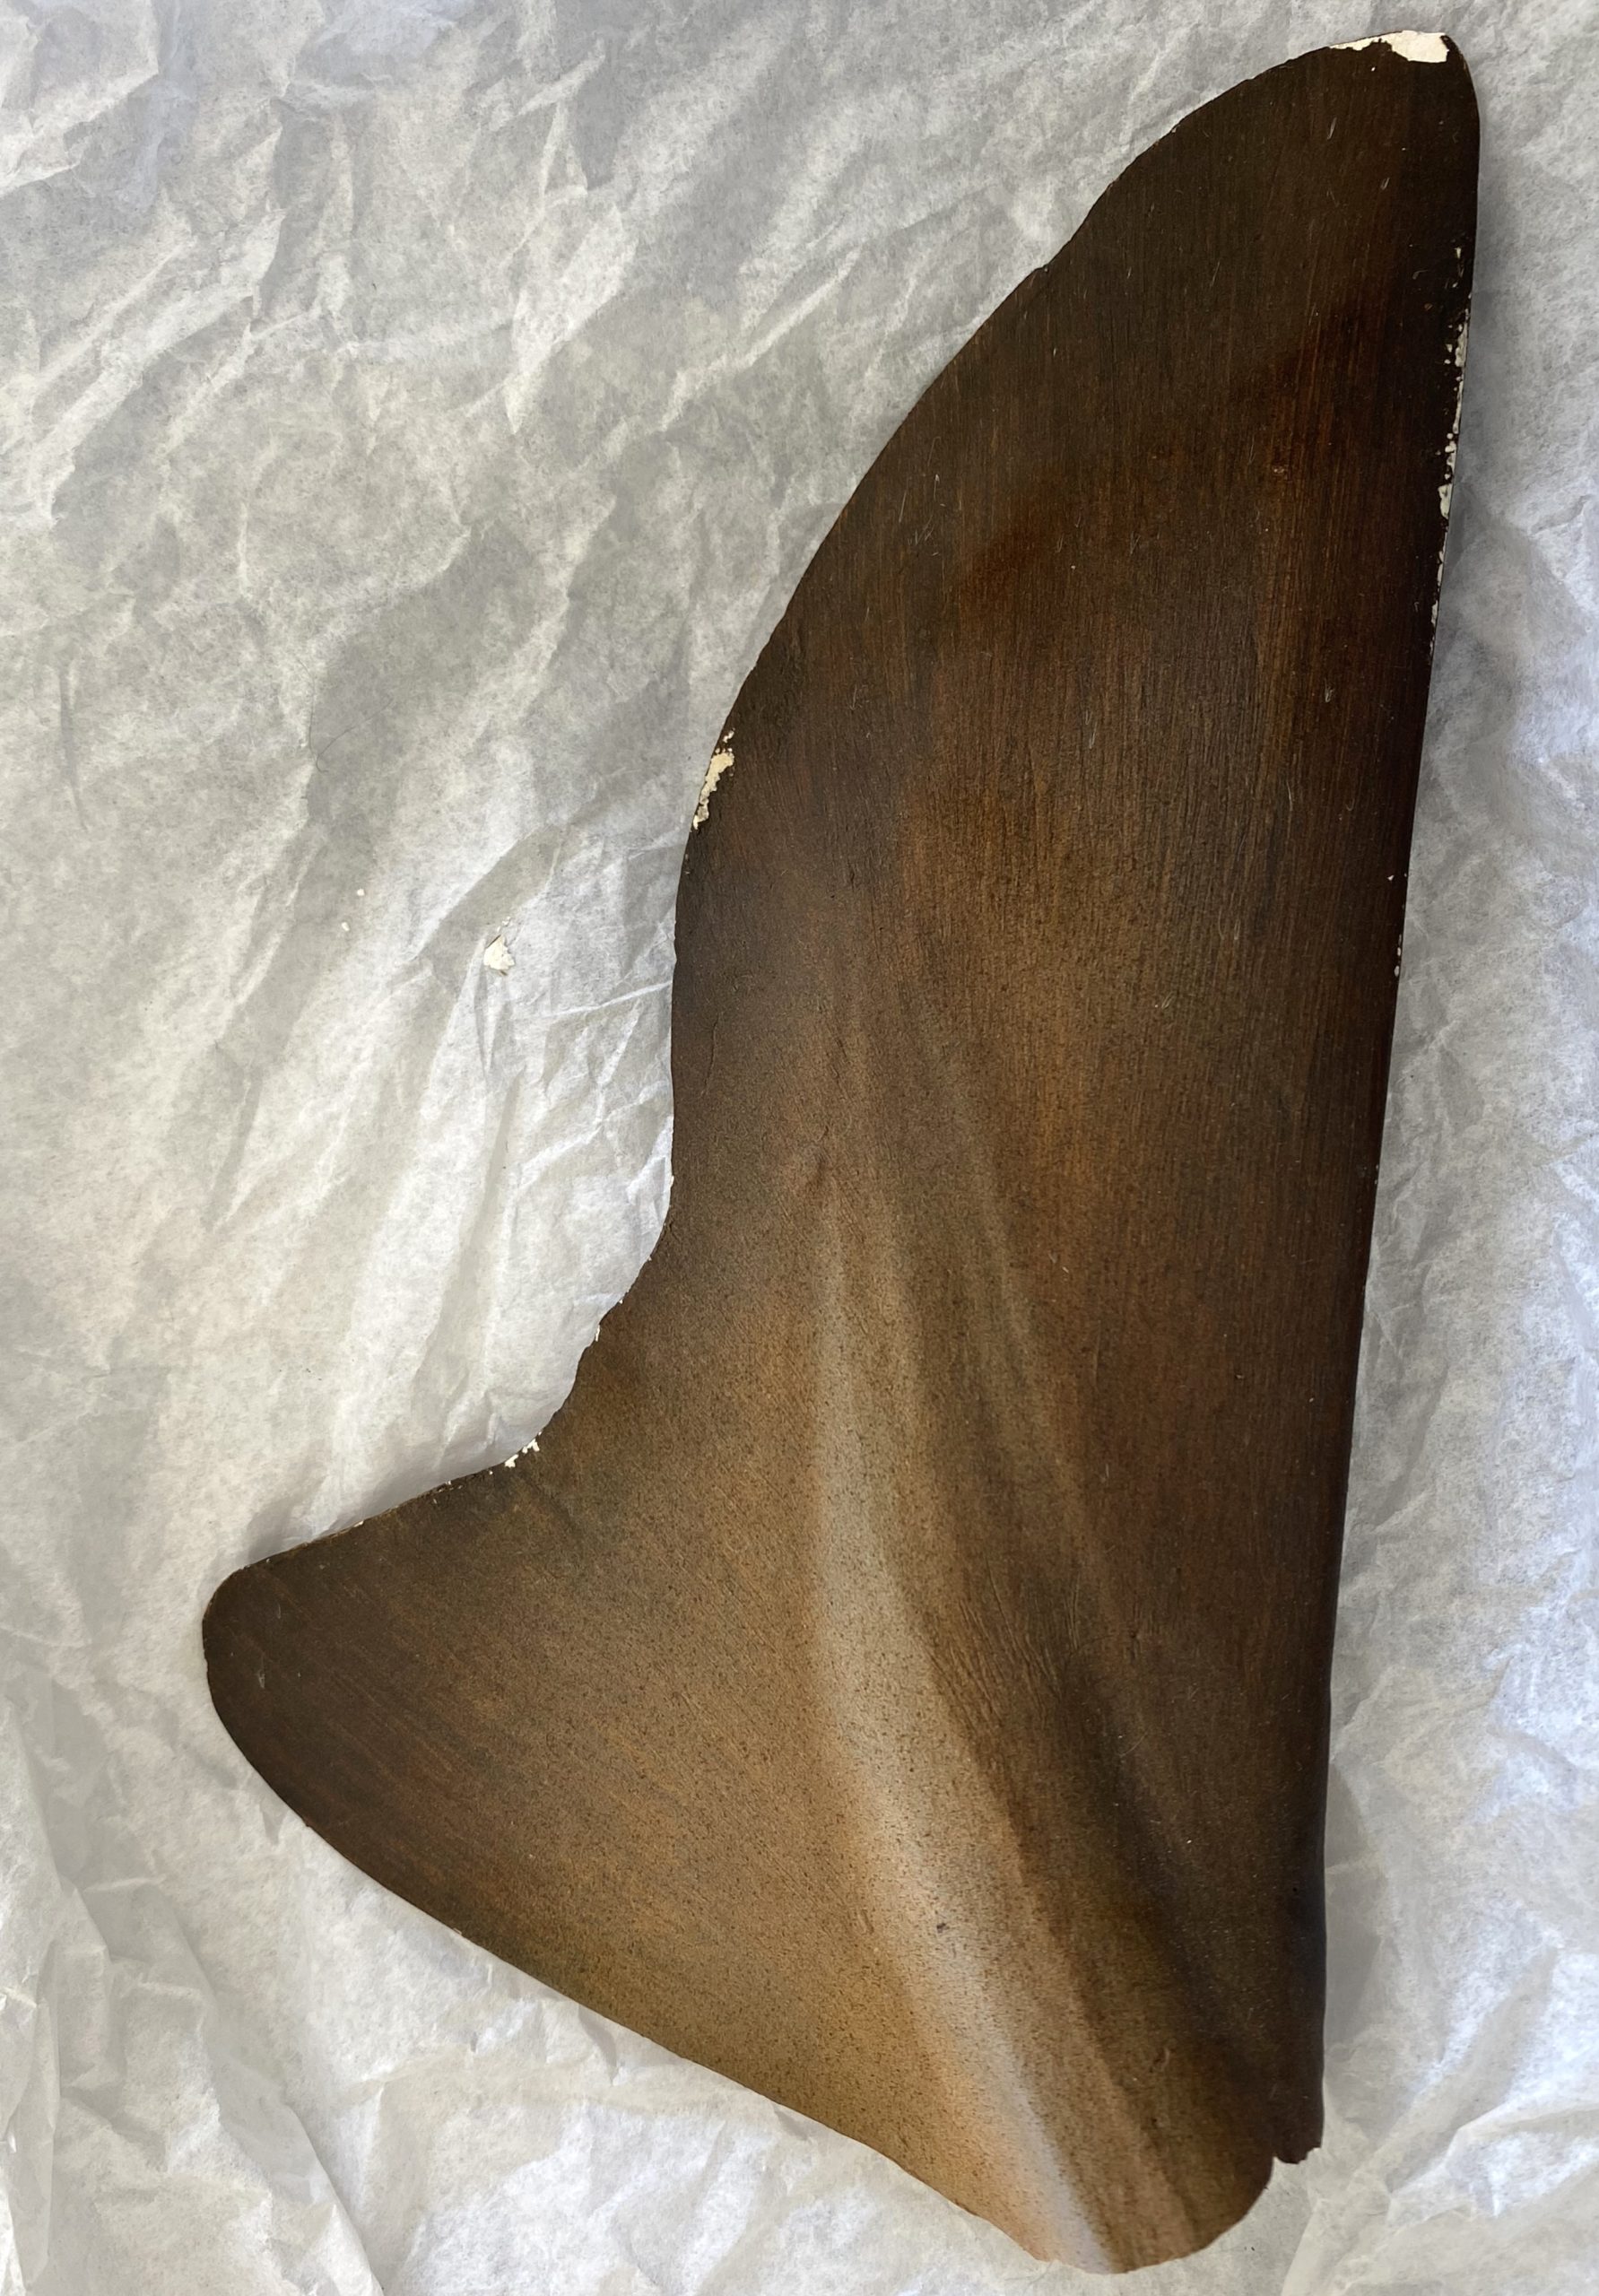
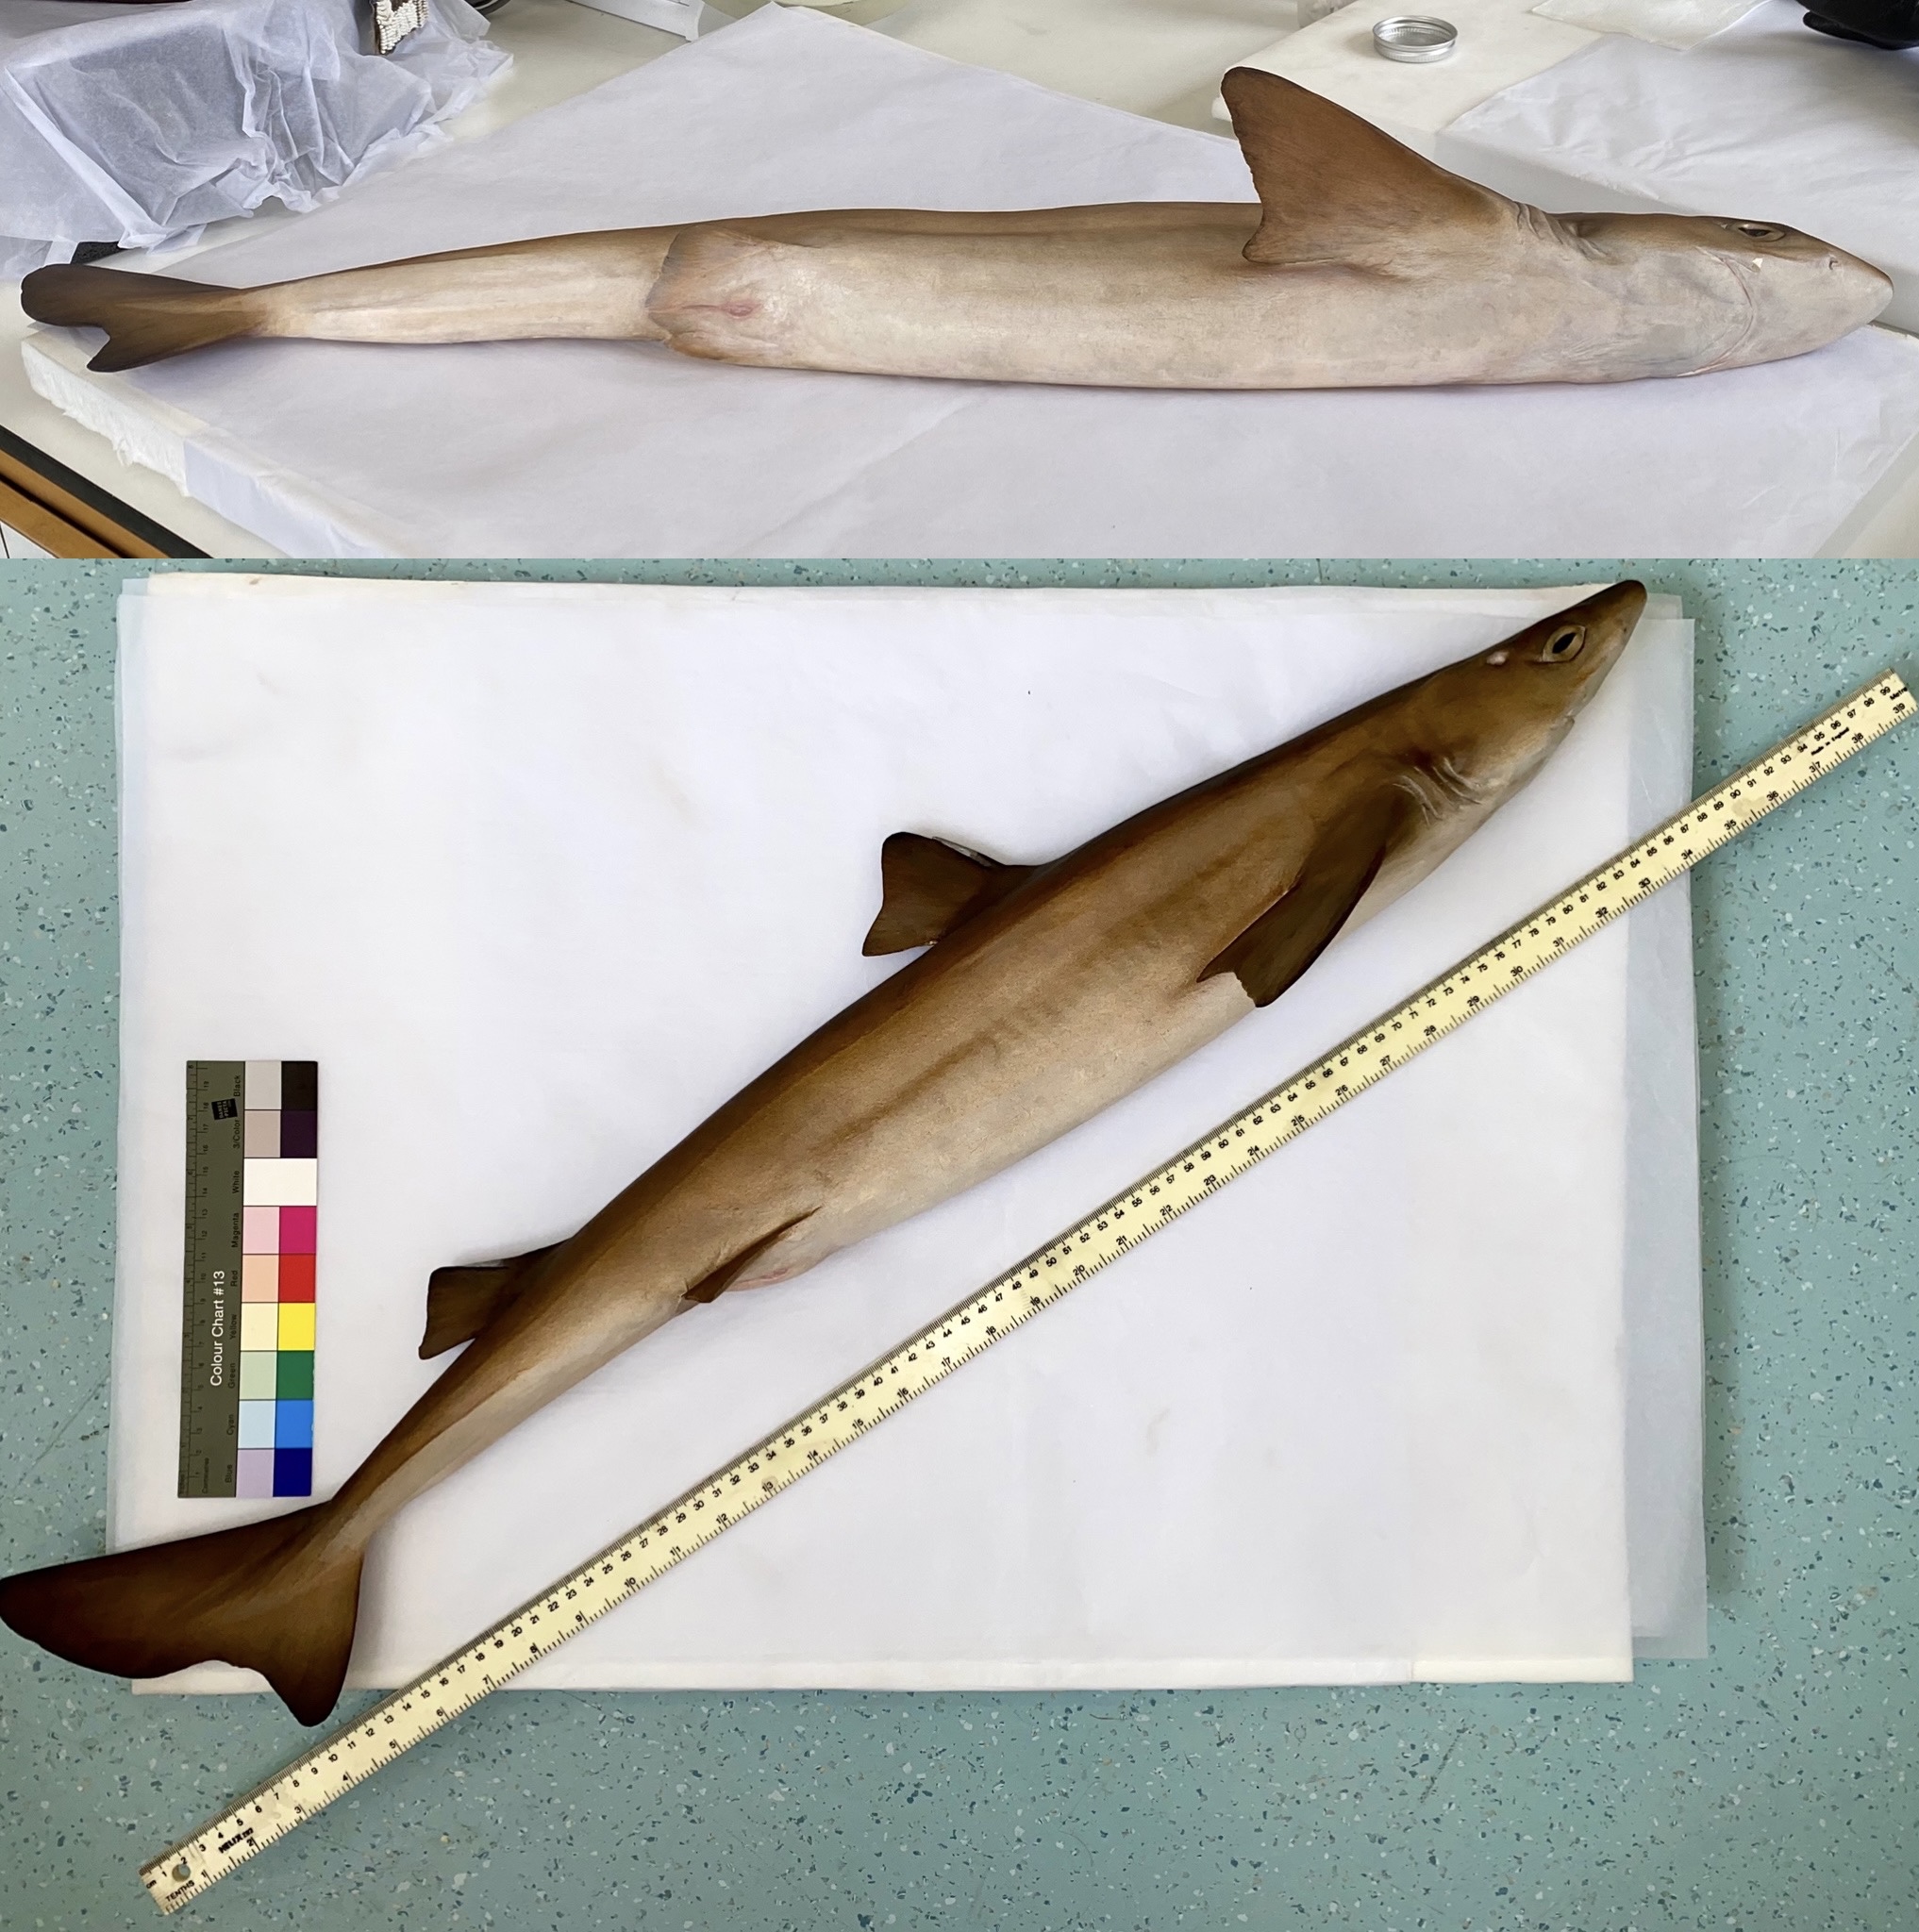
During week one, I was given a plaster shark model (Spurdog) that needed to be repaired.
My first step was to assess the condition of the object through observation and physical touch.
I wore nitrile gloves during the handling process to prevent the plaster from absorbing any oils and chlorides from my hands. Alongside this, I filled out a form in which I stated the reason for the assessment and the priority of treatment, as well as the name and number of the object, the owner, and the dimensions, weight, materials, and condition of the object.

Observations and Treatment Proposal
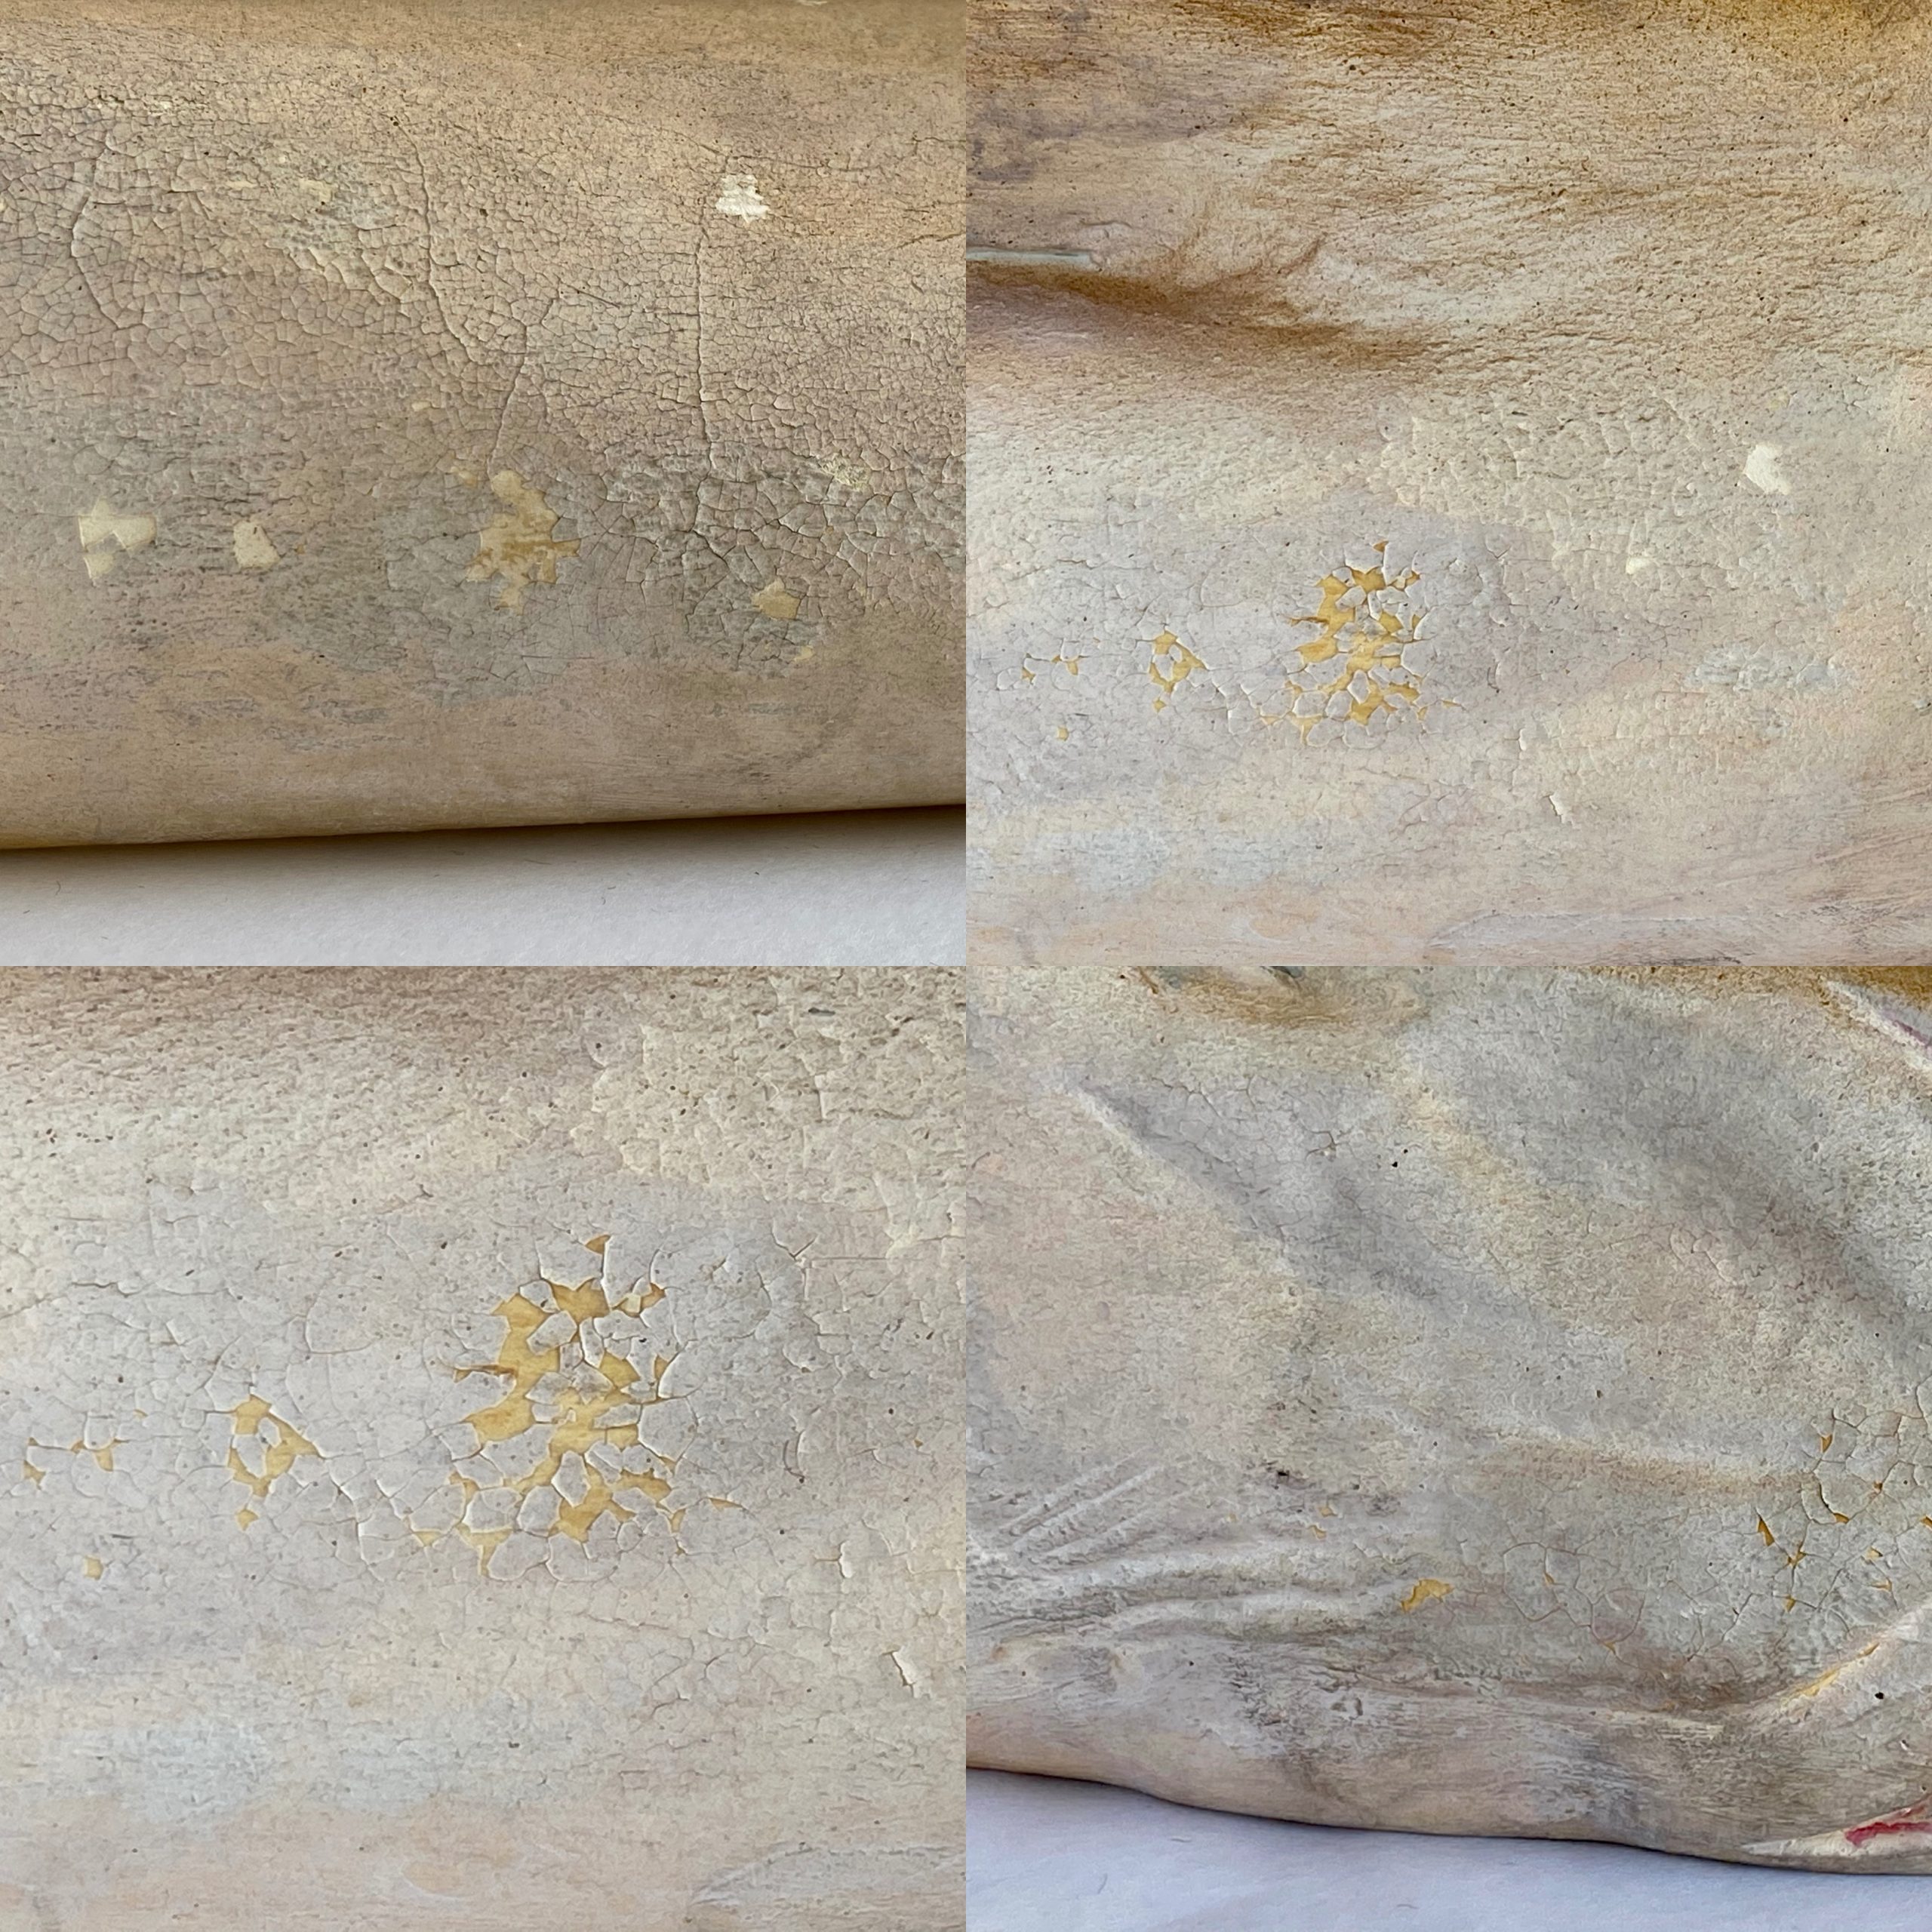
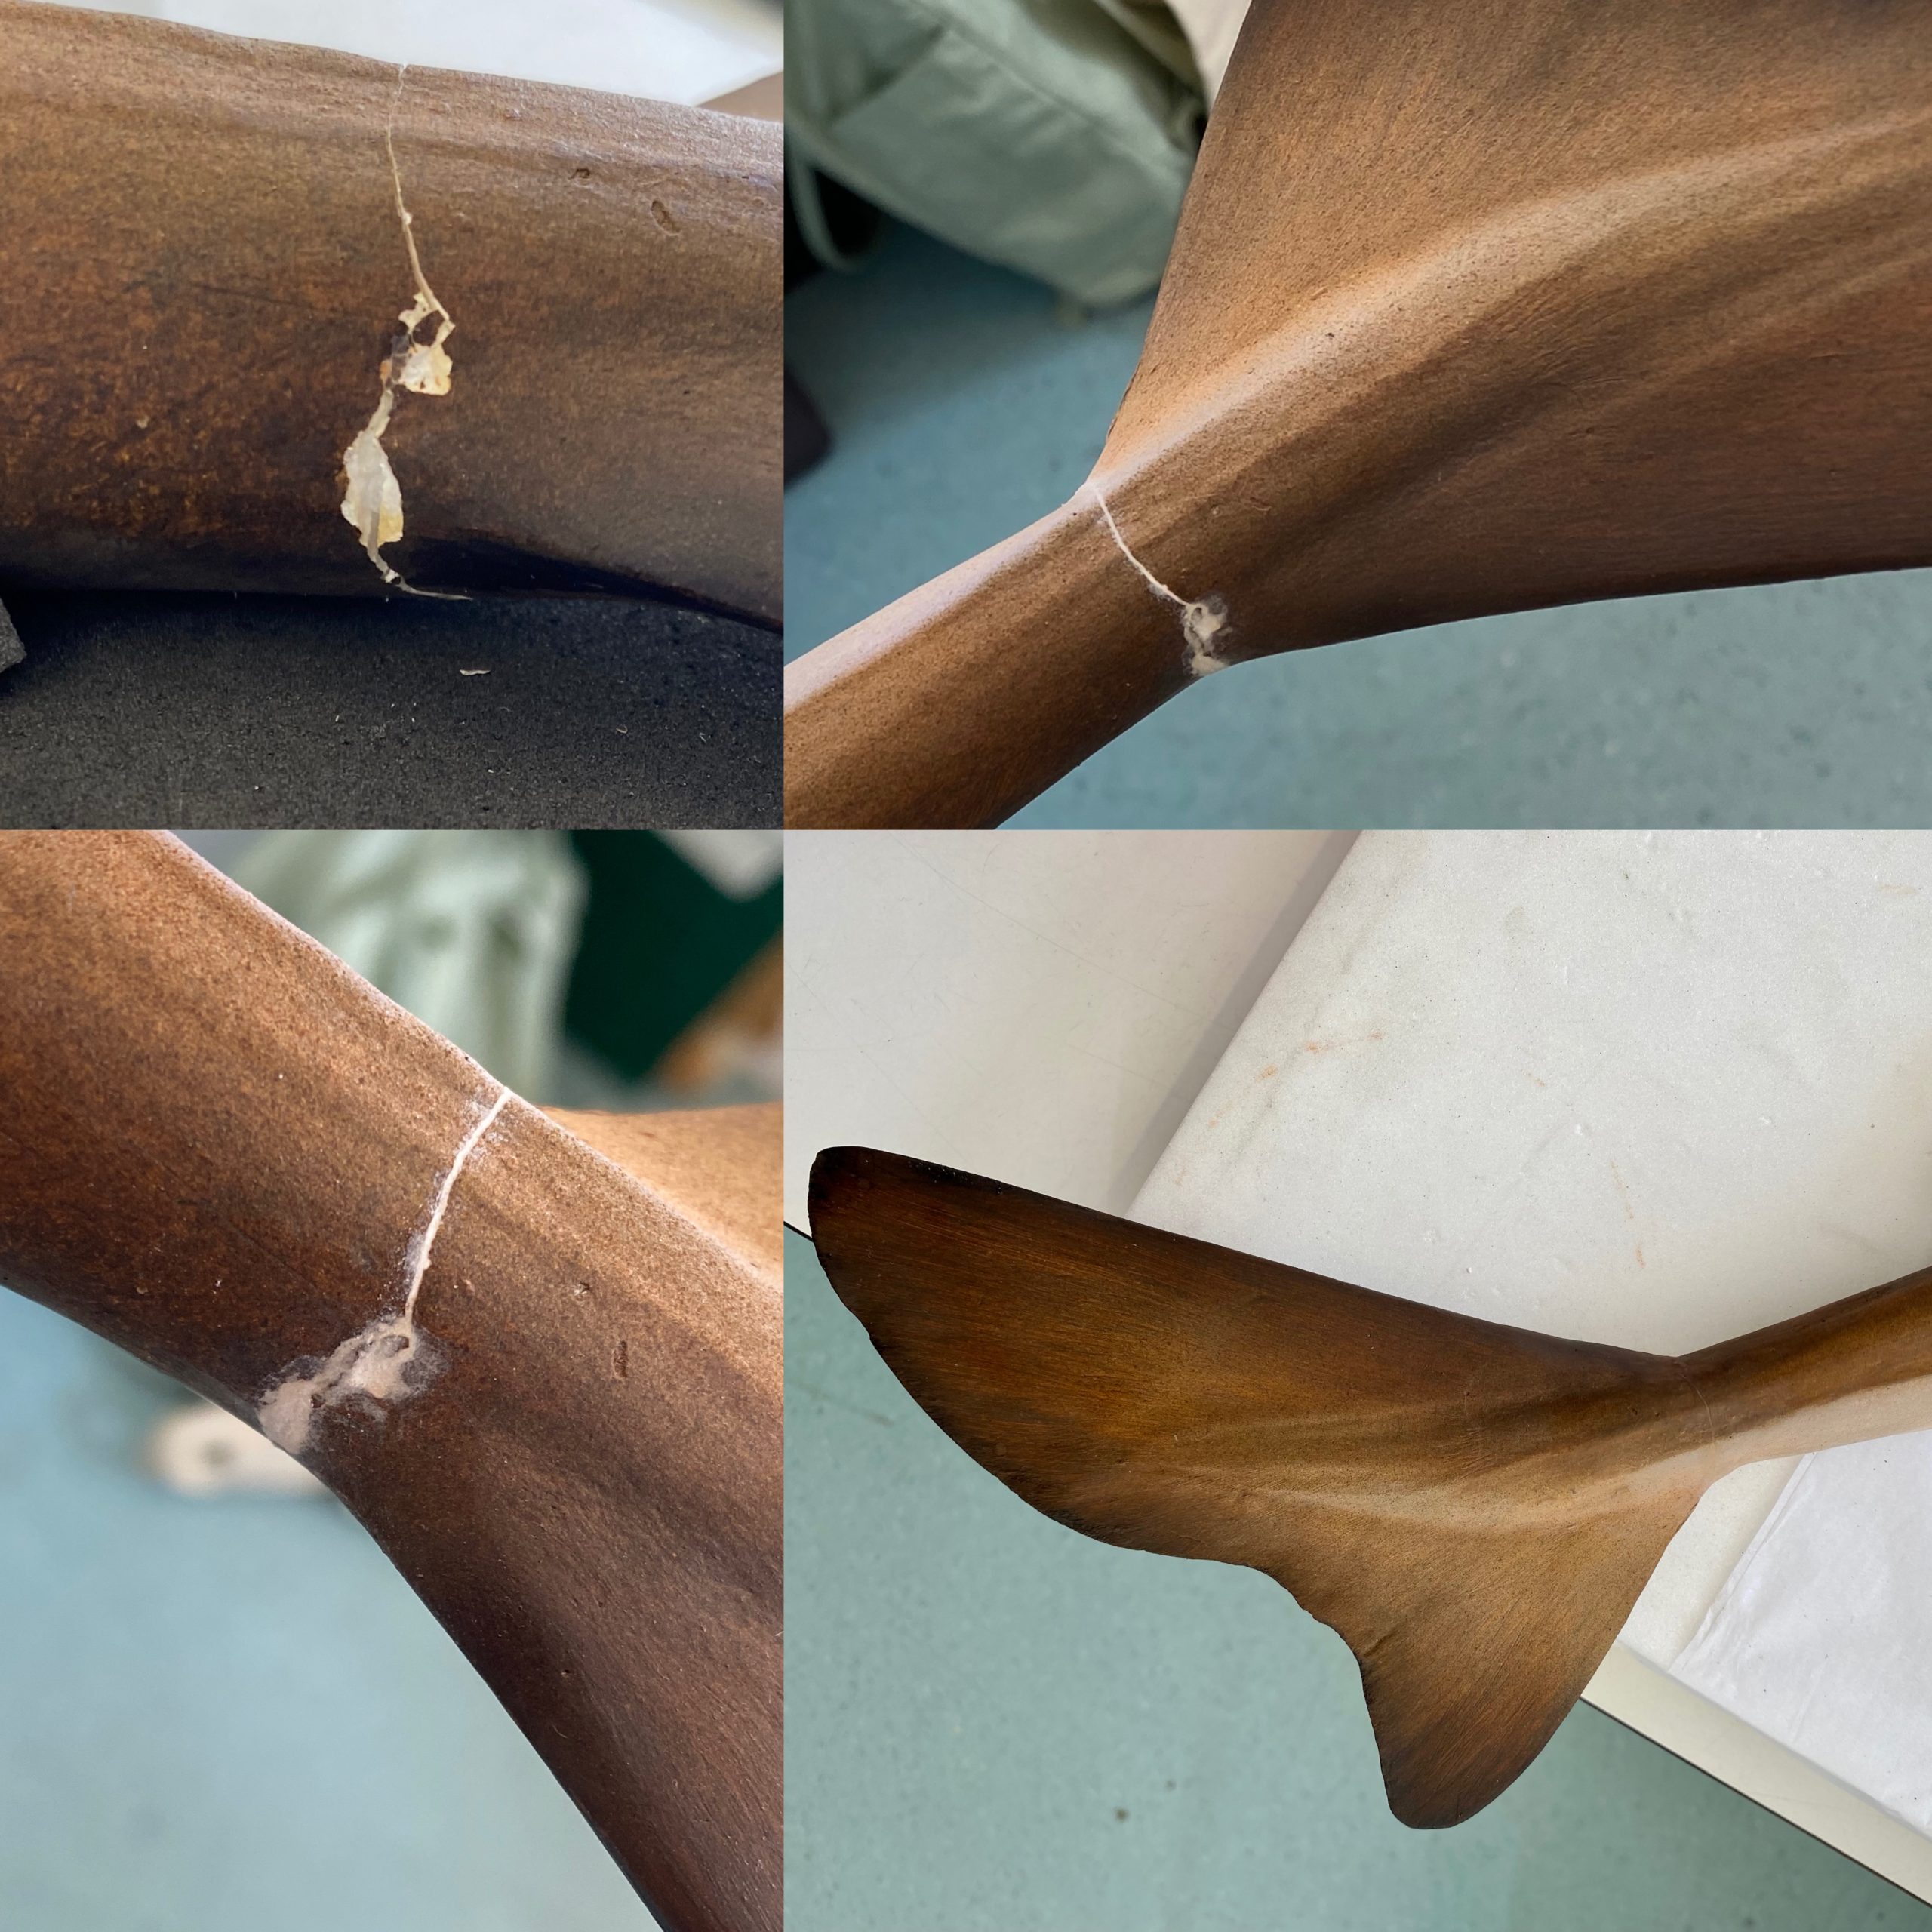
As evidenced by the image, the tail is broken, and closer inspection revealed that both the tail and body were a little dirty and covered in a thick layer of dust. The topside had a few chips and scratches, but the underside was actively flaking. Furthermore, the glaze within the eye had run, possibly due to heat from the showcase lights or when it was first made.
The treatment required for the object, according to my mentor, was to re-attach the broken tail to the body and in-paint areas that were missing paint. She also mentioned that it would be beneficial if the flaking could be stabilised.
Following this, I filled out a second form summarising three proposed treatment methods for the object, with priorities ranging from minimal to maximum intervention. With a limited treatment window compared to lab time, this summarised form aided in the swift development of several treatment options, determining which course of action was necessary.
I decided that the best treatment for the plaster object would be to improve the aesthetic by cleaning and painting the surface and repairing it by re-attaching the tail and stabilising the flaking stomach area if possible.
Plaster Samples and Solvent Testing
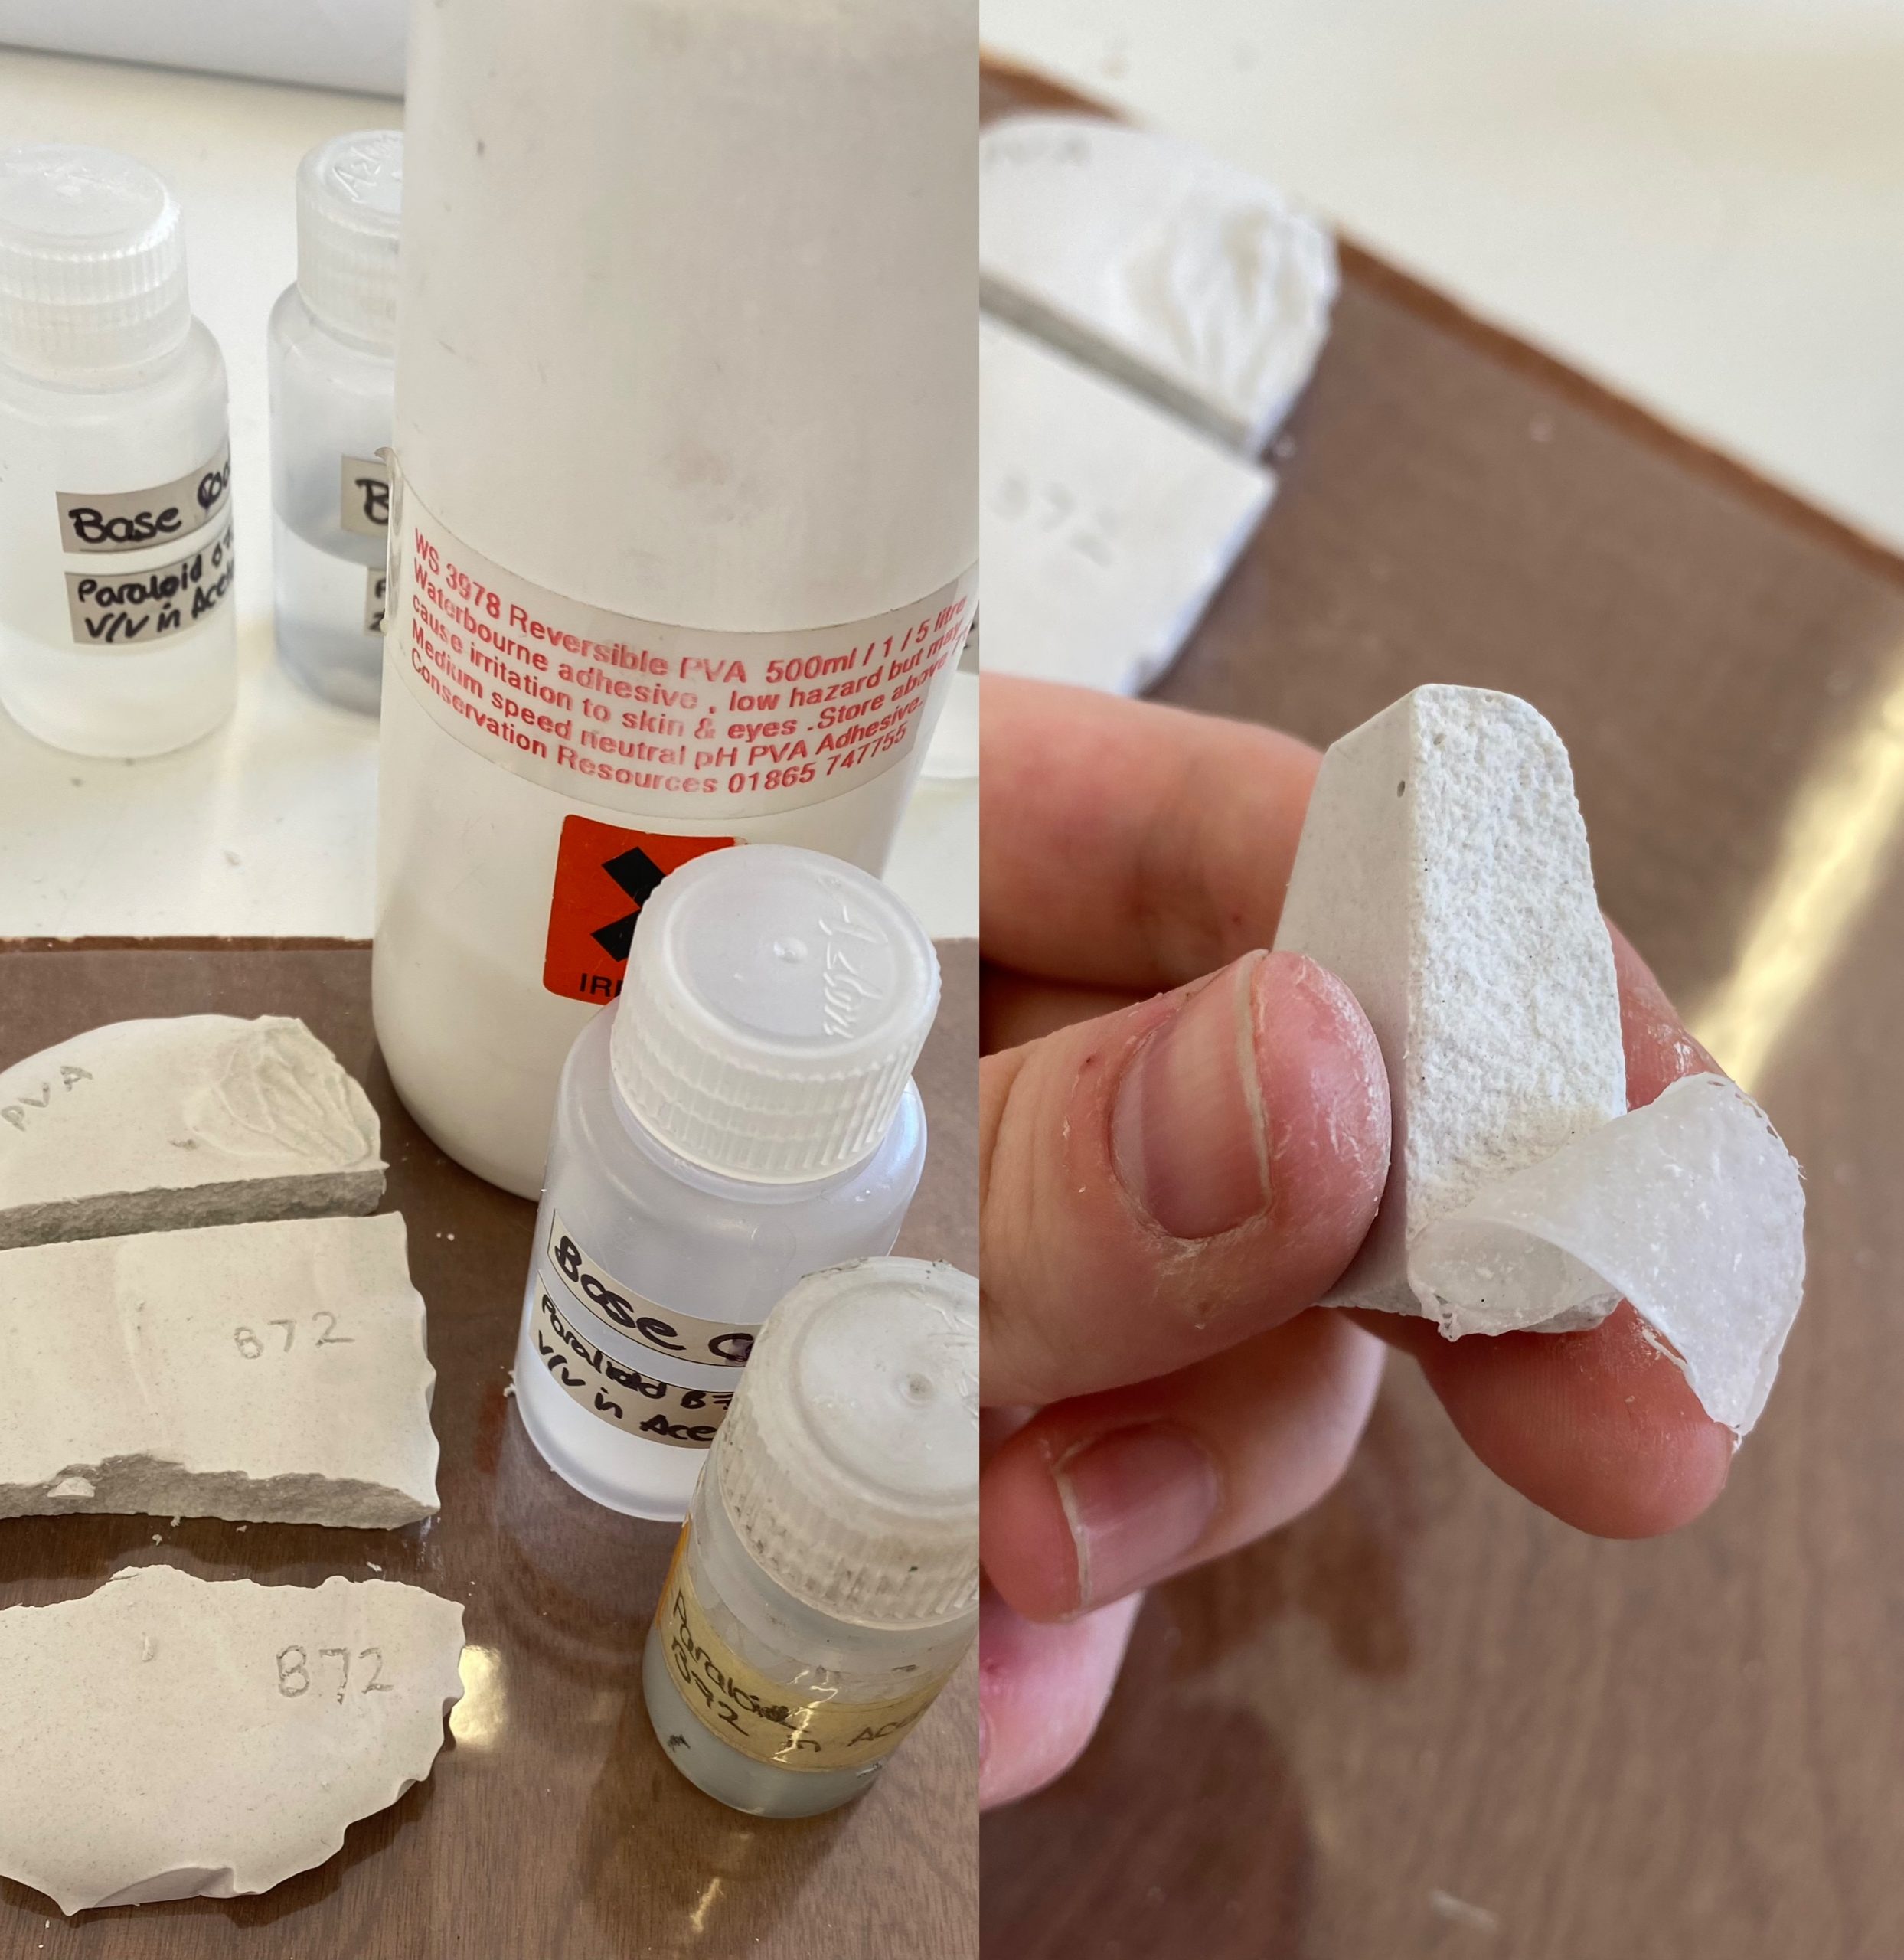
I began researching which adhesives and solvents are used in conservation for plaster. Using what was available in the lab, I decided to test them by creating plaster samples which I broke into pieces and reassembled with the adhesives I’d chosen: WS 3978 Reversible PVA with 40% Paraloid B-72 and 10% Paraloid B-72. These adhesives are easily reversible and cause minimal damage if removed. Allowing a 24hr cure time for each sample, I conducted several tests where I applied each adhesive from the bottle, increased and decreased their viscosity before application and applied the adhesives as a consolidant. The 10% Paraloid B-72 was low in viscosity and was absorbed into the fabric of the plaster, whereas the 40% Paraloid B-72 was too viscous and created a putty layer that could be peeled off, as shown in the image below. I then tested the strengths of each sample to see which would break under pressure and found that WS 3978 Reversible PVA was the strongest adhesive with and without consolidating the plaster samples.
In addition, solvent tests using water and acetone on the main plaster body had no negative effects, indicating that PVA or Paraloid B-72 could be used as firm adhesive options.
Paint Samples
Using the leftover plaster samples, I practised painting on plaster with watercolour and acrylic paints. I discovered that I preferred both mediums, but I felt more at ease with watercolour because mistakes were easier to correct by adding more water to weaken the pigment.
The Tailfin and the Plaster body
The tailfin needed inpainting to cover up the chips and scratches, but first, dust had to be removed.
I started out using a dry synthetic paintbrush to first dust over the surface. I then decided to vacuum using a HEPA Museum Vac® on a low setting, and secured protective mesh around the nozzle to reduce potential damage caused by the vacuums suction. Aided by an overhead air extraction unit to reduce dust exposure, I guided the remaining dust towards the vacuum nozzle, using a thin hogs hair paintbrush.
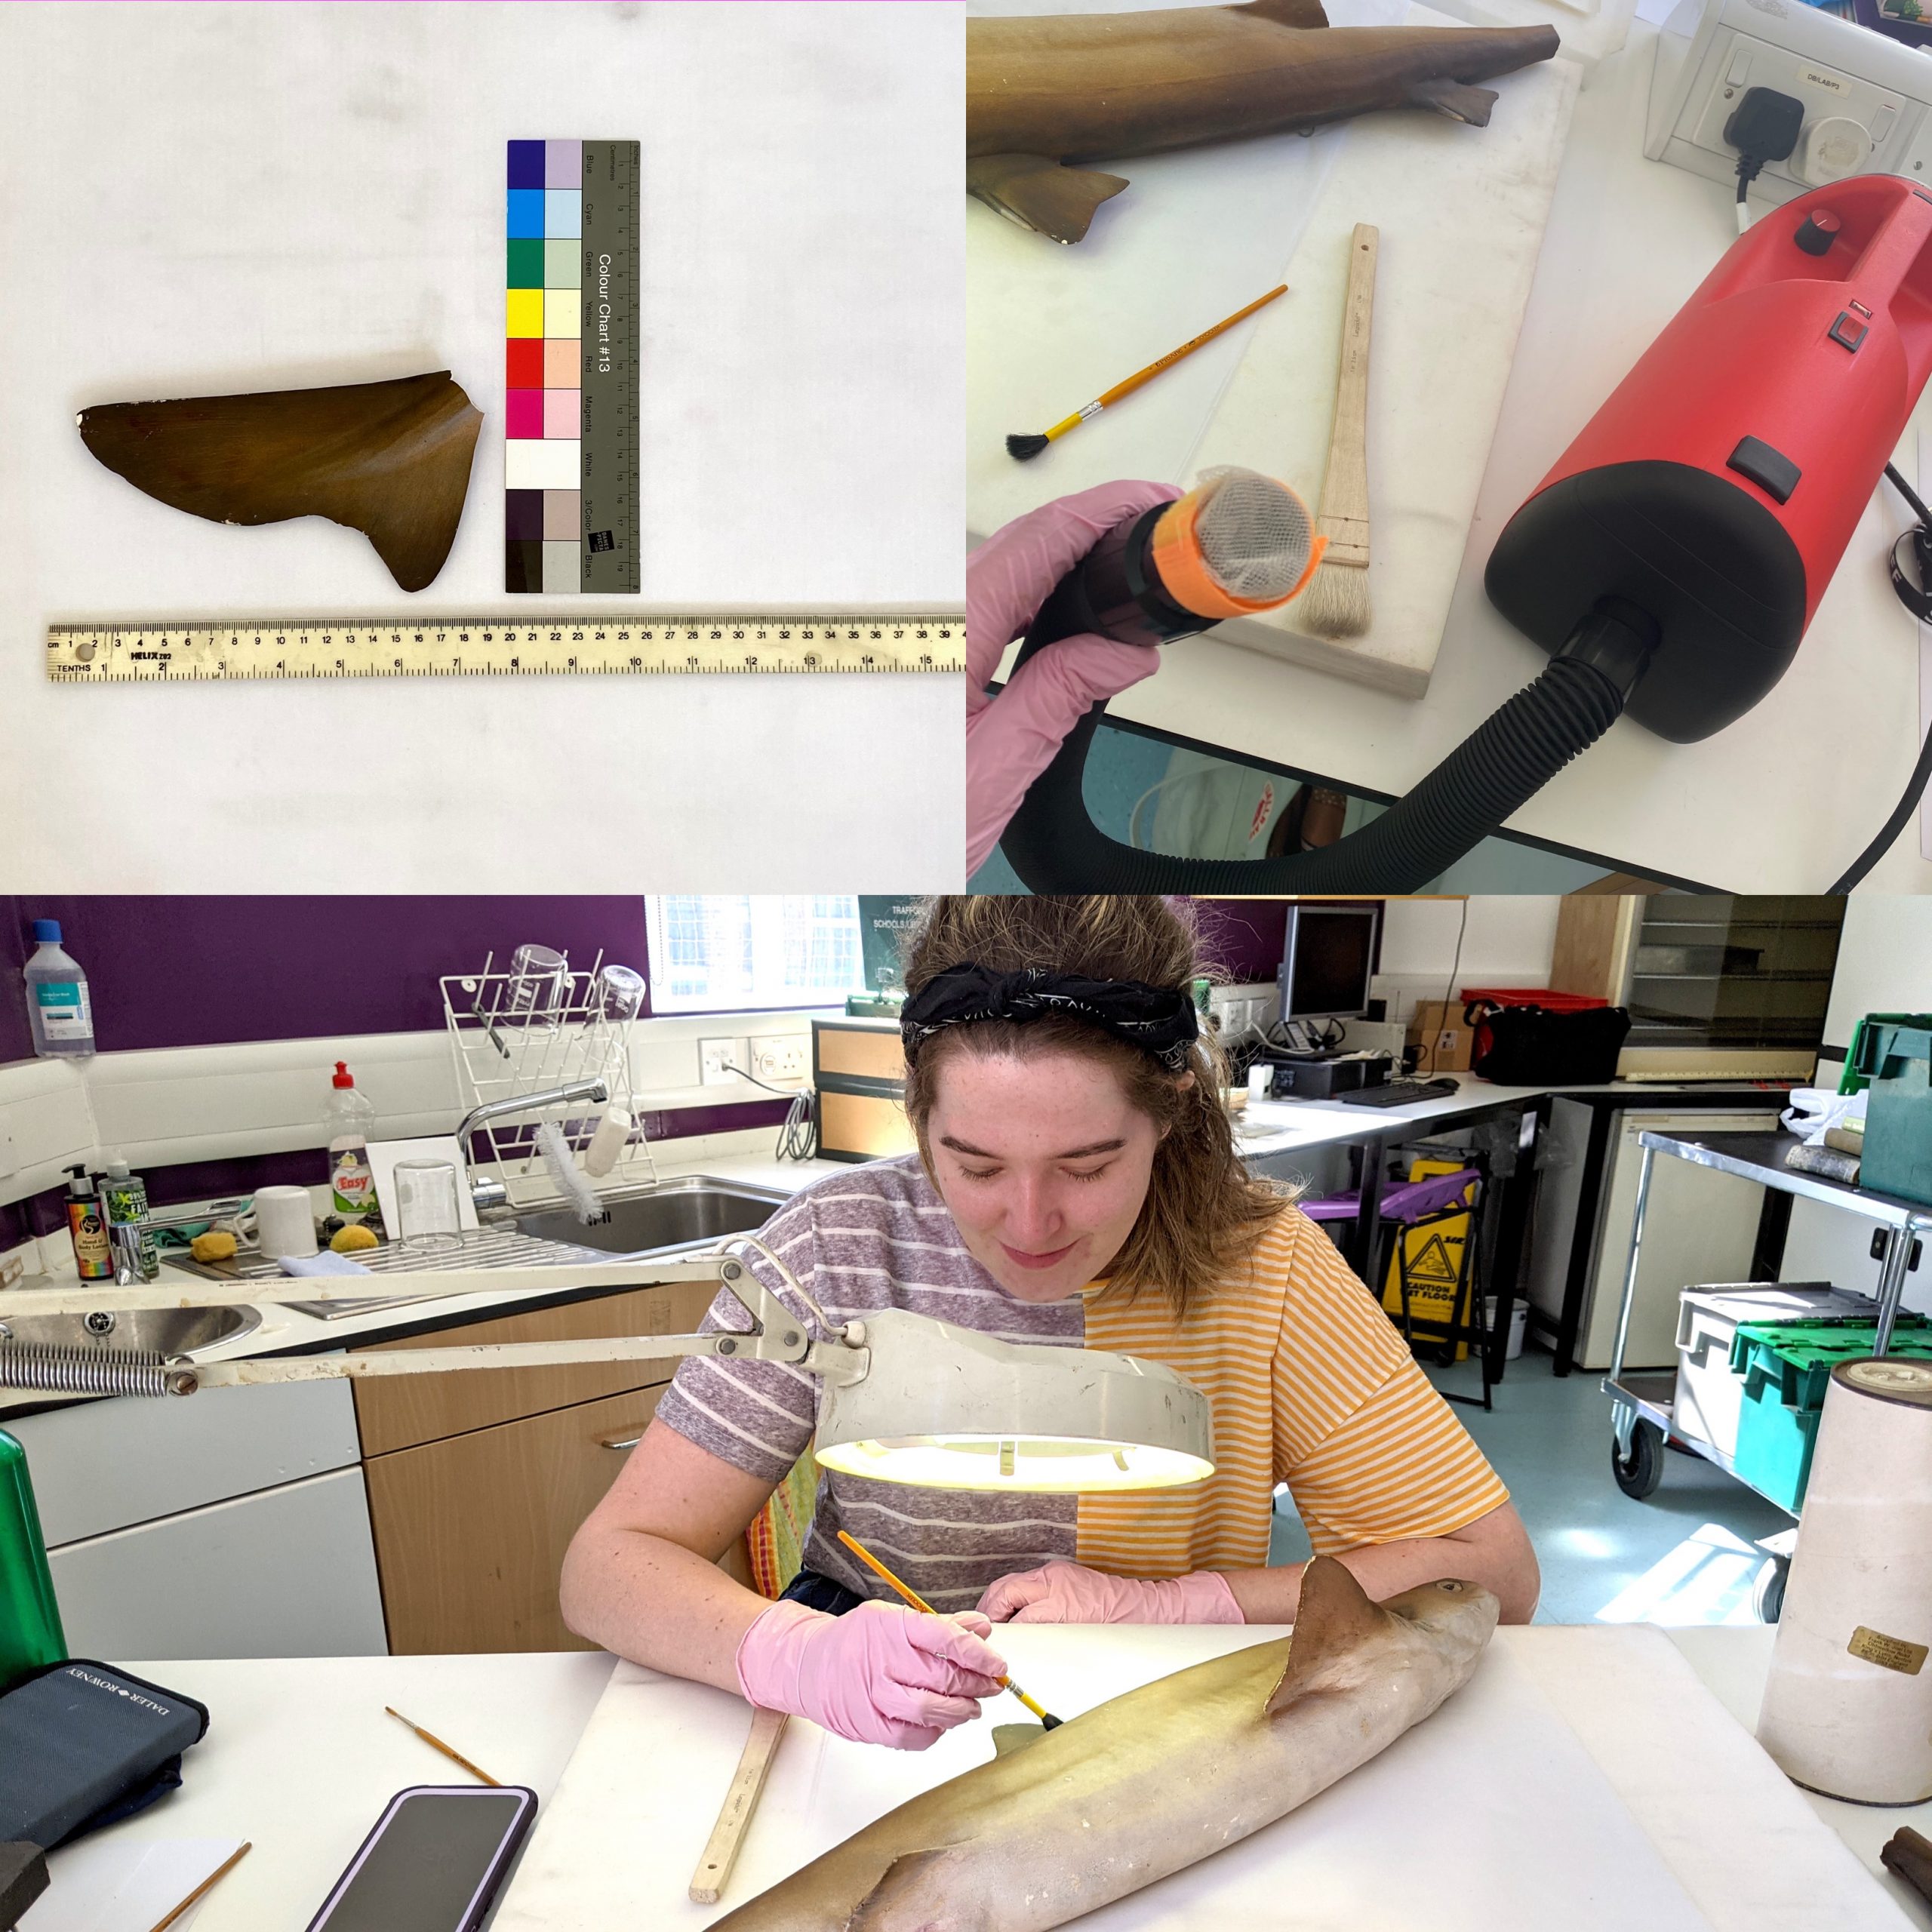
I removed dust from the topside of the body using the same method for the tail, taking extra precautions to avoid the flaking areas as much as possible. I also tried using PEL draught powder to try and remove any dirt that remained after vacuuming the body but it didn’t work.
Following that, I decided to repaint any areas that were missing paint while avoiding the flaking sections.
Inpainting is sometimes necessary to improve an object’s aesthetic and to blend in any uneven surfaces that distract from an object’s interpretation. The body was difficult to paint because many areas were impermeable to watercolour and had to be painted with acrylic, making colour blending and switching mediums simultaneously difficult. However, with acrylic paint, I was able to conceal dirt, such as pencil marks, as well as areas where previous paint and plaster had flaked off.
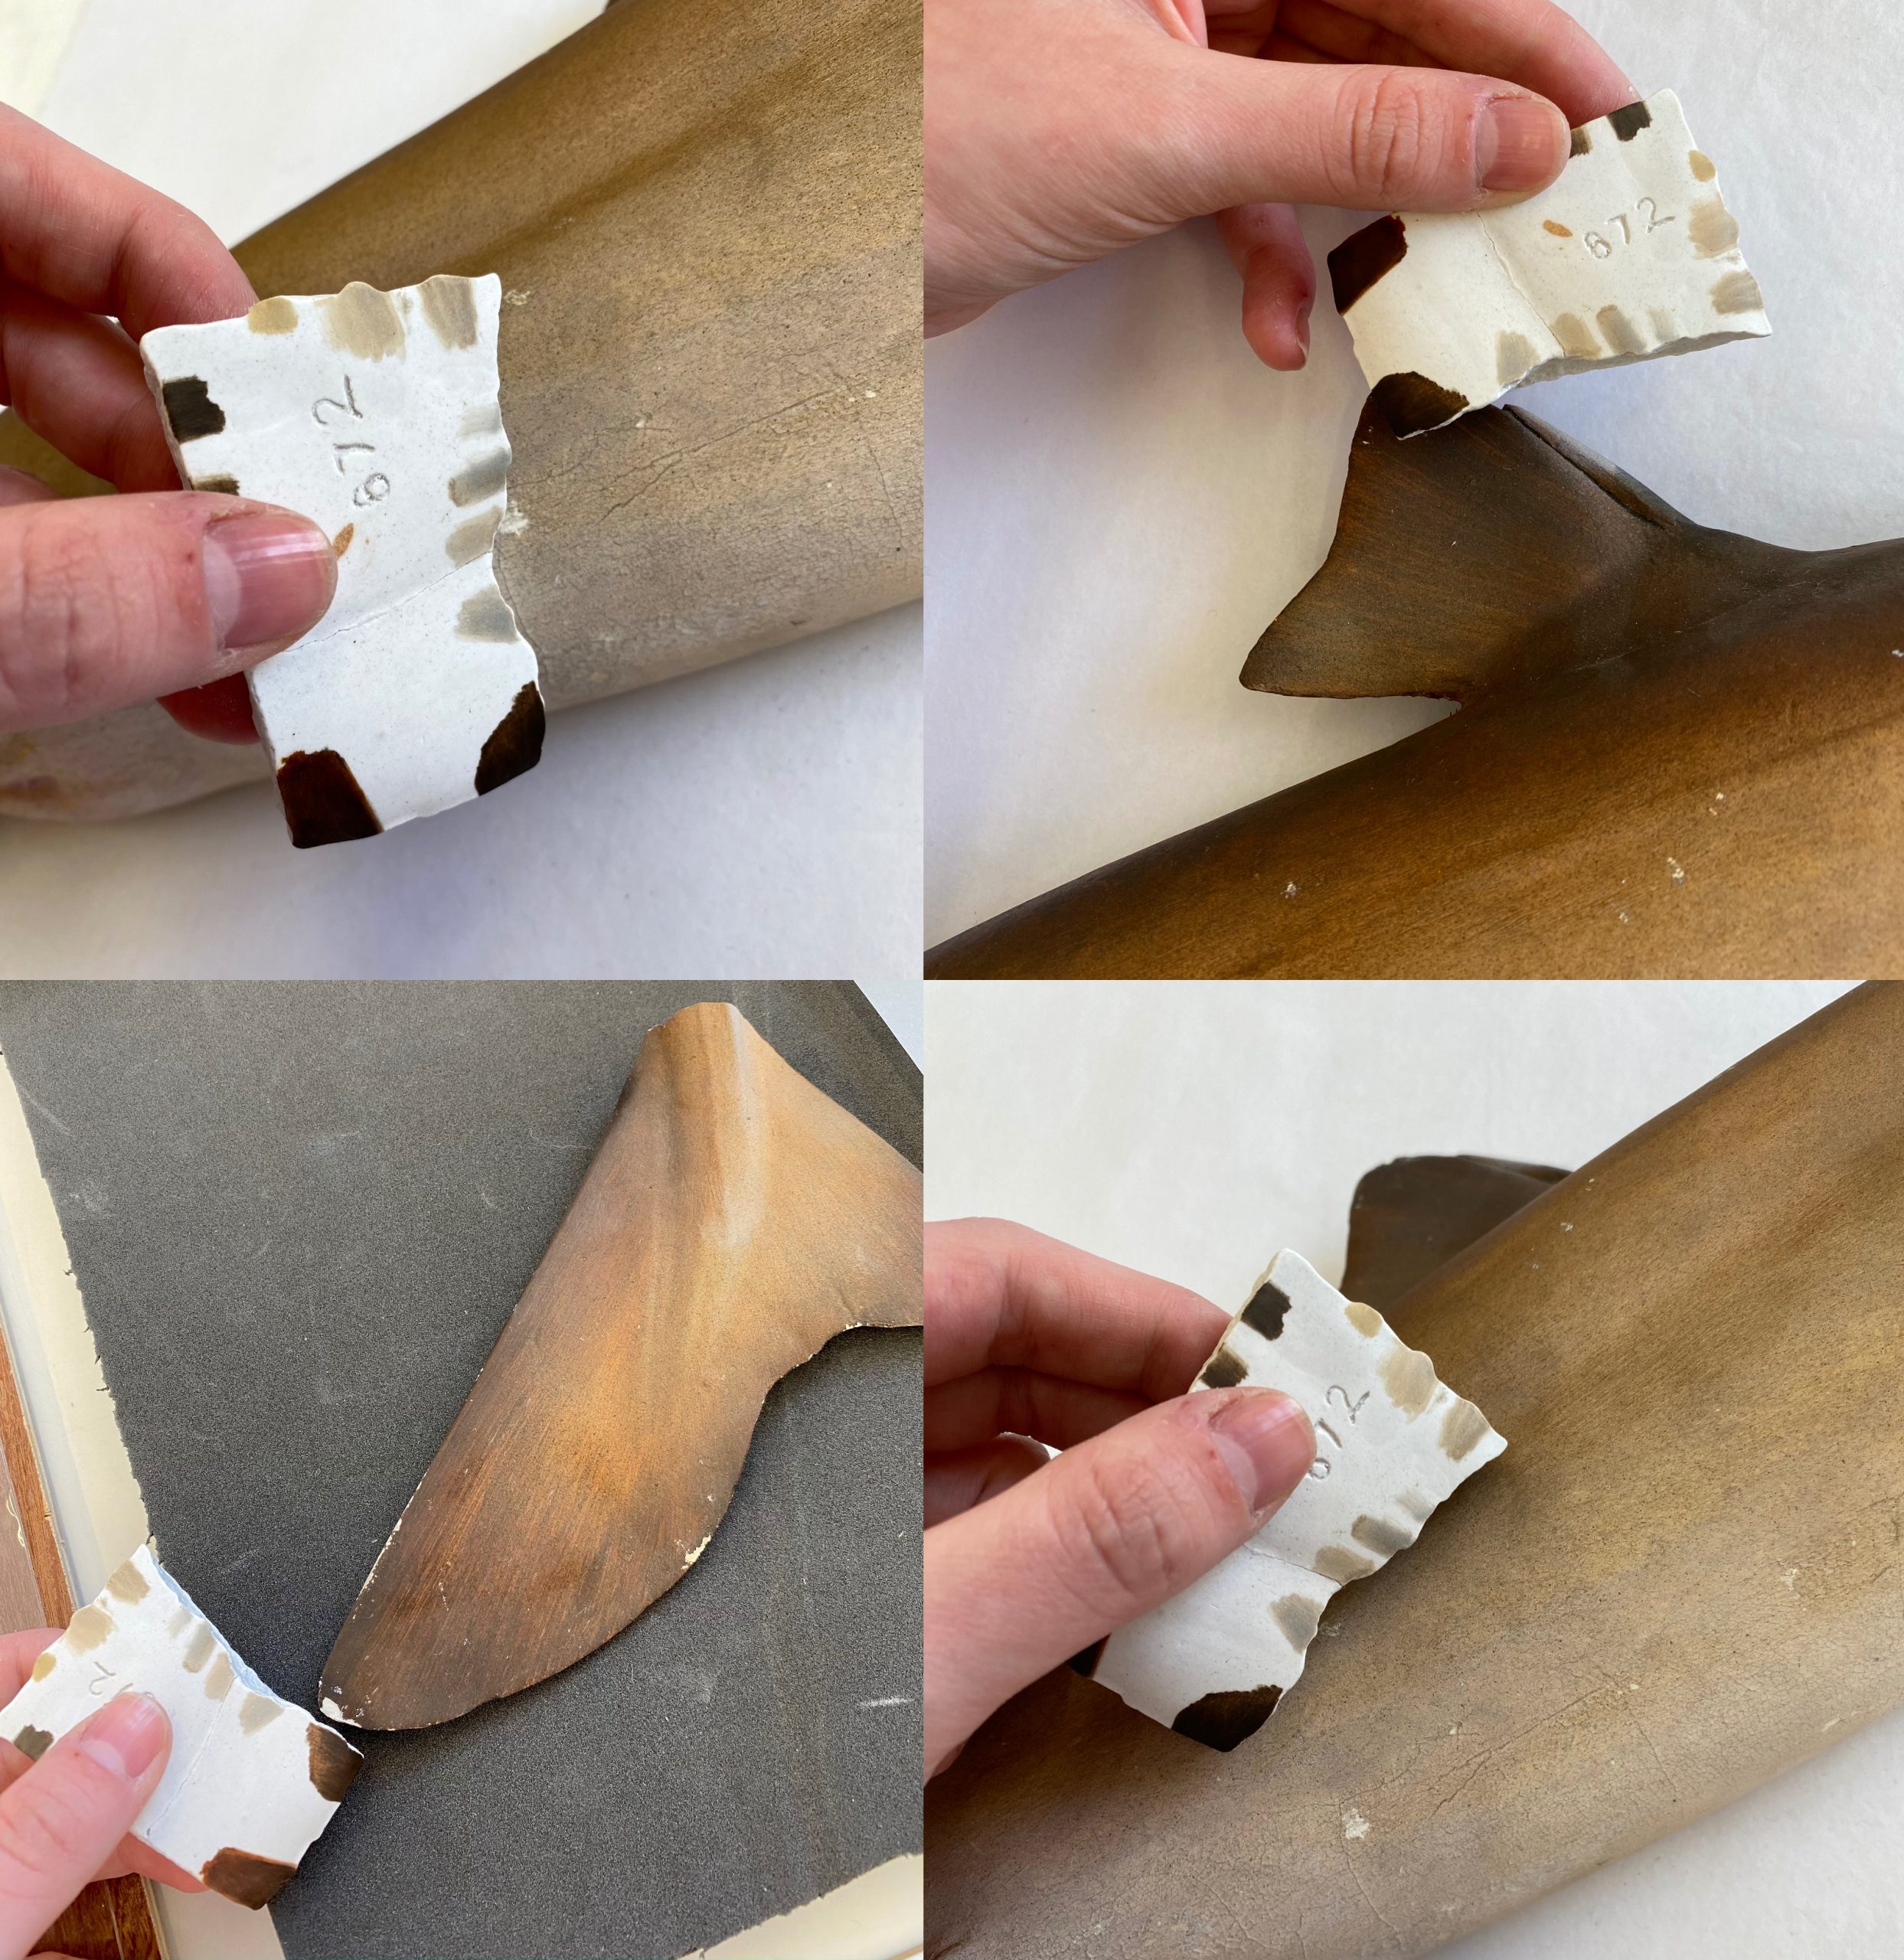
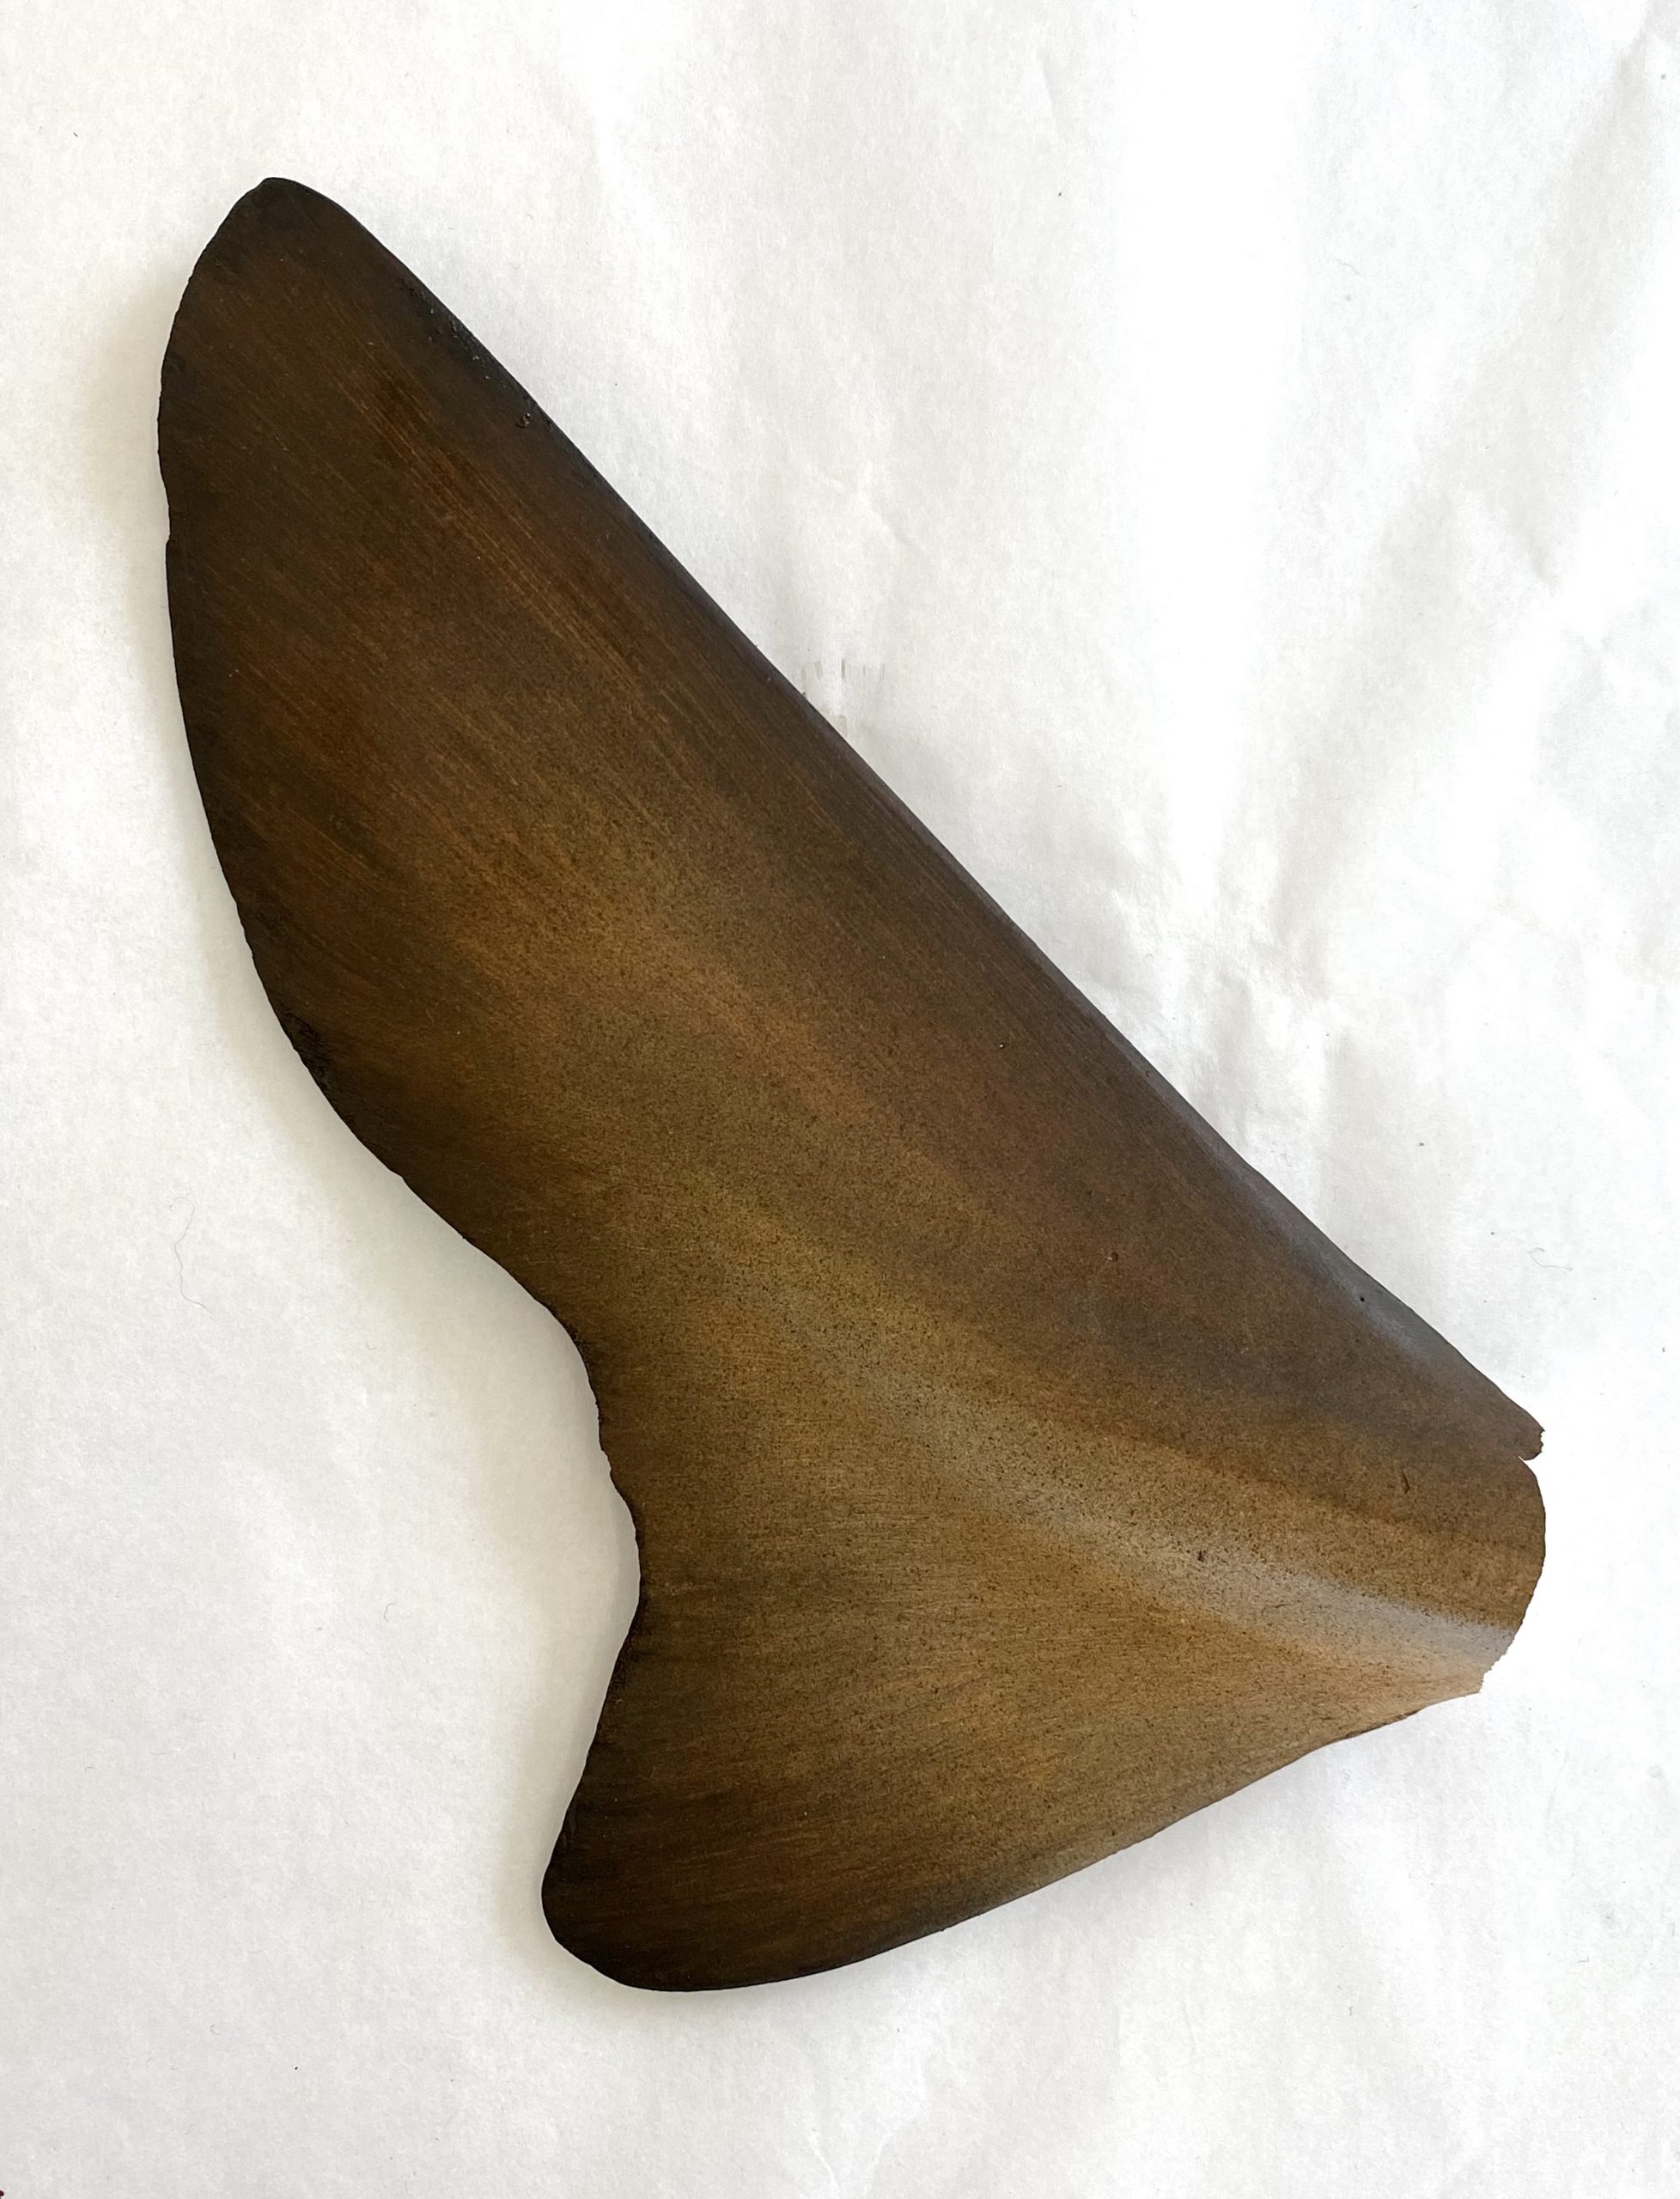
For the tailfin, I chose watercolour to fill in the majority of the chipped areas and I found it somewhat easy to match the colours with my artistic background. There were a few spots however that required acrylic paint as pigment from watercolour would dissipate. This is due to the fact that the plaster models in the museum are believed to have been painted with a variety of media, most notably acrylic, airbrush, or plaster pigment powder.
Adhesion Process
I consolidated the surface of each broken join with 10% WS 3978 Reversible PVA, which I let dry overnight. The following day, I applied WS 3978 Reversible PVA directly from the bottle to the joins as an adhesive.
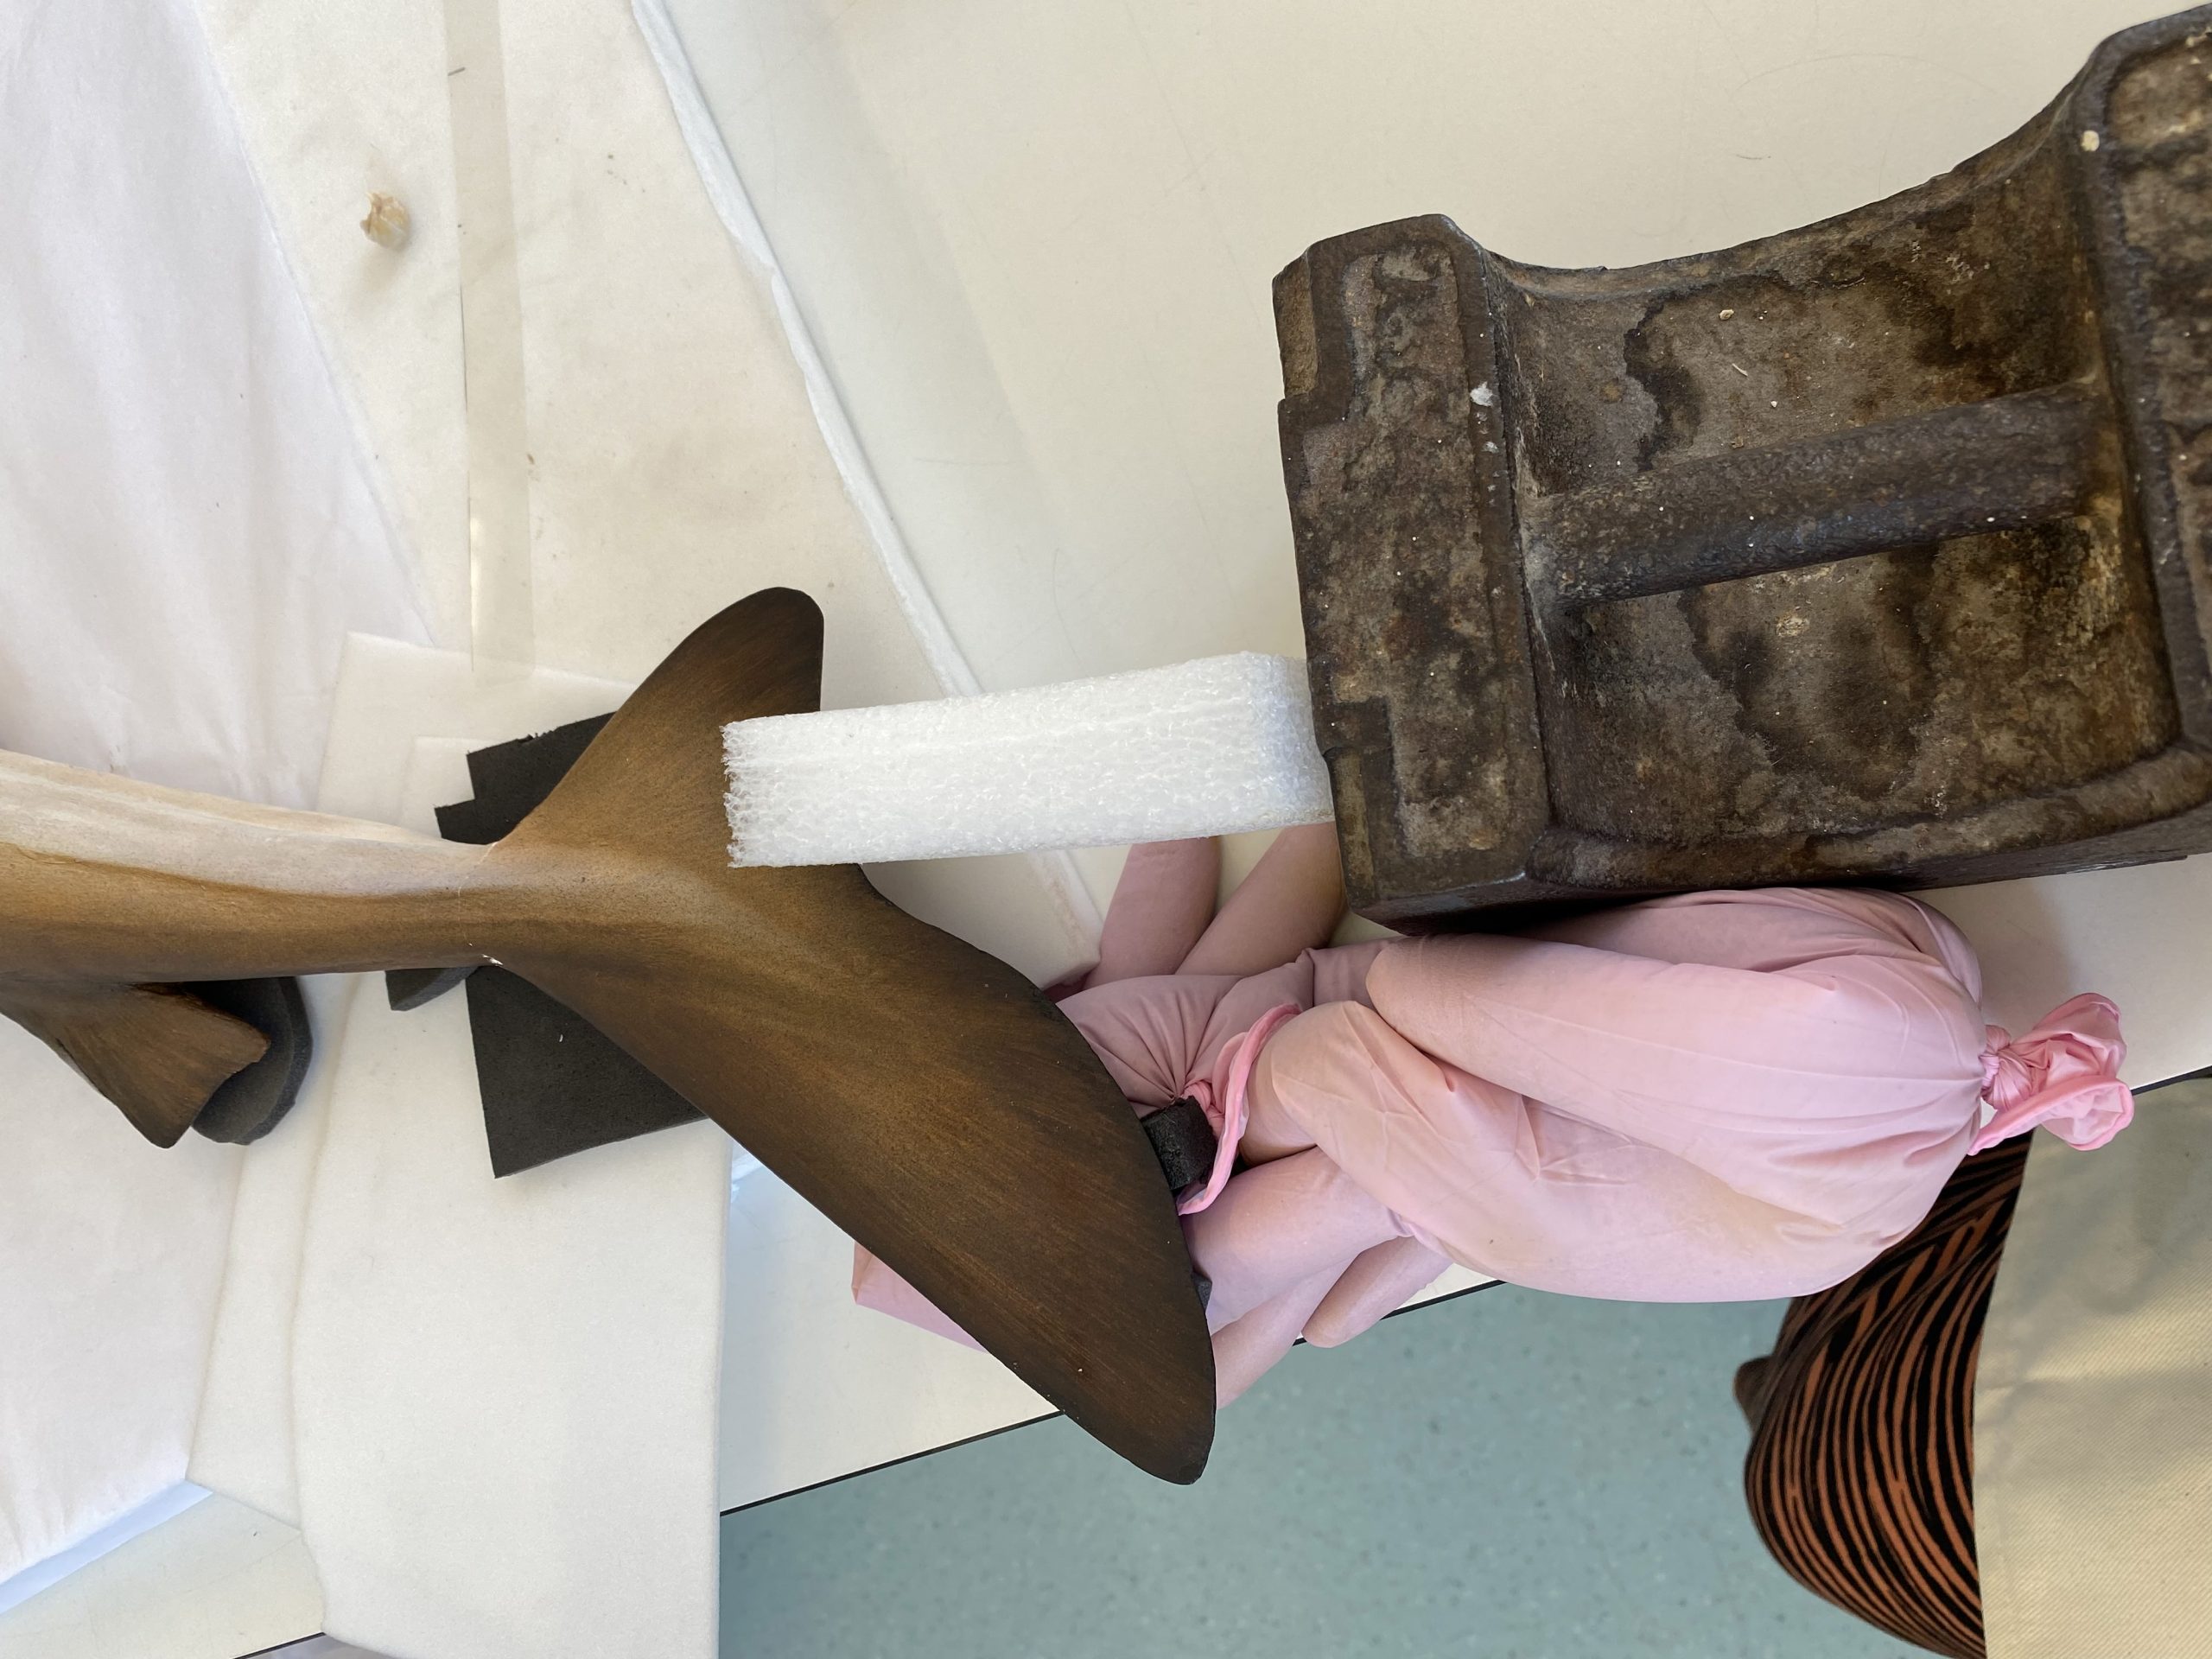
Reattaching the tail to the plaster body proved difficult due to the shape of the object, the break-edge and the weight of the broken tail fin. It would not adhere to the body unless constant angled pressure was applied, but I was afraid of applying too much force because it was delicate. When pressure from my own hands and sandbags wasn’t enough, I tried balancing the object within a sand bucket to allow gravity to help adhere the tail, but it wasn’t deep enough, and it kept trying to fall over.
I moved the object back onto the table and supported it with plastazote before applying a fresh layer of PVA to the break edge since the previous layer had dried. Then, sandbags, foam, and wood pieces were used as support, with heavy weights holding them in place to apply constant pressure. After it was secured, it was left to cure and dry overnight.
Observations the next day revealed that, despite the issues, the pieces had adhered, but gap-filling and in-painting were required.
There are several factors that disrupted the closeness of the join that can be debated, such as the type of adhesive I had used and the consolidant. I should’ve tested further to see if the adhesive needed to be diluted, whether several applications were necessary and if a consolidant was required. I had tried this with my plaster samples, but the results were very different from the actual plaster object.
Post-Adhesion Process
Gaps were filled using readymade multipurpose Polyfilla from a tube as I felt it wasn’t ethical to mix up a large bowl of plaster for an area so small.
I had some trouble painting the Polyfilla to match the plaster body with watercolour because the pigment wasn’t well absorbed and frequent applications of water dissolved it, so acrylic was used instead.
Stabilising Flaking
Following on from this, I decided to consolidate the flaking areas. I used Rhoplex B60A/ Primal B60A, as it is a consolidant used for crumbling masonry, sandstone, and plaster. The application was risky as it caused several flakes to fall and unstable plaster from the body to crumble.
Once dry, I mixed Rhoplex B60A/ Primal B60A with acrylic paint and painted over the area to match the original painted body. The paint application went smoothly, and I believe I stabilised the flaking and improved the object’s overall visual and physical quality to the best of my ability.

Final Thoughts
As with most conservation treatments, the object revealed a variety of issues along the way, necessitating a rethinking of treatment options or a different approach. While it was frustrating at times, it was also extremely interesting and enjoyable. I have learnt new conservation techniques and was able to stabilise and repair the object, as well as enhance its aesthetic appeal for a more accurate interpretation.
- March 2024 (1)
- December 2023 (1)
- November 2023 (2)
- March 2023 (2)
- January 2023 (6)
- November 2022 (1)
- October 2022 (1)
- June 2022 (6)
- January 2022 (8)
- March 2021 (2)
- January 2021 (3)
- June 2020 (1)
- May 2020 (1)
- April 2020 (1)
- March 2020 (4)
- February 2020 (3)
- January 2020 (5)
- November 2019 (1)
- October 2019 (1)
- June 2019 (1)
- April 2019 (2)
- March 2019 (1)
- January 2019 (1)
- August 2018 (2)
- July 2018 (5)
- June 2018 (2)
- May 2018 (3)
- March 2018 (1)
- February 2018 (3)
- January 2018 (1)
- December 2017 (1)
- October 2017 (4)
- September 2017 (1)
- August 2017 (2)
- July 2017 (1)
- June 2017 (3)
- May 2017 (1)
- March 2017 (2)
- February 2017 (1)
- January 2017 (5)
- December 2016 (2)
- November 2016 (2)
- June 2016 (1)
- March 2016 (1)
- December 2015 (1)
- July 2014 (1)
- February 2014 (1)
- January 2014 (4)