Hell bent for leather; an investigation determining type of leather used for bridle rosette
6 January 2022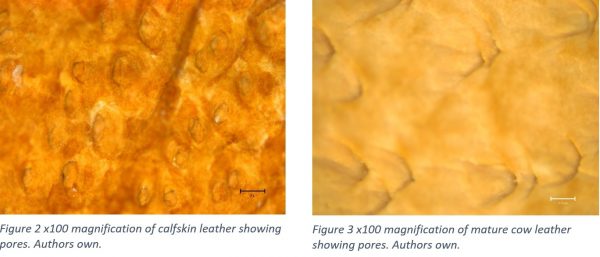
Why the investigation?
When conserving objects, it is important to know what materials it’s made up from. This will give insight into the types of decay or damage that might occur. It is also important to know the materials to aid in making decisions on the conservation methods that will be used on the object.
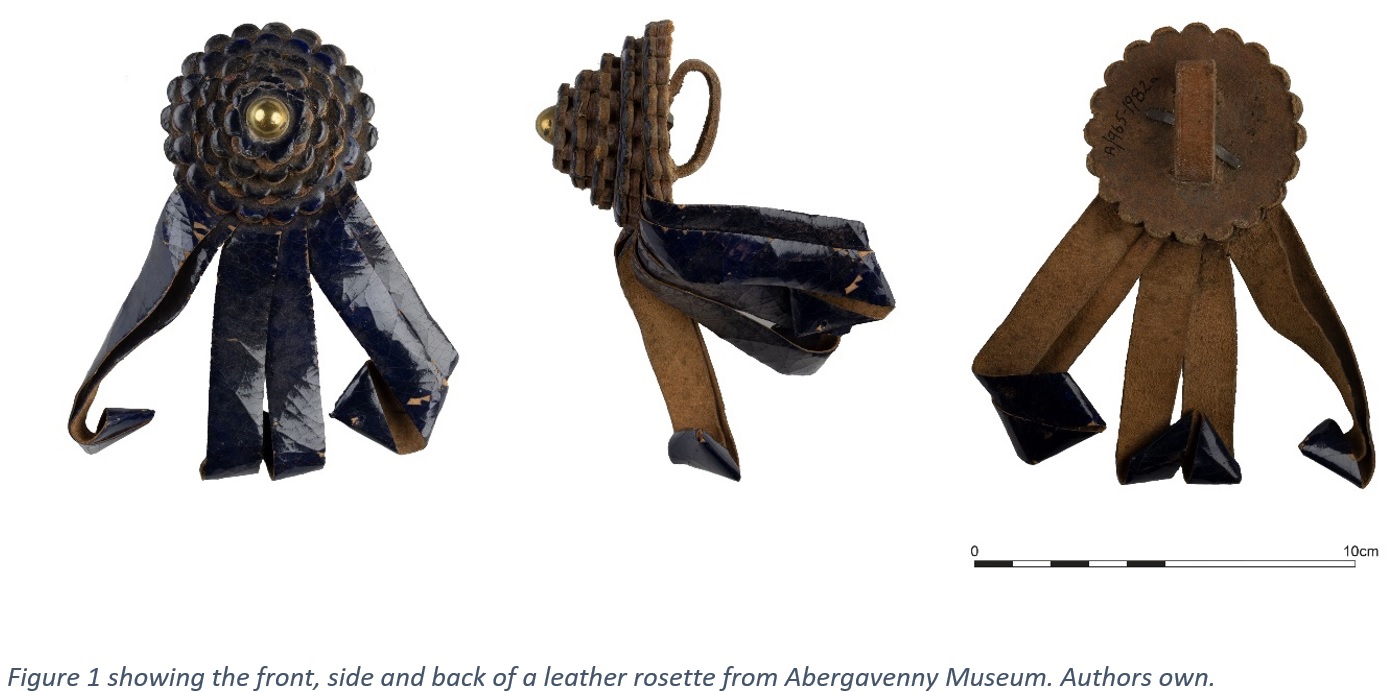
I’m currently working on a leather bridle rosette from Abergavenny Museum in South Wales. While I know that it is made form leather, I don’t know which animal the leather came from. Through research I have found out that you can work out the type of leather by looking different features under a microscope. The main feature to look for are the pores the hairs grew out of. These pores can be seen on the skin side of the leather, depending on the animal they can be different sizes, shapes, and the number of them within a given area can also change. Initial research told me that pores would either look like freature or holes in the surface of the leather (Brithish Leather Manufacturers’ Research Assn [no date]).
Carrying out the identification
My first step to identify the leather used was to find out the differences between different animal leathers. I did this by taking reference leather samples and looking at them under the microscope. I used a 100x magnification for each of these samples. Being new to conservation I first had to learn how to use the microscope, how to focus when using different light settings, and how to take images using a piece of software new to me. These images are important to be able to refer to when looking at the leather rosette itself under the microscope.
I wanted to compare the leather samples from the university reference collection to samples that I have acquired, I did this as not all leathers from the same type of animal will be identical. There will be variations, not only between different breeds within the same type of animal but also from one individual to the next.
I chose to look at a set number of animal leathers due to the fact the rosette was made around the turn of the century and some leathers would be more commonly used than others. How the leather was treated or dyed may impact how easy it is to see the pores or how the pores themselves look.
Reference leathers – What am I looking at?

I started off looking at mature cow and calf skin, while these have some similarities, they are different enough to be able to tell them apart. The calf skin (see figure 2), you can see the half-moon/crater shapes, these are the pores where the hair grew from. On the calf skin there are many pores, they are quite close together and not all pores are the same size. Whereas with the mature cow skin (figure 3) you can see that the pores are generally grouped into threes, with larger gaps between each of the groups. These pores are less round with a more pointed end.
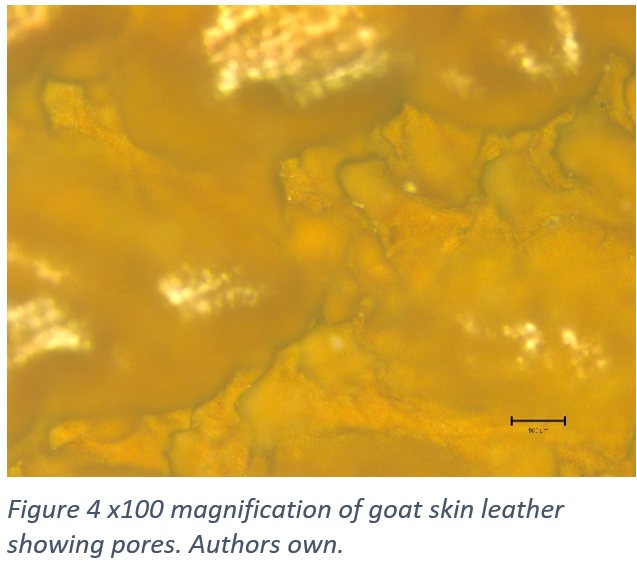
Next, I looked at goat skin (figure 4), this was harder to clearly see the pores on the surface of the leather. Partly this was due to the skin not being perfectly flat, this meant some of the image is blurry due to not being able to focus the whole surface of the leather at the same time. These pores are more angular and less round at the sides. These pores are also slightly smaller than mature cow leather but larger than calf skin leather. These pores don’t seem to be arranged in groups but are randomly spread across the surface of the leather.
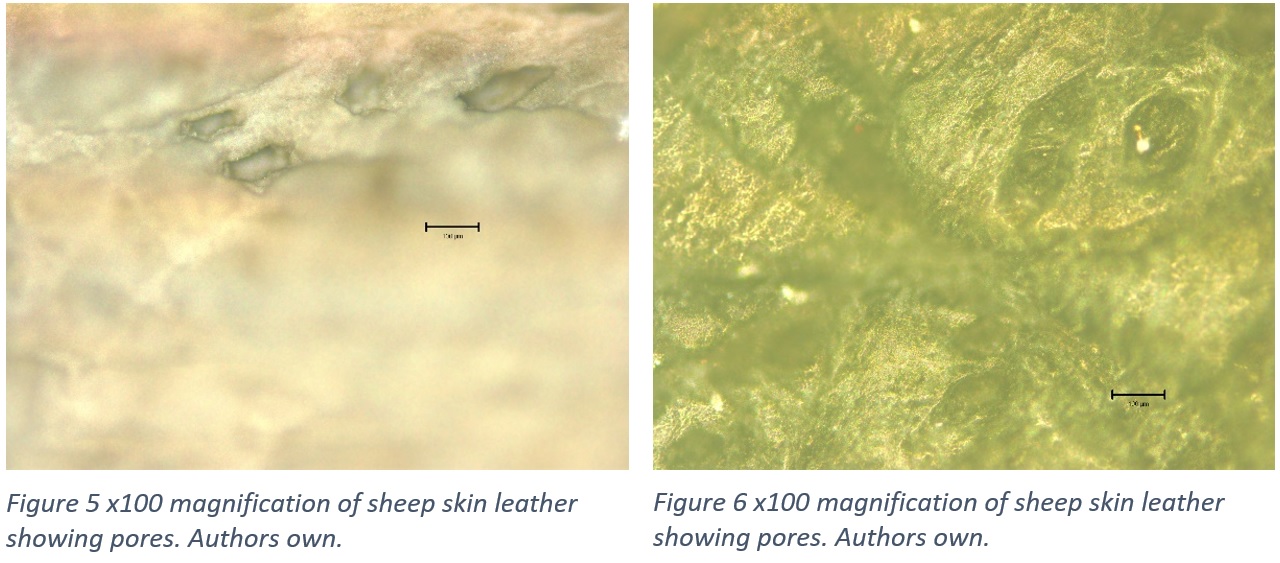
Another common leather used is sheep leather (see figures 5 and 6), within sheep leather there are many variations due to the many breeds of sheep there are. As sheep generally have a very full coat with many strands of hair this leads to very different patterns in the pores. In the image below on the left you can see some of the pores in focus (figure 5), these pores look deeper than from either cow or goat, they also look more like a hole into the skin rather than a semi-circles. They are more oblong with rounded corners and can vary in size from one pore to another. The skin on sheep is not very flat so it makes getting a clear, focused image of the pores. The pores are much harder to make out on some of the sheep skin leathers, see figure 6 for an example of this, here the pores can be seen in the top right-hand corner of the image, they look slightly darker than the rest of the leather around them. These pores seem to be deeper into the skin, and more oblong in shape.
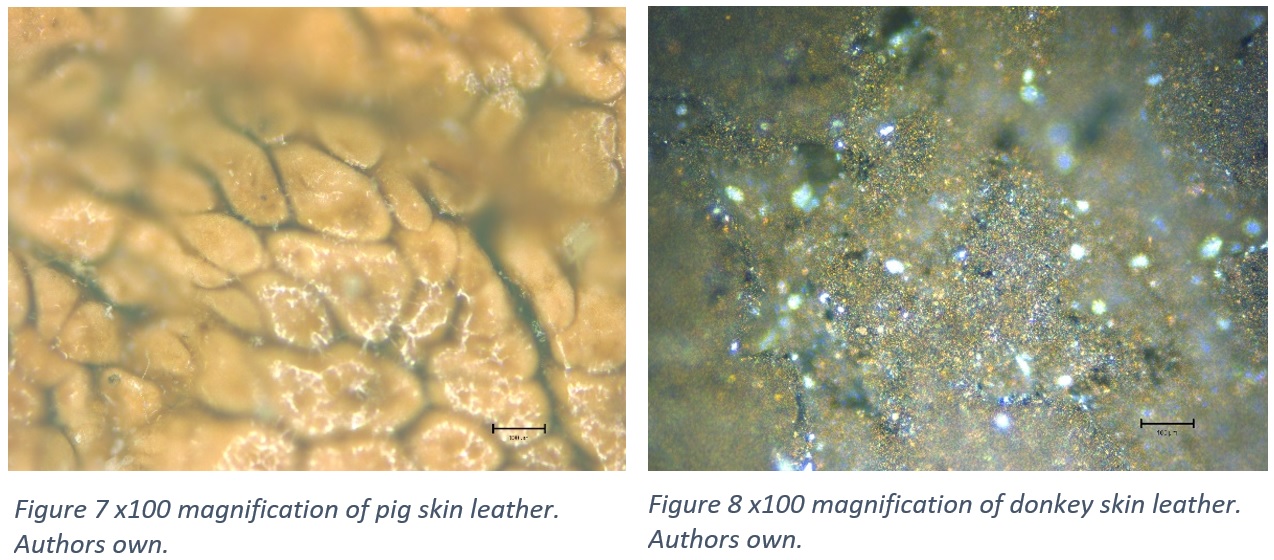
Pig leather (figure 7) is not as commonly thought of when someone mentions leather. I found this a very interesting leather to look at under the microscope as it looked less like pores and more like an assortment of shapes with a glossy layer over the top. I couldn’t see any common features between pig leather and any of the other leathers I looked at. While I know pigs do have some hairs on their skin, I know that they have less hair than what you would find on a cow, goat, or sheep. This leads to less pores that hairs grew out of.
Finally, I looked at donkey leather, again a leather that is not a commonly known of but has been and still is used. Unfortunately, when looking at donkey leather it was very difficult to distinguish the pores. This reminded me more of looking through a telescope rather than a microscope.
Identification itself
Once I had taken images of the leather samples, I then took the rosettes and found areas where the paint layer had flaked off and left the leather surface exposed (see figure 9). As you can see in both the images (figure 9 and 10), which show the leather at the front and the back off the ribbon, there aren’t any clearly distinguishable features. This means I am unable to determine what animal this piece of leather came from.
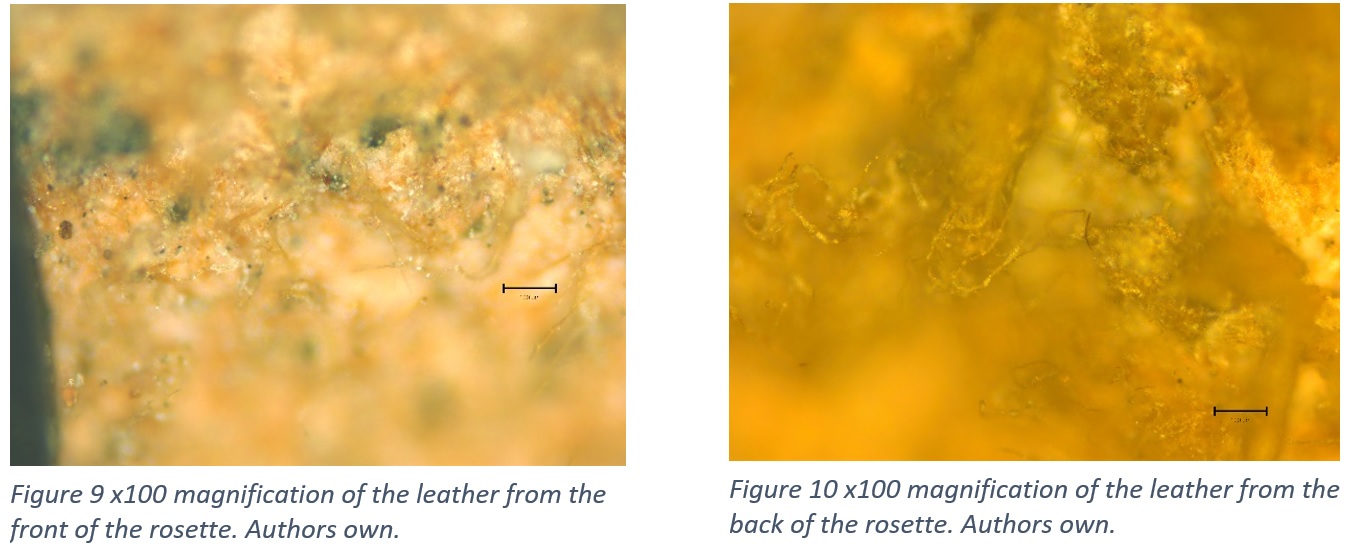
What was interesting to see under the microscope was the fragments of paint left behind (figure 9) and how different the surface of the leather looks compared to all the samples that I have looked at under the microscope. It is also difficult to distinguish between the skin side and flesh side of this piece of leather.
As a new conservator, not only have I enjoyed carrying out this research, but I also feel much more confident in my identification skills of leather, and I have gained new skills working with new software and microscopes.
References
British Leather Manufacturers’ Research Assn [no date]. Hides, skins and leather under the microscope. Surrey: The Assn., [19.
Haines, B.M. and Leather Conservation Centre 1981. The fibre structure of leather. London: Leather Conservation Centre.
- March 2024 (1)
- December 2023 (1)
- November 2023 (2)
- March 2023 (2)
- January 2023 (6)
- November 2022 (1)
- October 2022 (1)
- June 2022 (6)
- January 2022 (8)
- March 2021 (2)
- January 2021 (3)
- June 2020 (1)
- May 2020 (1)
- April 2020 (1)
- March 2020 (4)
- February 2020 (3)
- January 2020 (5)
- November 2019 (1)
- October 2019 (1)
- June 2019 (1)
- April 2019 (2)
- March 2019 (1)
- January 2019 (1)
- August 2018 (2)
- July 2018 (5)
- June 2018 (2)
- May 2018 (3)
- March 2018 (1)
- February 2018 (3)
- January 2018 (1)
- December 2017 (1)
- October 2017 (4)
- September 2017 (1)
- August 2017 (2)
- July 2017 (1)
- June 2017 (3)
- May 2017 (1)
- March 2017 (2)
- February 2017 (1)
- January 2017 (5)
- December 2016 (2)
- November 2016 (2)
- June 2016 (1)
- March 2016 (1)
- December 2015 (1)
- July 2014 (1)
- February 2014 (1)
- January 2014 (4)