From Retail to 18th Century glass: My first object
18 January 2022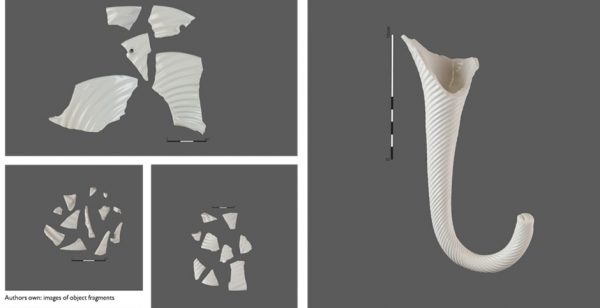
Are you coming to study MSc Conservation Practice? Are you thinking about changing your career and retraining as an object conservator? Not sure what to expect?
Here is a little look at what you could expect as a first year in the labs and when you get your first object. It can be quite an in-depth process, this blog post is a brief insight.
I’m a first year MSc Conservation student who is retraining after 10 years in retail. It is safe to say that this pandemic has put a lot of things in perspective for people and many re-evaluated their careers, myself included. After spending nearly 5 years in retail management, I knew, for a long time I was not in the career I wanted.
No time like the present to retrain and make a new path for myself? Why not!
Why Conservation?
I have always been enthralled and captivated by museums and when I was younger, I wanted to become an Archaeologist, however life happens, and I ended up studying a degree in Theatre. Fast forward to 2020 I spent a lot of the first lockdown going on virtual museum tours and watching many Museums YouTube videos, and conservation came up- a lot. I knew it existed, but it wasn’t until then that I thought of it as a career prospect.
The more research I did, the more I thought that conservation was where I needed to be, that is when I came across MSc Conservation Practice, a conversion course that enabled me to re-train without needing to go back to obtain another undergraduate degree in a more relevant field. The two-year course will give me the tools and experience required to become a professional Conservator.
If you want more information: https://www.cardiff.ac.uk/study/postgraduate/taught/courses/course/conservation-practice-msc?utm_source=instapage&utm_medium=landingpage&utm_campaign=conversioncourses
And well, here I am!
My Object
In October, I sat down at my new Lab bench, and I was handed a box which read “G1176, Glass wall Ornament, Bristol Museum”.
After getting over the initial shock that I have just been handed an actual historical object, on my first day and it was my role to treat it- what are the first steps? What did I have in front of me? As a conservator, where do I go from here?
Don’t panic, you are not on your own, all your cohorts are in the same position, and you are fantastically led by expert knowledge and experience guiding you down the right path.
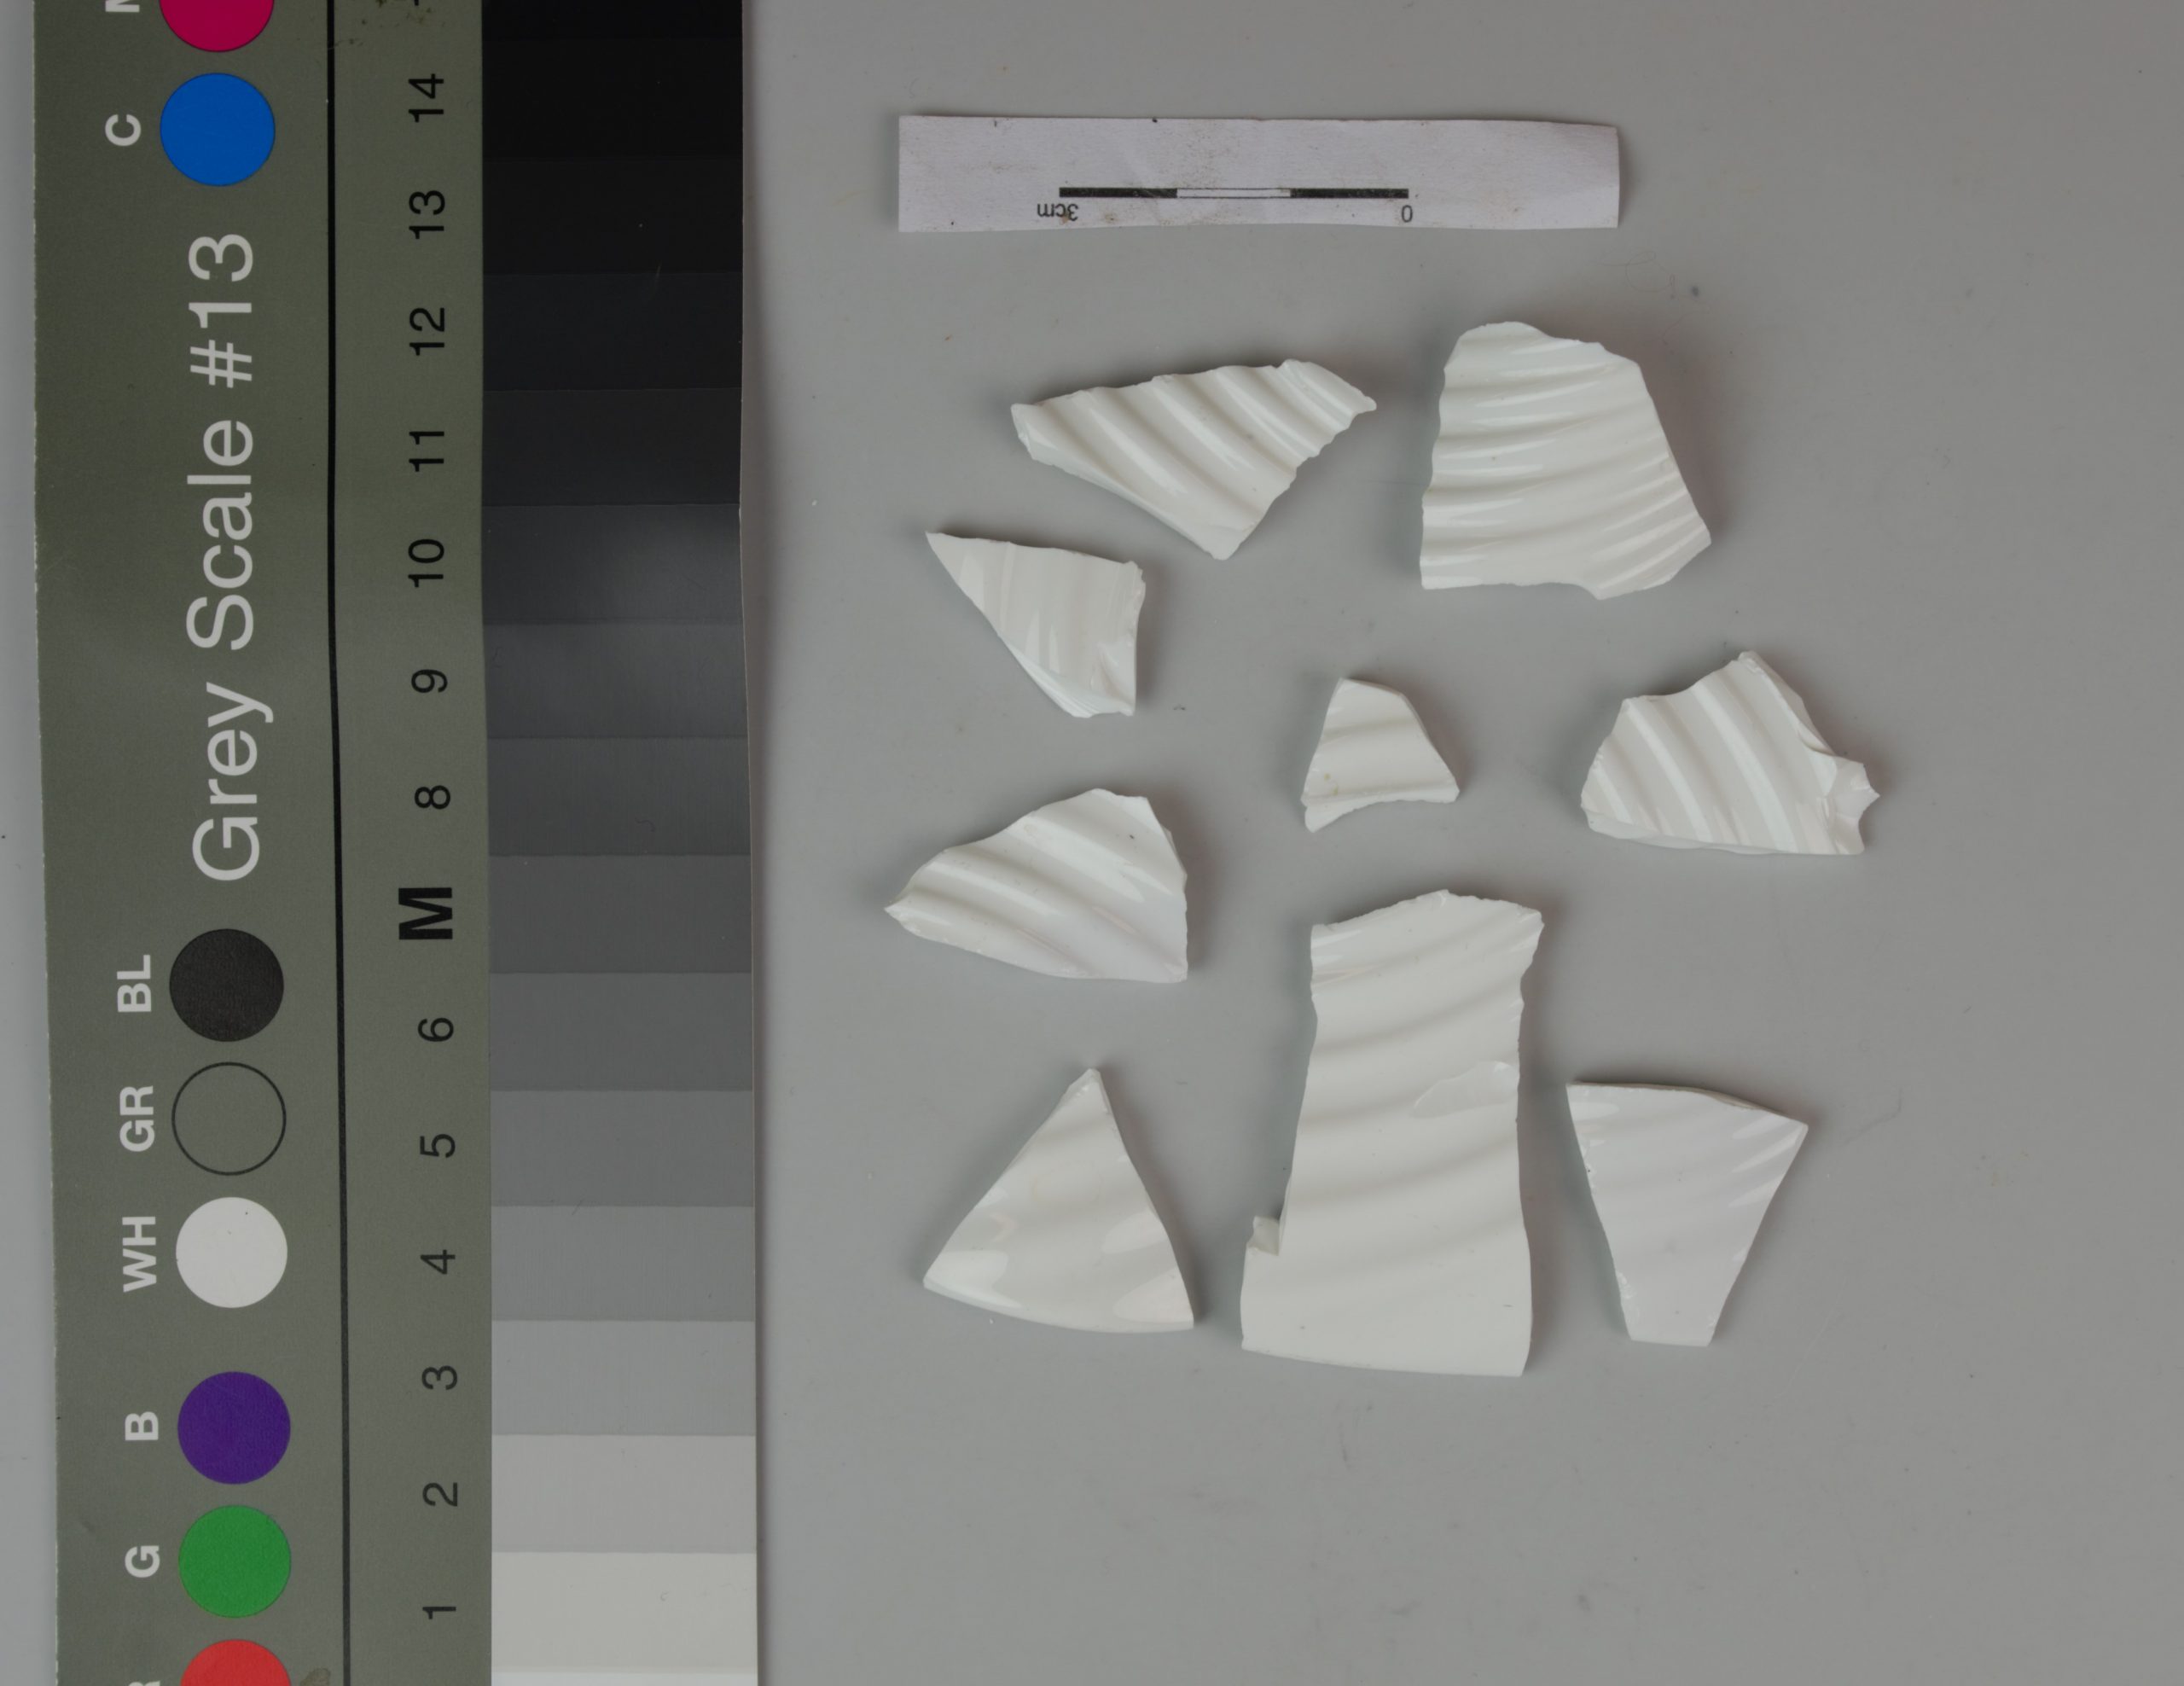
So, what did I have on my lab bench?

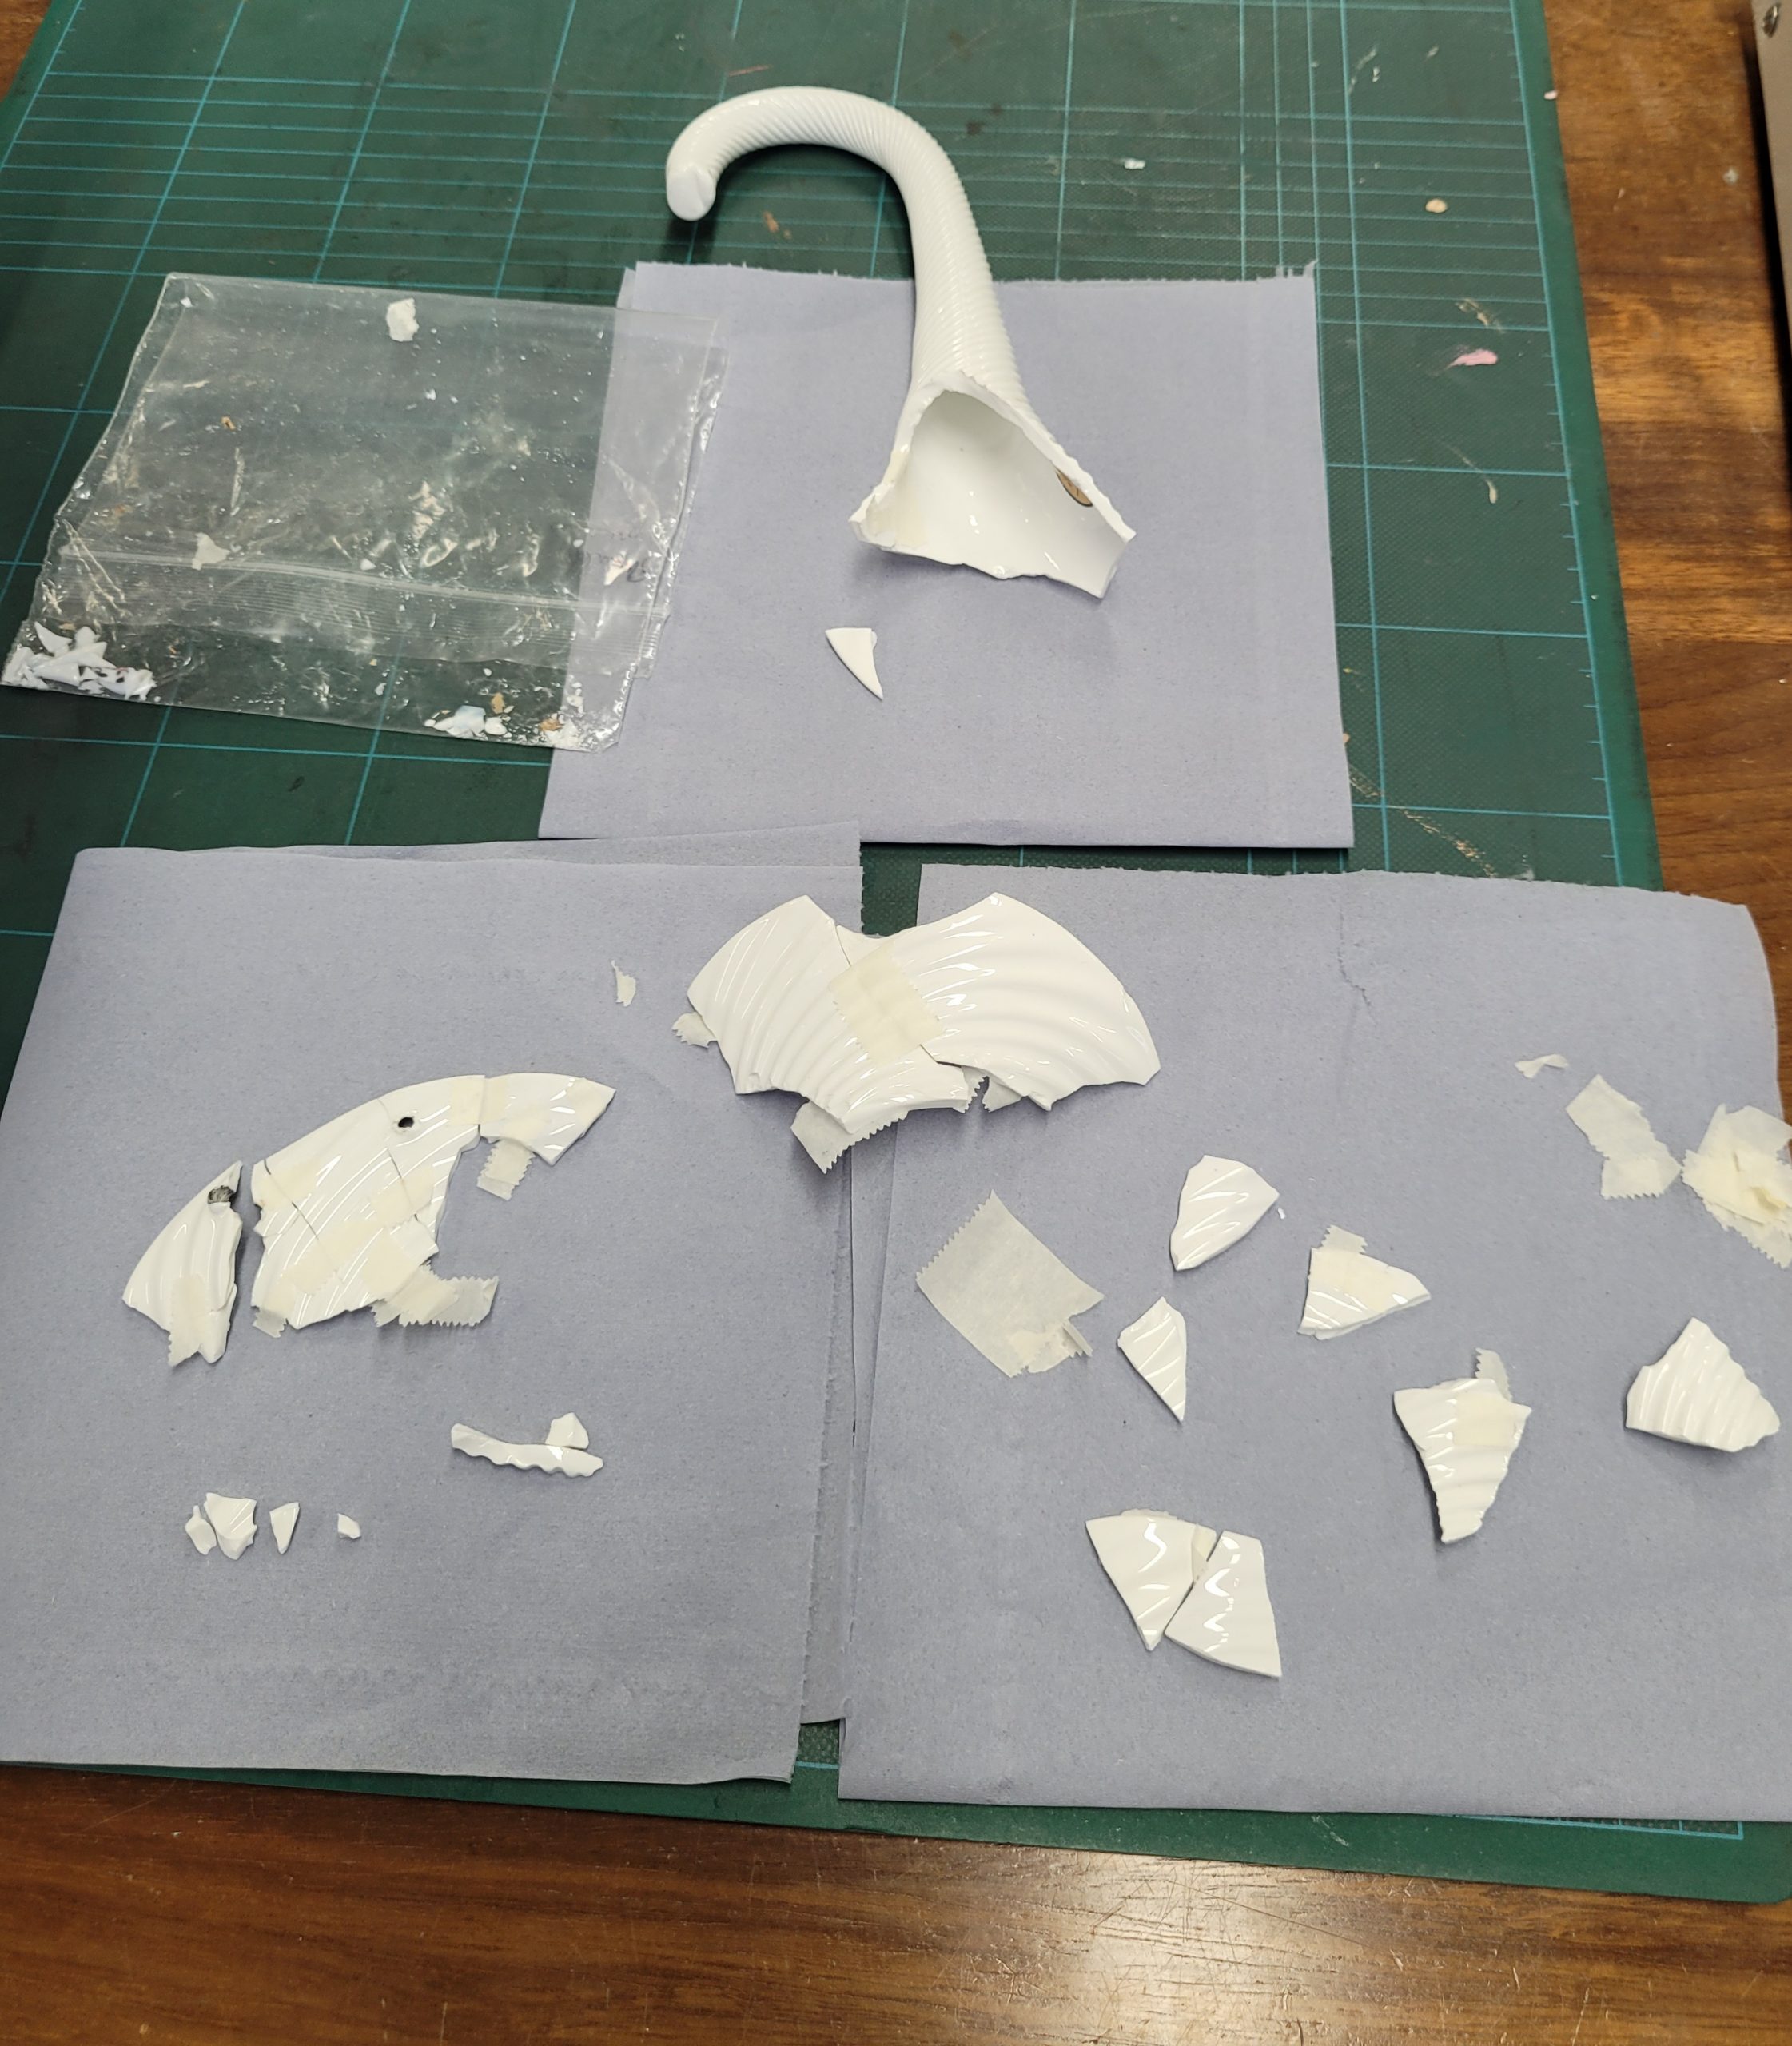
Figure 1: image showing object in box and then object laid out.
- What was it made of?
- What was the function/use of the object?
- How was it damaged/what was the extent of the damage?
- How am I going to treat it?
These will just be a few of the questions that you need to ask yourself when approaching your first object.
The box stated it was a glass ornament, but visually inspecting it- could it be a high fired ceramic? Sometimes, there can be more questions than answers!
It was heavy, and thick unlike other glass pieces I have seen in everyday life. It has a ribbed texture with a horn like shape. What are the visual indicators to the material? Is it rough, smooth?
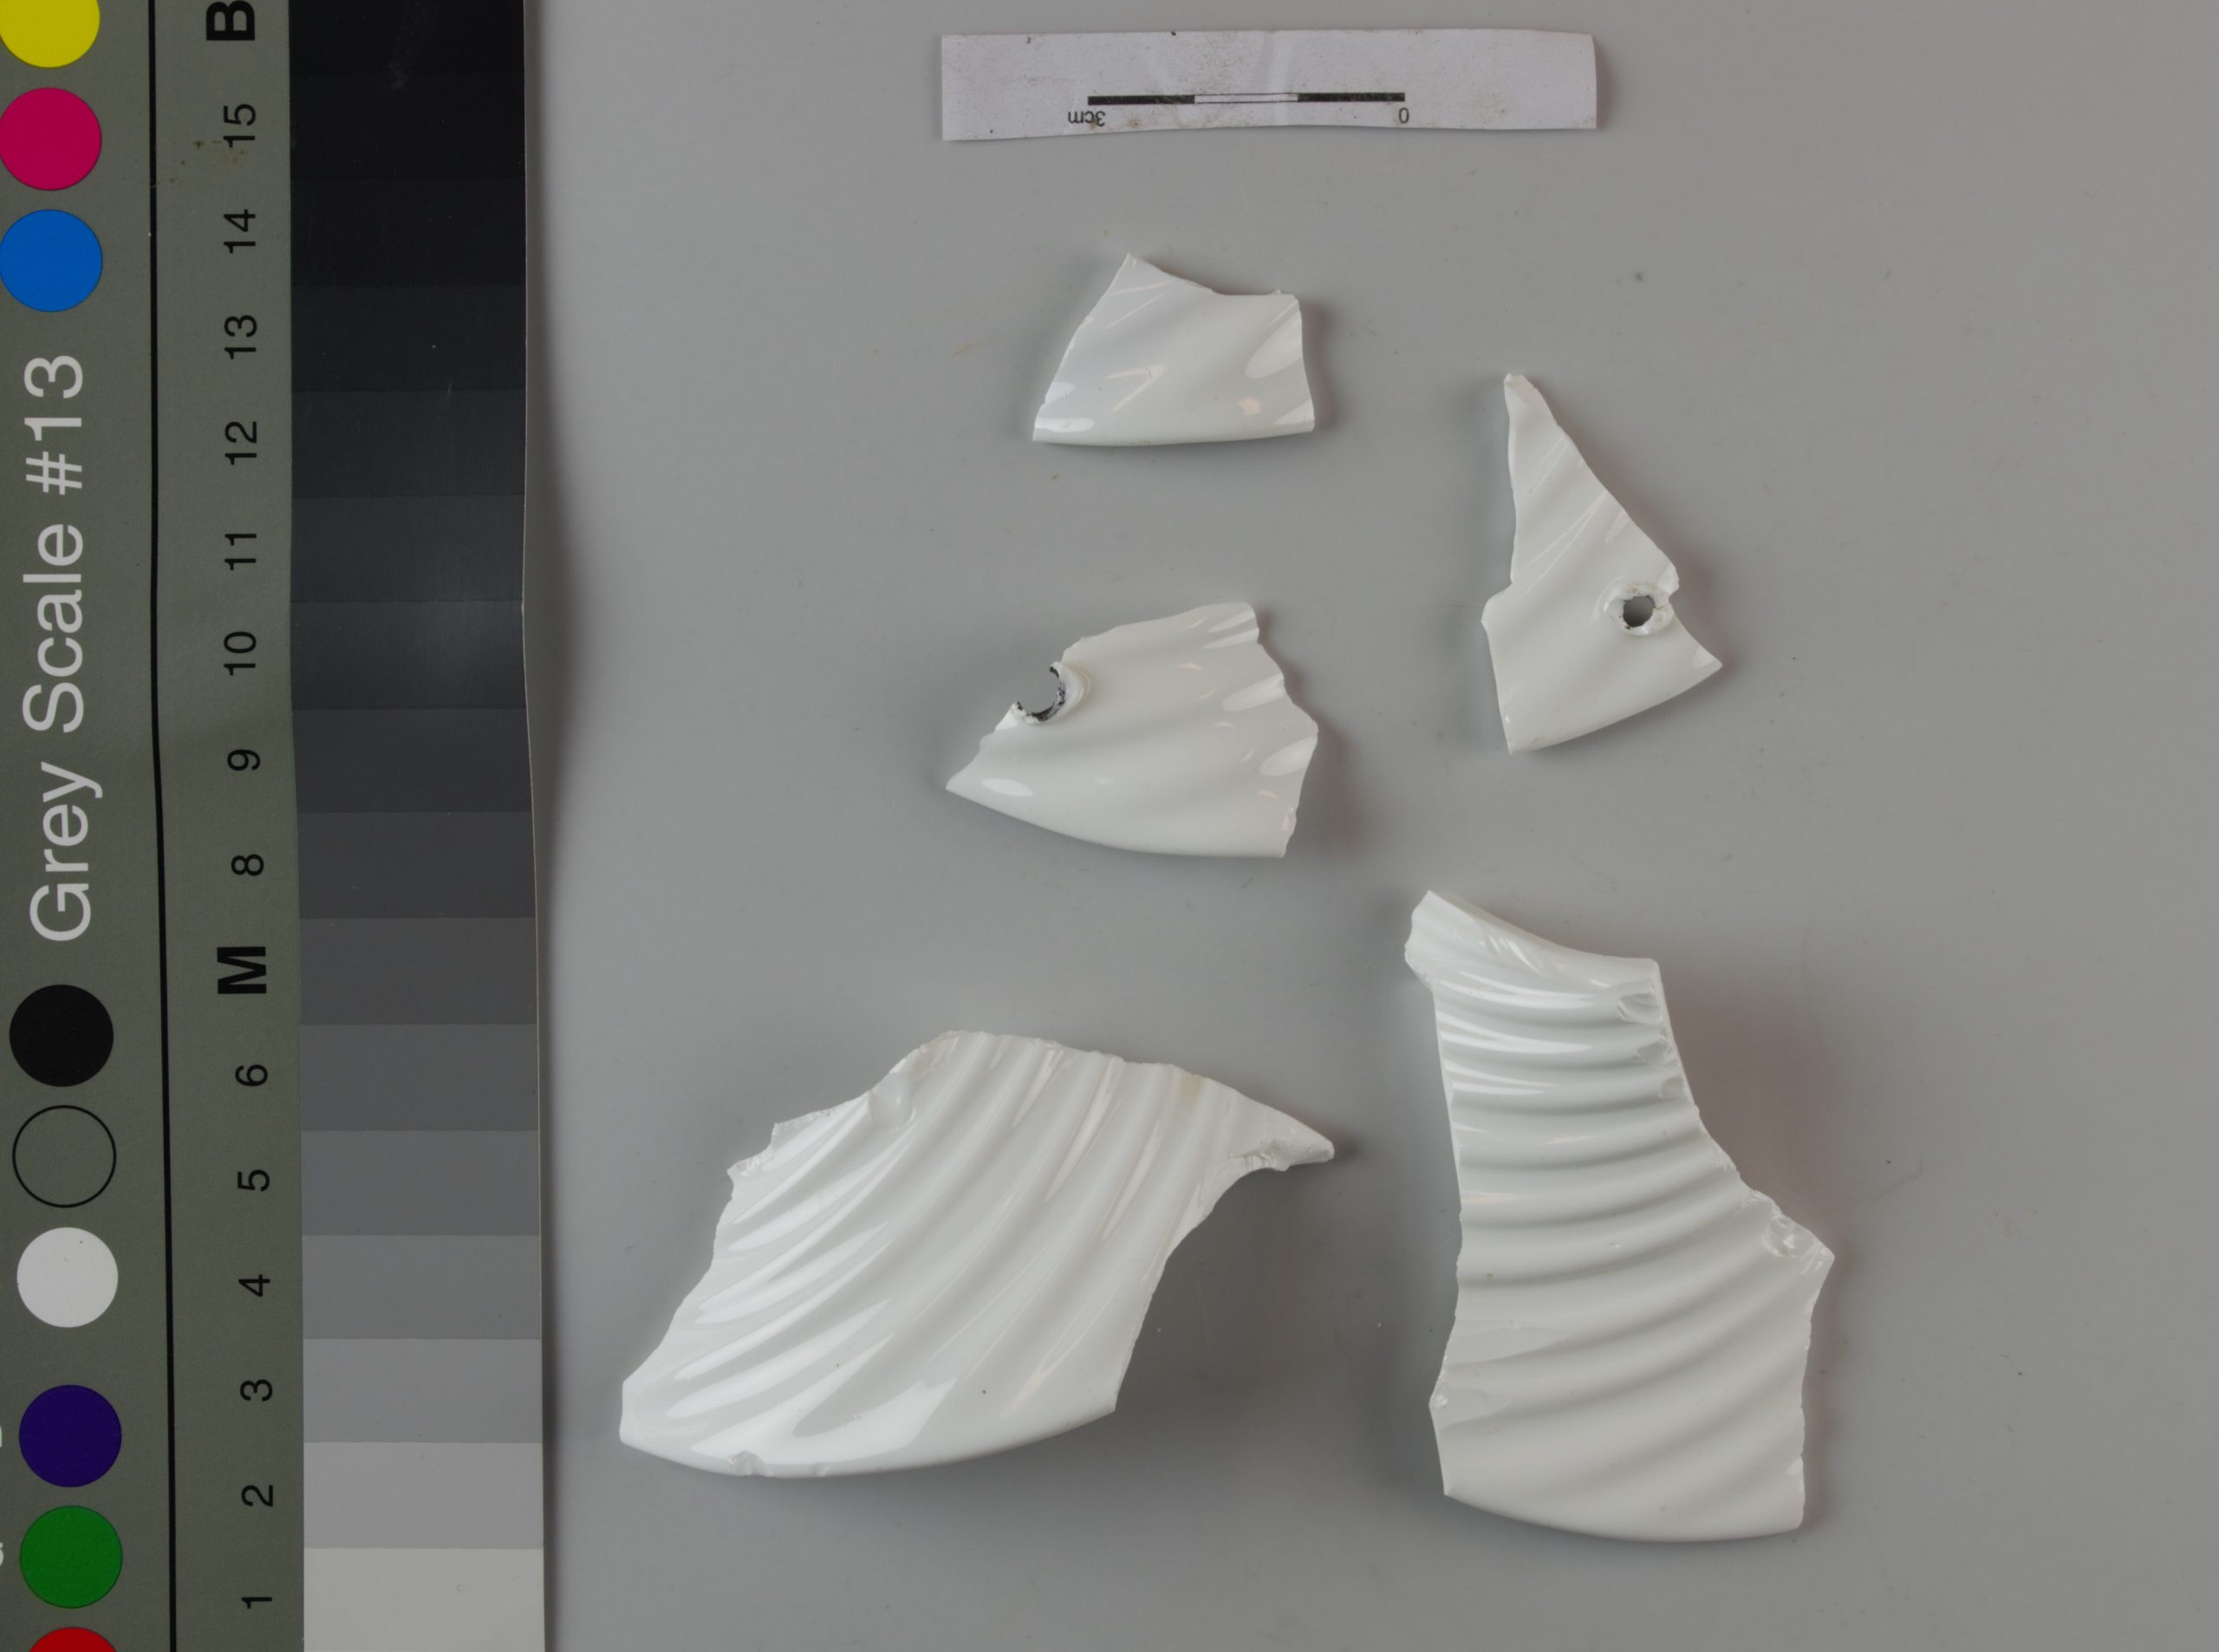
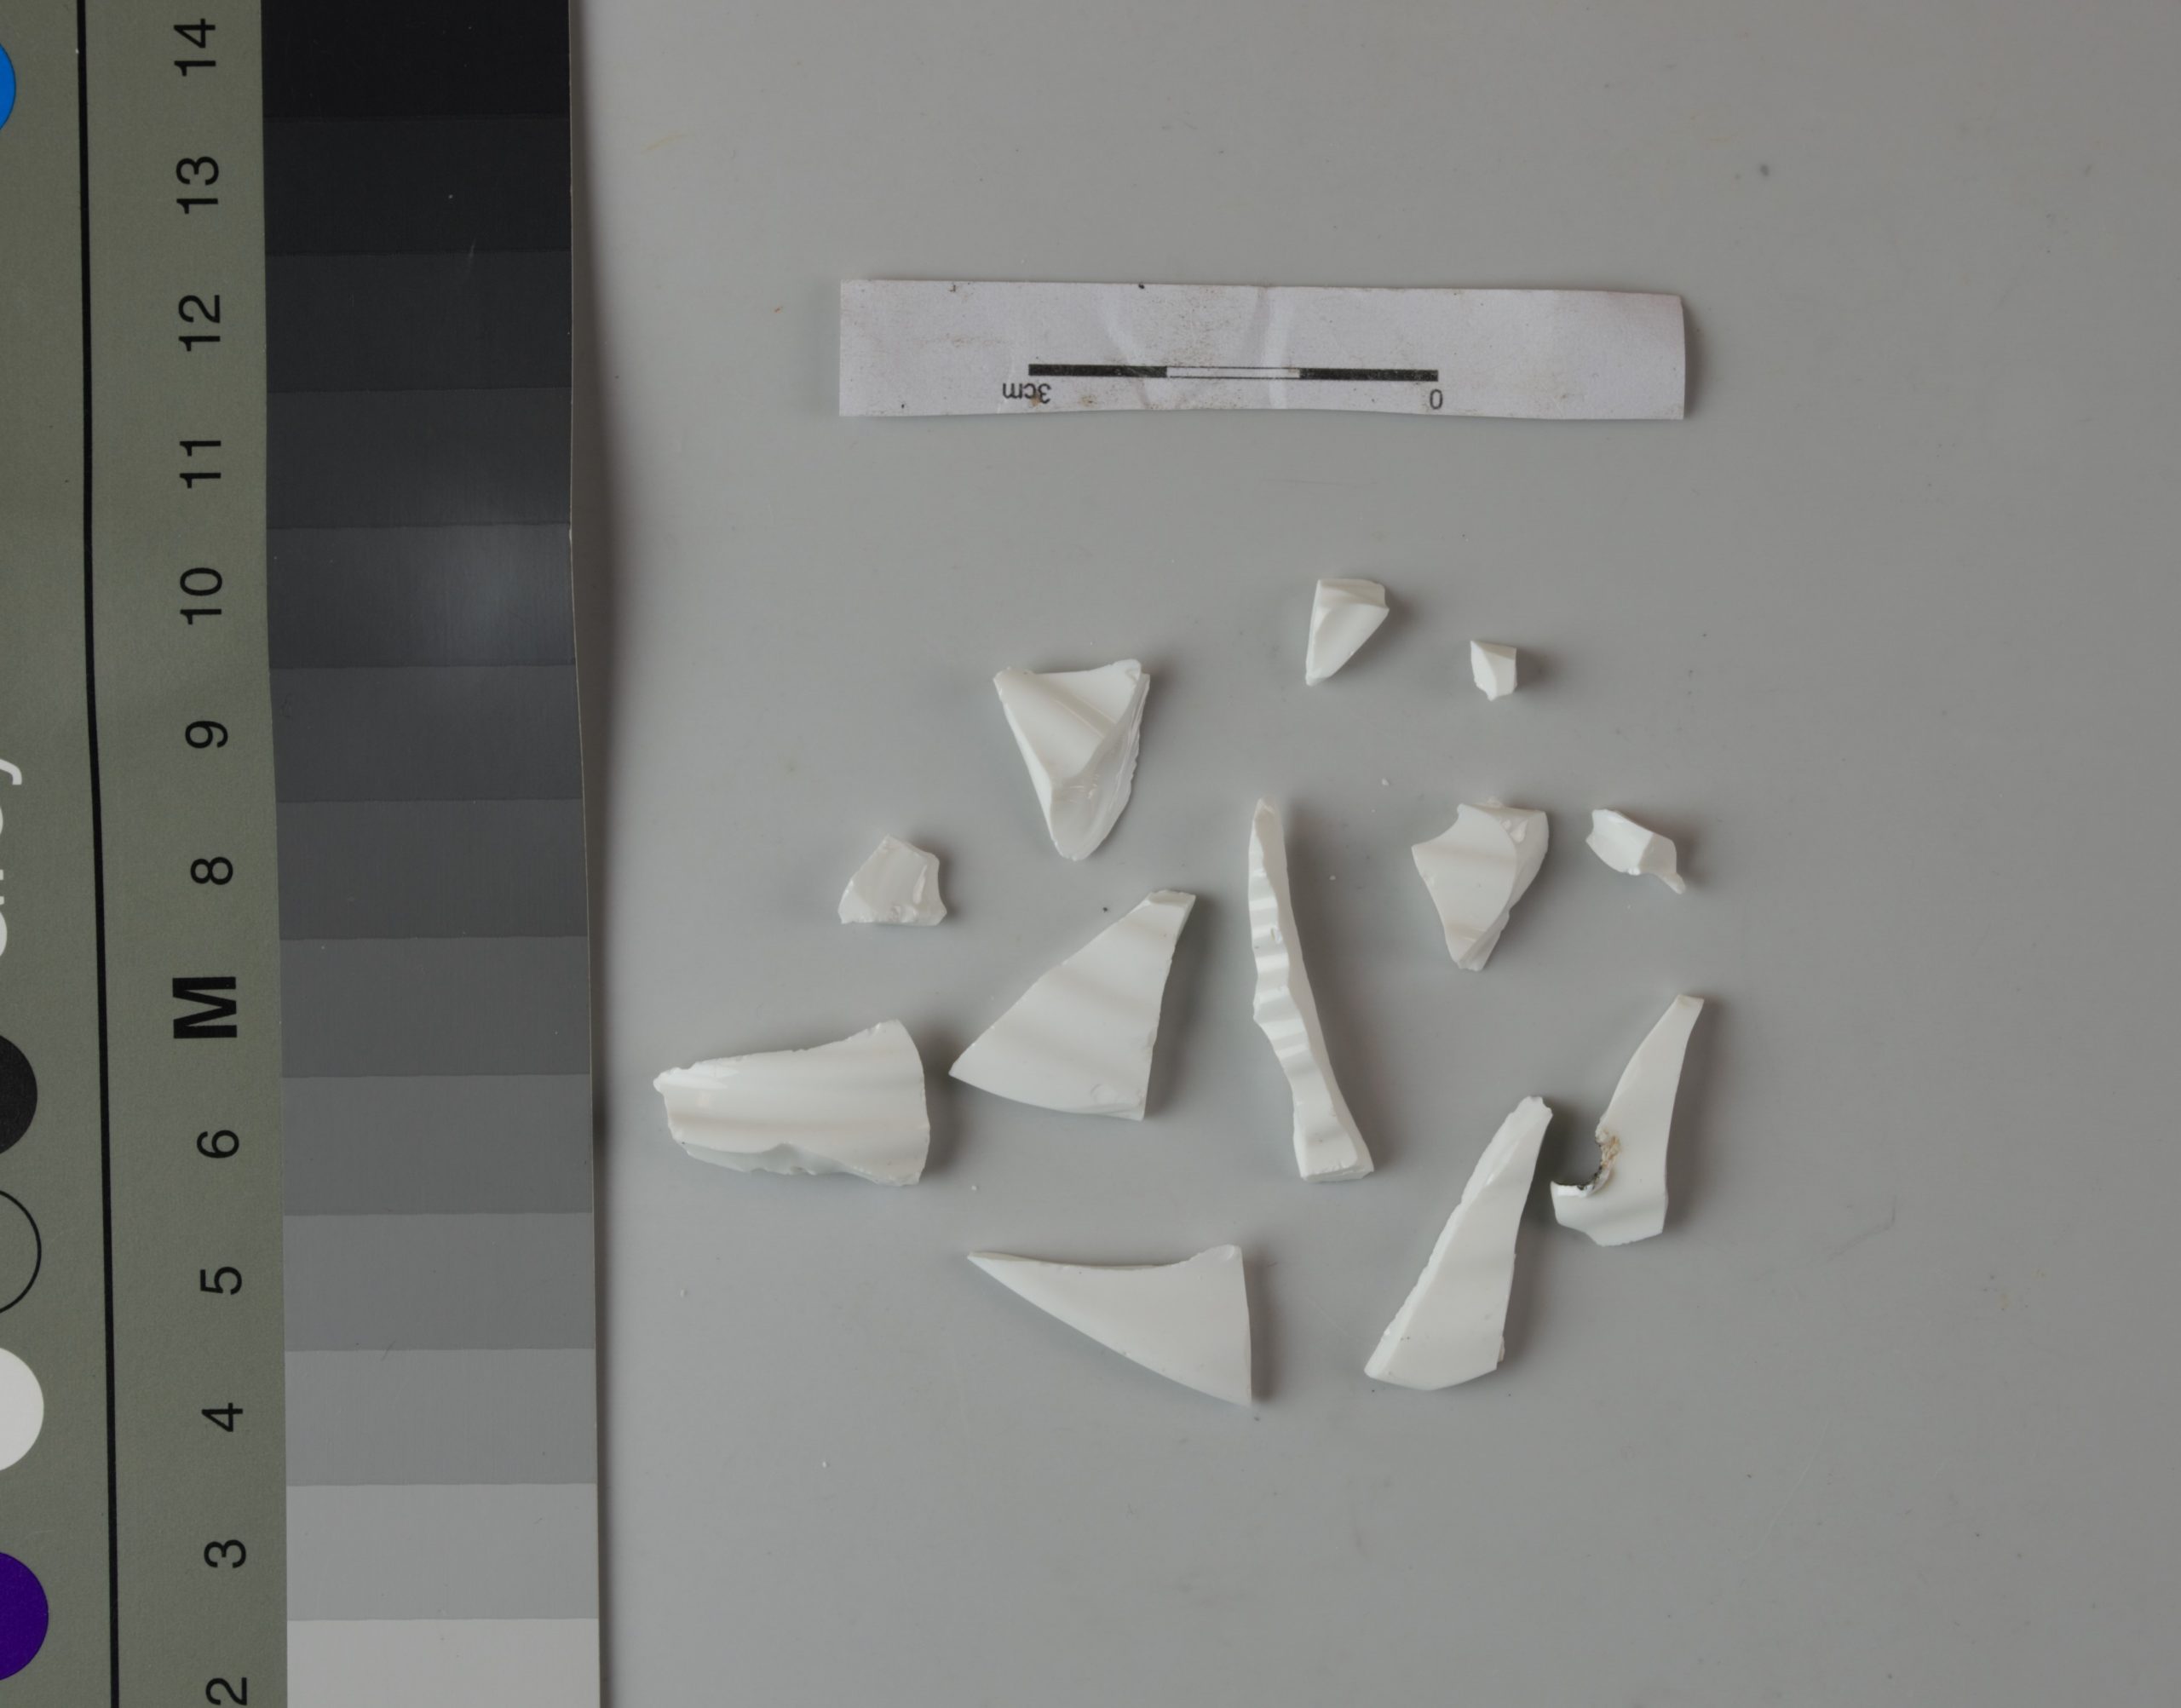
Asking these questions and familiarizing myself with what possible material looked like, I could visually identify that the material was more similar to glass, than a ceramic due to the smooth, non-porous composition that I could see on the edges of the broken pieces- (27 of them to be precise!).
I could see that it was tinted/coloured glass and not painted. From further research I could also see that it was not suffering from any glass decay and the over all structure of the object was sound, aside from the obvious breakage.
Analysis
Now I had an idea of the material, I wanted to confirm this and identify the composition of the glass which would indicate what type of glass I had.
How was I going to do this? Having never stepped foot in a lab and coming from an arts background I had limited knowledge on what analysis equipment there was, let alone how to use it, until my lecturer came to help.
I was pointed in the direction of XRF- XRay fluorescence, briefly, It is non-invasive which meant it would not further damage my object and it would identify the chemical elements within my object.
Here I was able to determine what I had: I had a lead glass which contained arsenic.
Arsenic, in the 18th century was a very popular element in glass making as an opacifier which obtained a nice milky white finish.
This analysis helped to determine a) that I had glass and b) I was able to date it to around the 18th century due to the composition and the opacifying agent used. This supported research that I conducted of my object.
History
Understanding the object: research into materials, analysis, manufacturing are just a few areas you need to delve into to discover what you are working with and to begin formulating a treatment plan.
However, research doesn’t stop at the physical aspects of the object, it’s significance is also very important.
For my object, I was able to discover that it was bequeathed to Bristol Museum by a David Mowbray Walker Bullock in memory of his mother Ellen Eliza Bullock in 1918.
As I was lucky to have a museum number, the museum collection archive website informed me of a production date 1750-1800 and that it was a flower pocket/ wall holder and cornucopia in shape.
Researching flower pockets/wall holders lead me to ceramic, ornate examples not glass, plain and twisted.
It wasn’t until I discovered the manufacturing method that I was able to find similar examples held at the met museum and the V&A.
The family who my object belonged to were involved in the glass making industry in 18th Century Bristol with an ale and water bottling company.
Photography
An important skill to master Is Photography, it is important to capture and document characteristics and the condition of your object as well as the progress as you move through the treatment plan you will develop.
Before

You will learn how to use the cameras in the Photography lab and how you can manipulate light and staging to capture the best images- the next step will be to edit your photos in Photoshop.
After

Treatment/ Method
I know about my object; the material, the history/significance, the manufacturing how am I going to treat it?
I have been given a brief from the museum that they would like me to adhere, make fills for any missing sections.
What properties am I looking for in an adhesive?
- Low Viscosity
- Tight join
- Non-yellowing
- Reversibility
- Non-epoxy.
Asking myself these questions, I was able to settle on an acrylic adhesive that would give me the properties I needed- 20% Paraloid B-72 in Acetone.
Now I have my adhesive, I needed to think about how I was going to adhere the pieces together. First of all I needed to identify how much of the object was missing.
I temporarily pieced the object together with, Sellotape- the object is sound and non-porous and any sticky residues could be easily removed and would not damage the object.


I discovered that 2 pieces were missing, and I would need to create fills for them- I was also able to see the shape of the object and how it would have been fixed to the wall and then filled with flowers- which would have been the use for this ornament. Doing this also enabled me to get an idea and develop a method of how best to adhere the pieces together.

I also got some practice in too before beginning to adhere my object back together with this broken vase.
Another thing to think about was how I was going to apply the adhesive:
I tried different methods to work out what would be best, the cotton swab would absorb the adhesive- it is more suited to removal. The brush and the bamboo stick I felt were too big and didn’t offer enough control of the adhesive for the edges of my object. This is where I settled on the steel wool swab- I could create a point at the end, which would collect the adhesive and allow better control and application for my object.

Left to right: Cotton Swab, brush, steel wool swab, bamboo stick.
Now that I have gathered my research, and put forward my treatment plan, it has been signed of, it is now on to adhering my object!
This is only a brief look into what you can expect working with an object similar to mine, especially if you are new to conservation and entering a lab for the first time. Of course, all objects are individual and the process can differ- there are some great blogs on ethics, stakeholders and different approaches to other types of materials here on CU Conservation Blog!
I could of course go into more detail- so watch out for further blog posts! We look forward to seeing you in new academic year!
Reference List
Bristol Museum (n.d.). Bristol City Council : Museum Collections. [online] Available at: http://museums.bristol.gov.uk/details.php?irn=202026. [Accessed 9 December 2021]
Davison, S, & Newton, RG 2003, Conservation and Restoration of Glass, Taylor & Francis Group, Jordan Hill. Available from: ProQuest Ebook Central. [9 December 2021].
westcountrybottles.co.uk. (n.d.). D. M. W. Bullock & S. Travers. [online] Available at: http://westcountrybottles.co.uk/mike4/Companies/Bristol_Companies/Bullock.html. [Accessed 9 Dec 2021]
- March 2024 (1)
- December 2023 (1)
- November 2023 (2)
- March 2023 (2)
- January 2023 (6)
- November 2022 (1)
- October 2022 (1)
- June 2022 (6)
- January 2022 (8)
- March 2021 (2)
- January 2021 (3)
- June 2020 (1)
- May 2020 (1)
- April 2020 (1)
- March 2020 (4)
- February 2020 (3)
- January 2020 (5)
- November 2019 (1)
- October 2019 (1)
- June 2019 (1)
- April 2019 (2)
- March 2019 (1)
- January 2019 (1)
- August 2018 (2)
- July 2018 (5)
- June 2018 (2)
- May 2018 (3)
- March 2018 (1)
- February 2018 (3)
- January 2018 (1)
- December 2017 (1)
- October 2017 (4)
- September 2017 (1)
- August 2017 (2)
- July 2017 (1)
- June 2017 (3)
- May 2017 (1)
- March 2017 (2)
- February 2017 (1)
- January 2017 (5)
- December 2016 (2)
- November 2016 (2)
- June 2016 (1)
- March 2016 (1)
- December 2015 (1)
- July 2014 (1)
- February 2014 (1)
- January 2014 (4)