It wasn’t all plane sailing – Conservation of a WW1 model aircraft
17 March 2017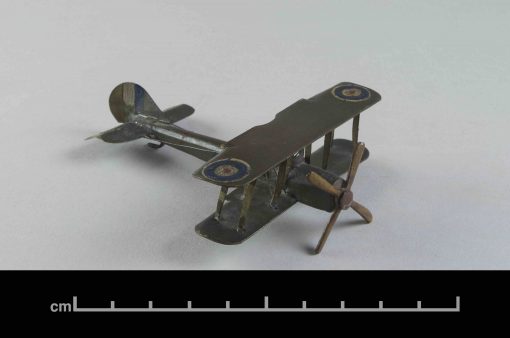
When I arrived at Cardiff to study Conservation this was one (of many) objects I was given. Jane Henderson asked me if I wanted the object and it reminded me of Airfix models that I used to make as a child. My love and enthusiasm for Airfix models consumed me and I gladly accepted the offer to work on the object. Little did I know, an object so small could have such a big impact.
Firstly, I would like to give a little bit of historical context to the BE2c model plane. The plane was handcrafted by World War I mechanic Jack Askey. The object was donated to the Abergavenny Museum by a family member of Jack Askey; it is really lovely that the object had stayed in the family and is now a unique piece of social history. What fascinated me most about this object was that it was made from an original BE2c bi-plane that had crashed during the war. With its hand-painted RAF roundels and intricately made components, I really fell in love with the object.
The first step was to assess the condition of the object. Most notable was the large amounts of yellowed adhesive on the tail of the plane, which presumably was from a member of the family trying to fix it! The object was quite dirty and dusty – there were even dead flies in between the wings. There were also areas where the paint was lifting and flaking. Some areas were bent and had even detached, such as the interplane struts on the tail of the plane. The plane was also missing its landing gear.
After assessing the object’s significance using Significance 2.0 (a useful to guide to help you do this), I felt it would be right to remove the adhesive, consolidate the paint, and straighten and re-adhere pieces that were bent and out of shape.
Removing the adhesive
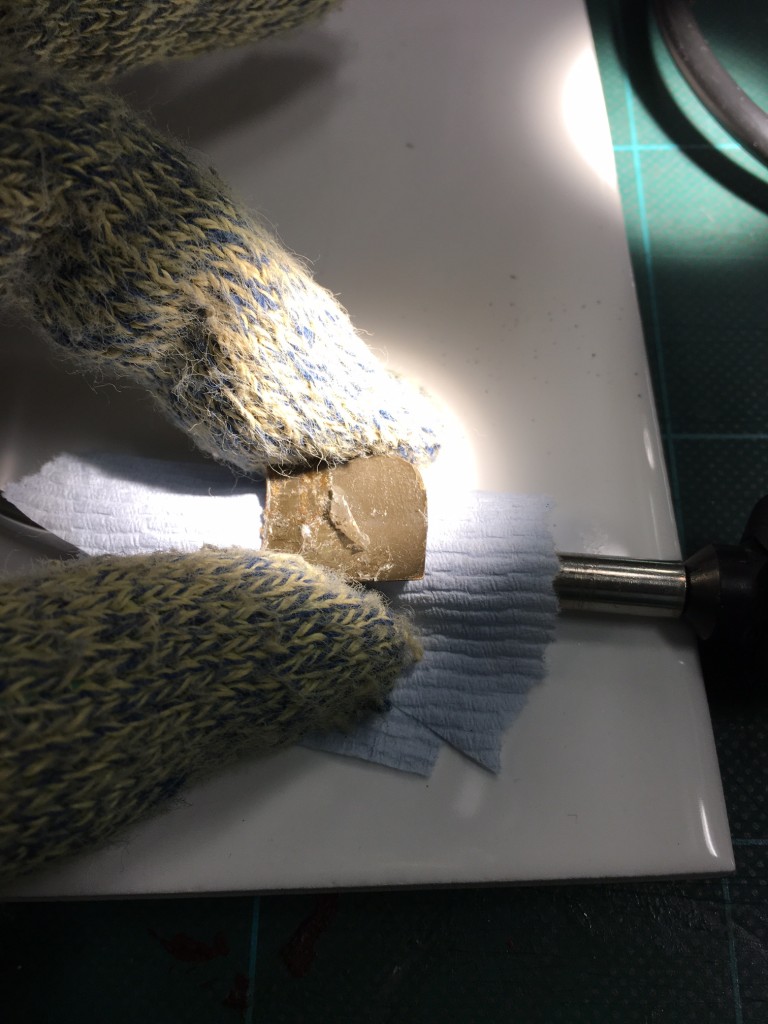
I identified the adhesive by taking a small sample from the yellowed adhesive and running it through the FTIR-ATR (Fourier Transform Infrared Spectrometer – Attenuated Total Reflection). I determined from the resulting spectrum that it was a Polyvinyl acetate, a readily available household adhesive. I hoped to remove it with a solvent, but solvents were unable to dissolve the adhesive. This was most likely because the polymer chains that make up the adhesive had cross-linked over the years and therefore became insoluble. Instead, I removed the adhesive by using heat. I heated the area with a heated spatula and rolled the adhesive away with the use of a scalpel. This technique worked well as it did not effect the paint layer!
Straightening and re-adhering
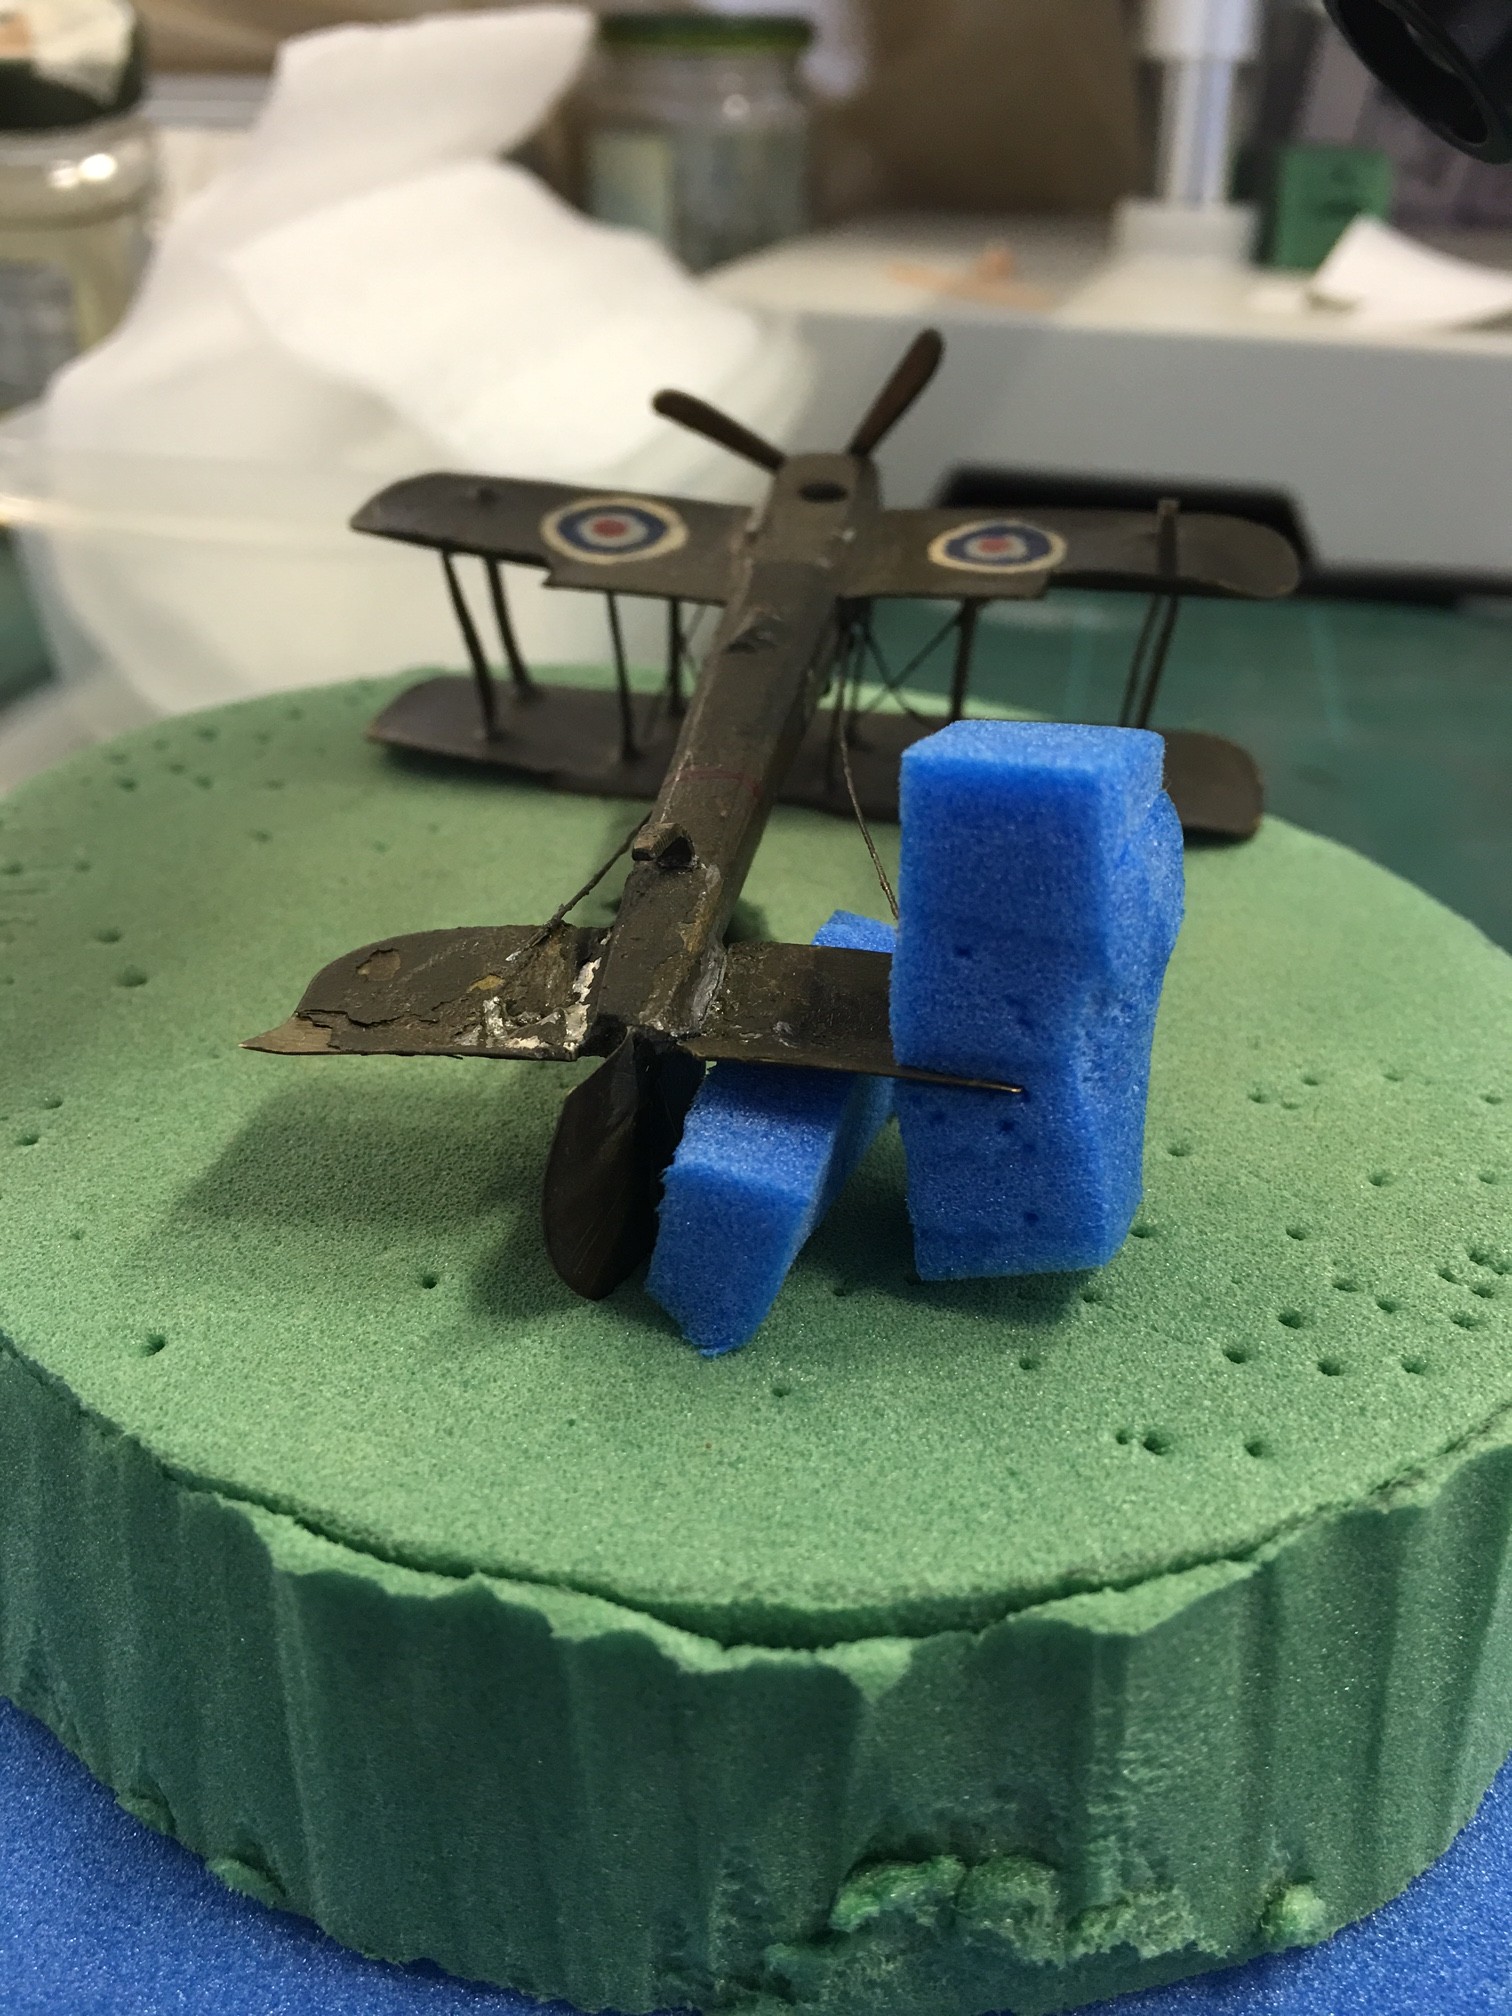
I straightened the Interplane struts using pliers and re-adhered them to the substrate using Araldite 20/20 epoxy resin. This adhesive provided the necessary strength to keep the pieces in place. Epoxies are irreversible, but why would I want to reverse it? After all, I wouldn’t want any pieces to go missing!
The tail and elevator cable were also re-adhered using Araldite 20/20. These were quite tricky to do because the break edges were so thin that they easily slipped out of place! I overcame this by using small pieces of plastazote and a clamp to hold the pieces in place whilst the epoxy cured.

Consolidating and Surface Cleaning
I consolidated the paint using a low concentration acrylic resin (about 5% w/v Paraloid B72 in acetone) and used a fine brush to put the consolidant underneath the paint layer. After all, I wouldn’t want any more original paint to come off!
I surface cleaned the object with Groomstick, a sort of “molecular trap” made of natural rubber that dust, dirt and debris stick to like a dream. The only downside to Groomstick is that it smells rather quite horrible! Once I was happy with the level of cleanliness (i.e. most of the dust had gone) I thought about doing an extra step…
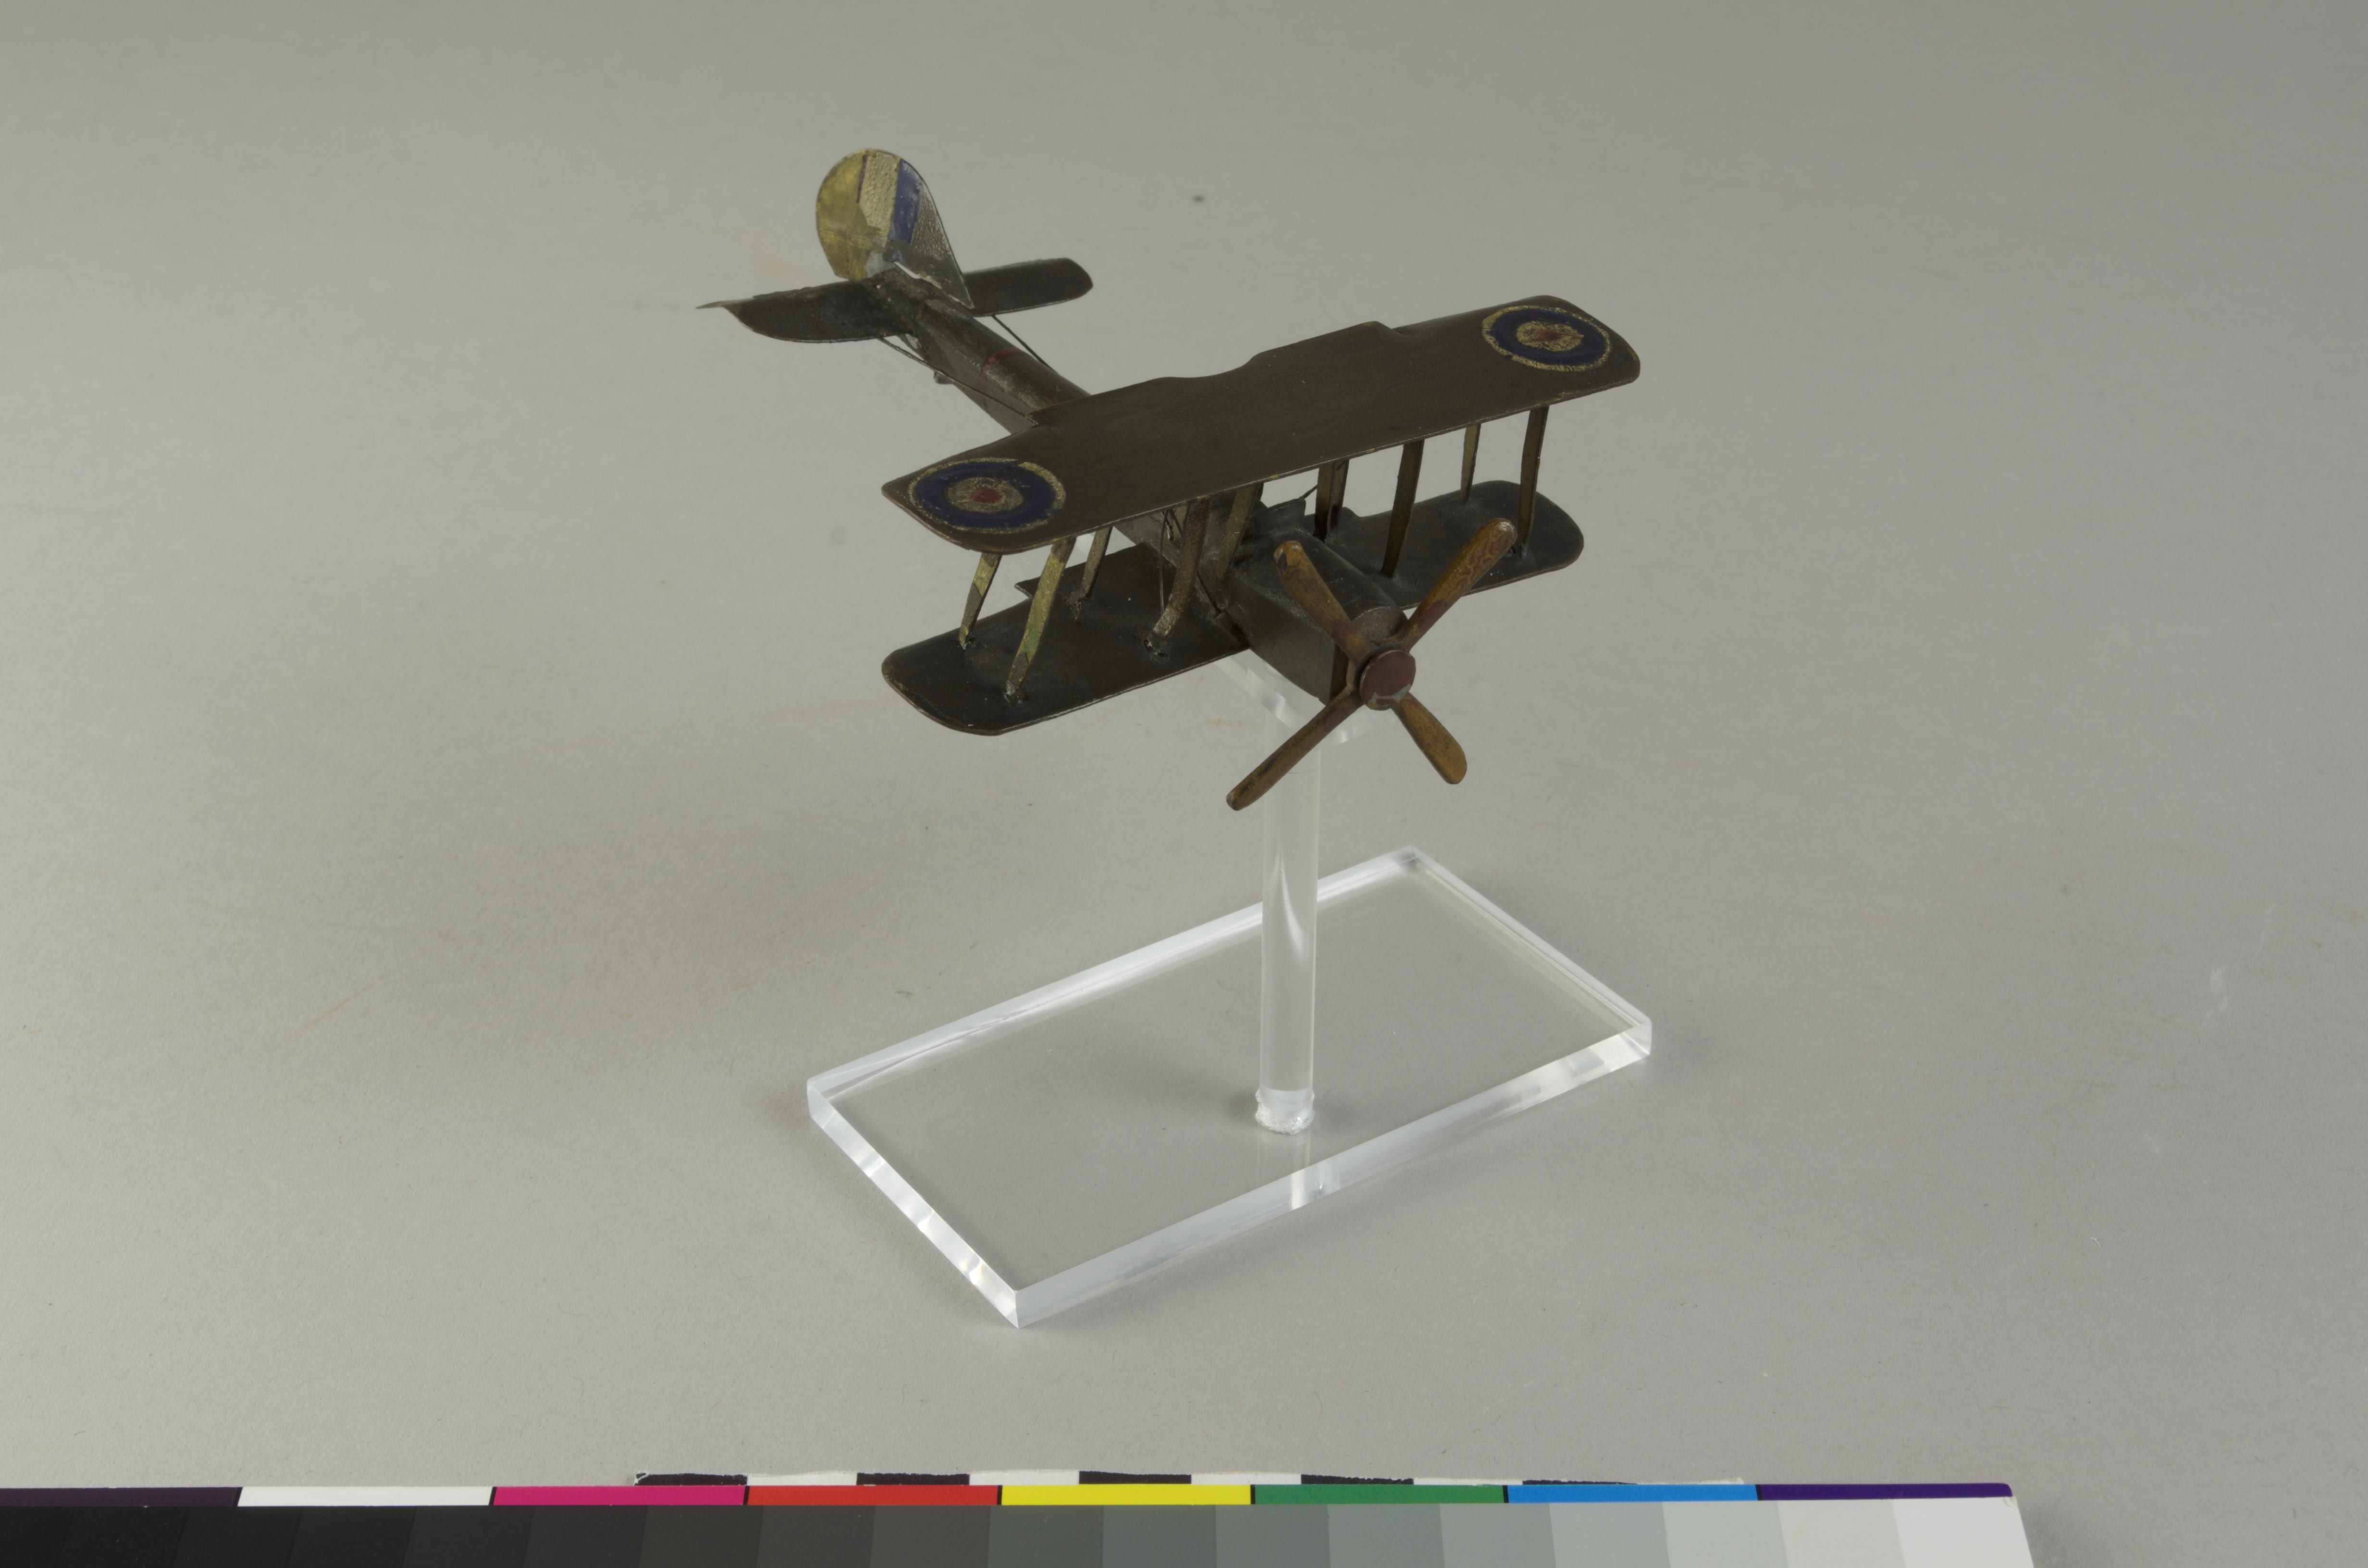
After working on the object for so long I felt that it would be nice to see the whole conservation treatment through from conservation to display. I decided that I would make a Perspex stand for the object to sit on when it goes back to the museum. I did this using 3 pieces of Perspex that could easily be put together and created the illusion that the object was flying. Here are the results!
Overall, this object turned into a labour of love. I learnt so much about ethics, removing adhesives, and re-adhering with epoxies from this one small object.
Comments
3 comments
Comments are closed.
- March 2024 (1)
- December 2023 (1)
- November 2023 (2)
- March 2023 (2)
- January 2023 (6)
- November 2022 (1)
- October 2022 (1)
- June 2022 (6)
- January 2022 (8)
- March 2021 (2)
- January 2021 (3)
- June 2020 (1)
- May 2020 (1)
- April 2020 (1)
- March 2020 (4)
- February 2020 (3)
- January 2020 (5)
- November 2019 (1)
- October 2019 (1)
- June 2019 (1)
- April 2019 (2)
- March 2019 (1)
- January 2019 (1)
- August 2018 (2)
- July 2018 (5)
- June 2018 (2)
- May 2018 (3)
- March 2018 (1)
- February 2018 (3)
- January 2018 (1)
- December 2017 (1)
- October 2017 (4)
- September 2017 (1)
- August 2017 (2)
- July 2017 (1)
- June 2017 (3)
- May 2017 (1)
- March 2017 (2)
- February 2017 (1)
- January 2017 (5)
- December 2016 (2)
- November 2016 (2)
- June 2016 (1)
- March 2016 (1)
- December 2015 (1)
- July 2014 (1)
- February 2014 (1)
- January 2014 (4)
Well done! Gives good ideas for tackeling other WWI toy/model restoration
would you recommend 20:20 for other people to repair models?
I would recommend using 20:20 if a strong join is needed. For example, I only has a very thin section that I could apply an adhesive too and to be able to hold it in place an epoxy was totally necessary, B72 would not have done the job!