Looking Beneath the Layers
23 November 2016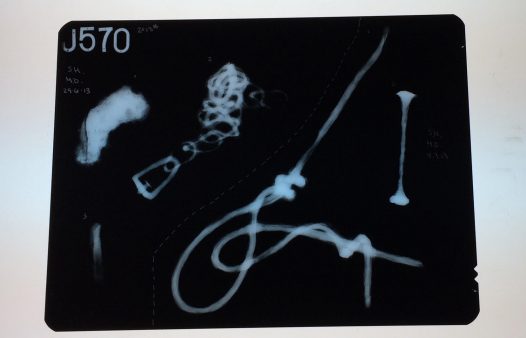
There are many stages to conserving an artifact. For example, you have to figure out what the object is made of and what types of corrosion are present. Were any adhesives previously used to hold the object together? How have current storage conditions affected the artifact? Is mechanical or chemical cleaning best for the object in question?
To help us answer these questions we do research, study the object visually, and use technologies that help us see what we cannot with the naked eye. One such tool is x-radiography.
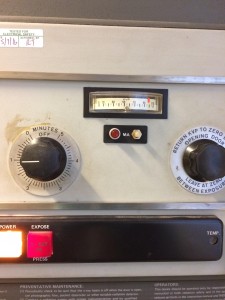
Usually you hear X-ray and think of the doctor’s office and broken bones. While it is the same principle (in this example, we are looking for the metal artifact beneath the corrosion layers) our machines are a bit different. The one we use here in the lab reminds me very much of an oven. There are dials for time and voltage (kV), a pull down door to slide the X-ray plate and objects inside; after this you learn that four to five minutes can be a very long time to stand, stare, and wait. The only thing missing is the “ding!” to let you know it’s ready. Instead we wait for the sign to stop glowing after we’ve pushed the green “start” button.
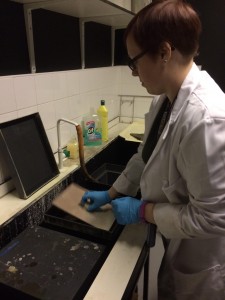
Here at Cardiff Uni we develop all of our X-rays in a dark room. This means that we start the process by getting the X-ray plates (the film the image is transposed onto) from the dark room and putting them in a protective case to prevent light exposure. From there we head to the X-ray room and, once the machine has been warmed up, we begin to prepare our plates to be X-rayed.
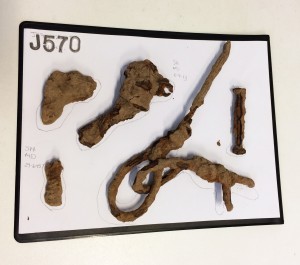
Each X-ray plate is given an identification number, i.e. J570. We use lead letters and numbers to mark each plate since lead, being very dense, is always visible on the X-radiograph. From there we begin to lay out the artifacts on the X-ray plate and mark the placement of each for future reference (see above). Once complete, we put the plate and objects in the oven… I mean X-ray machine, and adjust our settings. This particular machine can range from 0-110 kV for up to five minutes. We generally X-ray artifacts from 90-110 kV and anywhere from one to five minutes depending on the artifact’s density. The denser the material, the longer it stays in and the higher the voltage.
Once the machine has been set we step out of the room, close the door, and press the green button on the wall. The light above the door illuminates and you stand and wait until it has finished. Once the light goes out you can enter once more and remove your X-ray plate and artifacts from the machine. From there you take your completed X-ray plates to the dark room for developing.
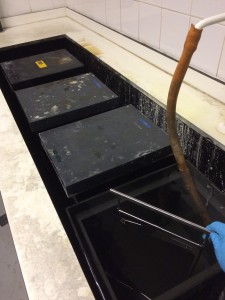
There are five stages to developing: the developer bath (four minutes), the stop bath (10 seconds), the fixer bath (four minutes), the wash bath (30 minutes), and drying (45 minutes). The developer reacts with the silver in the film to develop the image while the stop bath stops the reaction from the developer. The fixer fixes the films surface by removing any developer that has been left behind. The wash bath does a final rinse of the film after which we hang the X-ray films in a drying cabinet at 20˚C and return in 45 minutes to completed X-radiographs!
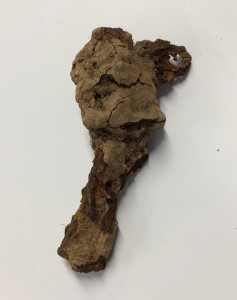
At this point we look to the X-radiographs to help us determine what the object was/is* and how much metal is left below the corrosion product. Sometimes you can find objects with multiple types of metals and each will show with a different intensity on the X-radiograph, revealing details and design clues. Just as other technologies help identify the structure of an artifact or its composition, X-radiography helps us determine important information about an artifact’s production and in this case, the metal artifact that is hidden beneath the corrosion. For example, this apparently corroded ‘chicken wing’ turned out to be an iron chain with a pin inserted into the end.
All artifacts in the images are from the CAER Heritage Project. The Caerau Iron Age Hillfort has been occupied through many eras including the Iron Age, Roman occupation and the Medieval Era. Please feel free to learn more at https://caerheritageproject.com/ or follow the project on Facebook Here .
All images taken by the author.
*was/is : Sometimes artifacts have lost all of their original metal but we can determine what the object was based on the different corrosion layers.
Comments
1 comment
Comments are closed.
- March 2024 (1)
- December 2023 (1)
- November 2023 (2)
- March 2023 (2)
- January 2023 (6)
- November 2022 (1)
- October 2022 (1)
- June 2022 (6)
- January 2022 (8)
- March 2021 (2)
- January 2021 (3)
- June 2020 (1)
- May 2020 (1)
- April 2020 (1)
- March 2020 (4)
- February 2020 (3)
- January 2020 (5)
- November 2019 (1)
- October 2019 (1)
- June 2019 (1)
- April 2019 (2)
- March 2019 (1)
- January 2019 (1)
- August 2018 (2)
- July 2018 (5)
- June 2018 (2)
- May 2018 (3)
- March 2018 (1)
- February 2018 (3)
- January 2018 (1)
- December 2017 (1)
- October 2017 (4)
- September 2017 (1)
- August 2017 (2)
- July 2017 (1)
- June 2017 (3)
- May 2017 (1)
- March 2017 (2)
- February 2017 (1)
- January 2017 (5)
- December 2016 (2)
- November 2016 (2)
- June 2016 (1)
- March 2016 (1)
- December 2015 (1)
- July 2014 (1)
- February 2014 (1)
- January 2014 (4)



Really interesting, thank you